
Once we discussed about the basis tasks of the mixing phase, I would like to add some additional notes that can help you (they helped me) to achieve better mixes.
How to enhance your mixes?
Paradoxically, some of the basic things that help to achieve better mixes have nothing to see with plugins or outboard gear.
1. To accoustically conditionate your Room
There is no way to avoid it, believe me. You can think about this all you want but, without a minimally conditioned room where to mix, where you can remove reverberation, echoes, resonances and other things that the own room sums or rest to the sound you are mixing, there is no way to achieve a good mix that can be transported to other systems or environments, out of your mixing room.
Shape and dimensions of your room, the furniture, decorative elements, walls, building materials, windows, doors, etc... everything summed together, generate certain anomalies that alter the way your mix is being reproduced through your monitors.
Plain surfaces are highly reflexive and, the sound bounces from side to side, creating some anomalies related to echo and reverberation. This anomalies are creating an effect called comb filter.
Inside square or rectangular rooms, the corners trap the bass frequencies that enter in resonance, dramatically affecting the reproduction of your mix.
These resonance frequencies due to the dimensions of the room are better known as room modes.
There are some software solutions that solve some of the issues, like IK Multimedia's ARC System, analyzing how the reproduced sound deviates from the source sound, allowing to create a correction curve that equalizes the output in a way that "removes" most of the room issues.
But, even that such kind of software helps a lot (even just to visualize in which frequencies are you having the issues), it isn't the definitive solution, just a compromised solution.
Only Bass Traps can really get rid of the issues with low frequencies.
Some other issues, as the fluttering echo, among others, aren't solved with a simple corrective equalization.
There exist some free software (as http://www.hometheatershack.com/roomeq/), that allow you to analyze the issues in your room, even using your PC Card. It's a good starting point to try to enhance your mixing environment.
To acoustically isolate a room is an operation that consist into coat the room with materials that can absorb a high amount of the sound, avoiding that the sound can leave the room and, that any external sound can enter in the room.
To isolate, what you need more is mass, that is, you need high density and thick materials. Since not all materials can absorb the same range of frequencies, usually, a solution consists in "sandwiches" of several isolant materials, including air cameras between them.
So, that idea that the "egg cardboard boxes" can isolate a room is completely wrong. Without Mass, there is no way to isolate a room.
To acoustically conditionate a room is, however, is a different thing. It consists in to correct the sonic deviations that the room introduces in our reproduction of our mix.
In this case, we use absorbent elements, that have the function to absorb or reduce (not to completely remove) the content in a certain range of frequencies. The mass, the shape and schema of its surface, its molecular structure, among many other variables, allow to filter with different percentages, different frequencies.
Standard Absorbent Panels get rid of the broad range of frequencies but, to handle low frequencies, we need Bass Traps, that require different materials, shapes and place in the room.
Apart of the absorbents, we use also diffusers, which goal is to avoid a continuous feedback of the reflexions against the wall. They are often used to correct some issue derived from reverberations and echos, helping to "dry" the room.
The typical "egg cardboard box" can be used as a diffuser (not as an isolant).
There are some few things that we can easily do as, by example, to put a massive carpet (dense, heavy) on our room's floor, to absorb floor reflexions.
We can try to put some high density foam on the corners or, some kind of high density board, to try to reduce the issues with low frequencies.
We can put some seller, with irregular sized books, CDs and any sort of irregular objects, to help to deviate reflexions, etc.
But without going for an expensive professional audio solution, maybe some kit of acoustic treatment, as the Auralex' Project 2, could be a good way to enhance our mixing room, attacking all kind of issues simultaneously.
2. Correctly place your monitors
Nearfield monitors should be placed at 30 degrees of your hearing spot. The distance between both monitors and, between the center of such a distance and the hearing spot should be the same. So, we form an equilateral triangle were the 3 vertex are: the two monitors and the hearing spot.
You could use some of those cheap laser levelers that emit two rays, with variable angle, to correct the position of your monitors.
3. Callibrate your monitors
A calibration standard means that with your volume knob at 0 dB, you should have a loudness of 83 dB SPL in your hearing spot, while reproducing Pink Noise of broad frequencies, between 500 Hz and 2 KHz, emitted with -20 dB RMS.
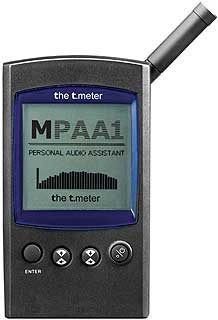
To measure the sound level (SPL) you will need a RTAS or SPL measurement unit (as the T.Meter MPAA1). The meter will give you the level in dB SPL of the sound projected by your monitors to your hearing spot. You should move your monitors' volume control until you read 83 dB SPL.
When you read 83 dB, mark that volume control position with a zero (0) value.
To emit a signal of Pink Noise, with a frequencies range between 500 Hz and 2 KHz you will need, or a plugin able to reproduce such a noise or, to download some file containing the proper material for this calibration.
In Pro Tools, you can use the plugin called Sound Generator, in an instrument track, to generate the Pink Noise at -20 dB, with all the bandwith. After such a plugin, you can put a plugin equalizer, to cut frequencies below 500 Hz and above 2 KHz.

Leave all faders, of all buses to zero, including the output fader. If you have some RMS meter (as the TT Dynamic Range or IXL Inspector), you could clearly verify that the RMS of the generated Pink Noise is of -20 dB.
But... all this for what?.
Nice question.
83 dB SPL is the standard level used in cinema.
If you have your volume control with the zero mark and, such a zero mark corresponds to 83 dB SPL (of the Pink Noise described above), anything that you mix in this position of your volume control and, that you are satisfied with its sound, will achieve it without clippings, overs or similar.
If you achieve a nice mix in that control position, you could masterize later the mix without issues and, it will be translated to any other kind of device or environment without the issues introduced by some A/D or D/A converters.
This calibration level corresponds to the use of the K-20 meter designed by Bob Katz.
To masterize or, when doing a model, we will usually compress the program between 6 to 8 decibels.
Repeat the described operation but, this time, move your volume control down until your meter reads 77 dB SPL. This corresponds to reduce the volume in 6 dB. Mark this position as -6.
You will usually masterize at this level, pop material or any other kind of music not so energetic.
This corresponds to the K-14 meter designed by Bob Katz.
Repeat once more the operation and, lower a bit more the volume, until your meter reads 75 dB SPL.
This corresponds to reduce the volume in 8 dB. Mark this position as -8.
You will masterize at this level, sonic material that requieres a high sonic impact, as rock.
It corresponds to K-12 meter of Bob Katz.
So nice, so good. Monitors calibrated... what else?
To mix, always use the mark 0.
You can check the mix at different volume levels, for sure but, if the mix sounds good in your mark 0, you should achieved a dynamic mix, without excessive compression and perfect for the masterizing phase. This mix can be the track of any film without needing to adjust anything else.
To masterize, you will move the control to the marks -6 or -8, depending on the type of material and destination (CD, broadcast, MP3, etc).
Theoretically, the use of such control marks avoids the need to work with meters, to control if the resulting sound remains between the proper levels, and you shouldn't be afraid of clipping or overs.
4. Control the mix with mono and dithering of 16 bits
If your Monitor's Control System, your Audio Card or any Meter plugin has a Mono button, put it on to check the goodness of your mix in mono.
The Mono mode is very useful to check the relative volume of all instruments that conform the mix.
It's also a good tool to check if there is some instruments with overlapping frequencies and, to check if the corrective equalization that we are applying to each instrument is effectively helping to better perceive each instrument individually.
One more thing that drove my crazy for a long time was the need to convert from a good mix in 24 bits to 16 bits (to test a master in a CD or to convert it to MP3).
Most of the material that was sounding good at 24 bits, started to sound confused, with excessive low content and with a clear lost of spatial information.
The Sonnox Limiter plugin, that I am using as a brickwall limiter, at the end of the mix bus, has an useful button that allows to hear the mix with dithering of 24 bits (the usual while mixing) or of 16 bits.
I've often discovered that a mix that sounds nice at 24 bits can sound really bad at 16 bits. This button is very useful to better adjust the compression level, amount of reverberation and rest of processing that you are doing to the whole mix.
When I think I am done, I always check the mix with dithering of 16 bits and, fix any issue, before bouncing the final material.
Practically every DAW comes with some plugin for dithering, that we can use at the of the masterizing chain.
Activate the dithering at 16 bits to check if your are overdoing your process.

When you are converting from a higher resolution (24 bits) to a lower one (16 bits), you are loosing 8 bits of information. Those trailing bits are responsible of the finest nuances of the sound and, often they have spatial information (reverberation, echoes, etc).
This lost of information makes the sound to be "quantized" or stepped, in a way the it sounds artificial and tasteless.
Dithering tries to get rid of such issue. Dithering consist in a mathematics algorithm that generates a noise of very low volume (few decibels), with different curves (types). The sum of such a noise and the truncated information when downgrading the bits, help to "reestablish the lost bits", in a way that the converted sound is closer to the original sound, with more resolution and detail than without applying the dithering.
Every time that we would bounce our mix at 16 bits (for CD, MP3, ...), we should apply the dithering. Results are easier to foreseen if, during our masterizing or mixing, we control the goodness of the mix in our project resolution (32 or 24 bits) as well as in the final bounce resolution (16 bits).
No comments:
Post a Comment
Please, feel free to add your comments.