Introduction
This is my first retubing project for my beloved Marshall 1923C 85th Anniversary Combo (based on DSL50) and, a continuation of the first entry related to this topic.
As explained in Part 1, I am still checking some other tubes for V1 to take a final decision about which tubes do it better for my own goals.
Remaining V1 tests
Test 4
This time, I went for a Tung Sol 12AX7 reissue for V1, maintaining rest of tubes as in Part 1 so, the configuration was like follows:
V1: Tung Sol 12AX7 reissue
V2: EH 12AY7
V3: Sovtek 12AX7-WC
V4: Sovtek 12AX7-LPS
In clean, what you notice immediately is that the Tung Sol is a very musical tube. It instantaneously gave some body to the sound and made neck pickup to sound really nice.
Overall, the tube shows a clear bump in basses and trebles that are very useful while under controlled gain but, that can be too much when the tube is kicked hard. Trebles can go piercing (not so much as with the TAD 7025 HG, but close) and basses can go really boomy. When basses are projected hard, the sound lacks note-by-note definition.
In crunch mode, the sound goes very alive and powerful, with stunning basses and piercing trebles. Overall sensation of power. Stacking pedals in this channels gives too much gain, big basses that make the tube to loss definition note-by-note. Has more gain than the Svetlana tube and, probably more than the TAD 7025-S HG.
Very mixed sensations with this tube. It sounds really alive and musical, while the gain is being controlled under a certain amount but, when it's kicked harder, sound goes confusing, with blurry definition note-by-note and, excessive projection of basses and trebles. Don't take pedals as well as the Svetlana tube, by example. The Svetlana sounded me more natural in crunch and high distortion modes but lacked some body in clean.
Maybe, all those flaws can be fixed with some EQ correction in the amp's tone stack but, this results are aligned with my extensive tests in other amps.
Test 5
Time for the good-for-everything and specially-good-for-nothing beloved EH 12AX7, a tube that does the right job in every amp, every position I've tried but, without being the best in nothing (neither the worst!).
So, configuration looked like:
V1: EH 12AX7
V2: EH 12AY7
V3: Sovtek 12AX7-WC
V4: Sovtek 12AX7-LPS
One of the things I love of this tube is the sound when overdriven. It has one of the most defined crunch sounds in new production tubes, with some rawness and, from time to time, it seems to have micro-explosions that give some electric-bolt character to the sound.
Overall, the EH sounds more even EQ'd than the Tung Sol, with defined basses but that can sound a tad bonny if you heard before the Tung Sol. Trebles are in same ballpark, more or less and can go piercing with the bridge pickup, without correcting the EQ. It seemed to me with slightly higher gain than the Tung Sol and more quieter in V1.
Cleans are as goods as with the Tung Sol but, basses can sound a tad bonny if you compare them against the Tung Sol ones, even that they are well represented and the overall sound is nice and musical. Takes pedals with ease and, there is way more definition note-by-note than in the case of the Tung Sol.
In the Ultra Gain / Gain 1 channel, alone delivers a nice crunch, with very musical and detailed content. Takes gain pedals better than the Tung Sol and, remains more defined note-by-note.
In both cases, both tubes can create a high amount of feedback when pushed hard stacking several gain pedals, while this was more controllable with the Svetlana.
While in the Tung Sol you can hear a blurry wall of sound when kicked hard, the EH maintains a better note-by-note definition.
No surprises here. The EH always delivers at least an usable sound. Not the best of tubes, always delivers a correct sound. A nice workhorse.
Test 6
Time for the JJ ECC83S, the tube that usually brings the "true Marshall" sound and, it's the natural election for Marshall amps (among other makers). I have a relabeled version of those tubes, under the name TAD 12AX7-CZ. Those are verified JJs (so, good ones).
Therefore, configuration looked like:
V1: TAD 12AX7-CZ
V2: EH 12AY7
V3: Sovtek 12AX7-WC
V4: Sovtek 12AX7-LPS
Another workhorse tube (and cheap!) that can work really good in every position but, that can go darker or brighter depending on the amp so, not so straight forward as the EH. Usually, it has a pronounced bump in mids-highs and can go piercing. Stands very clean and has an over-specifications output level that can drive hard complex amp front ends (the EH also). In some way, the Svetlana is a silkier (and with less output) take of the JJ ECC83S.
Well, the JJ seems to suit very well this amp. Overall more balanced than I've expected. More or less same foundational tone as the EH but, surprisingly more defined note-by-note (while usually happens the opposite). Basses are more or less like in the EH (so bonnier than the Tung Sol) but, they are more prominent when drived hard but, without loosing the definition note-by-note.
Trebles are a bit piercing in the clean channel but, hurt less in the gain channel. I am quite sure a right EQ can fix this issue.
In clean, the sound is very nice, same body as with the EH or the Tung Sol, less boomy basses and same highs, more or less. Slightly less musical than the Tung Sol, stands definer in every situation. When pushed hard delivers a nice crunch, in the same ballpark of the EH but, maintaining a better definition.
Quieter (less floor noise) in V1 than the other two and, gets pedals with ease in the clean channel and, a good amount of stacked gain in the gain channel (except for the fuzz and any combination with the fuzz, when it has to much gain to digest).
Less feedback and more controllable than in the case of the EH or the Tung Sol so, easy to work with stacked pedals in both channels.
I am surprised with this tube . I usually didn't liked in the amps I've tested it before, at least as the V1 tube but, I have to recognize that is doing a good job in this amp and with the rest of tubes for this test.
Test 7
Even that I've tried the Mullard 12AX7 reissue in V2 and PI positions and, even in position V1, that was with other tubes in the rest of spots so, it's time to check back my (usually) preferred new production 12AX7 tube. Would it remain the Winner?.
Configuration was like follows:
V1: Mullard 12AX7 reissue
V2: EH 12AY7
V3: Sovtek 12AX7-WC
V4: Sovtek 12AX7-LPS
WOW!, I am feeling at home again. To me, there are just a couple of new production tubes that can go better than the Mullard re-issue. First one is the Genelec Gold Lion reissue but, it has prohibitive prices, even expensive than NOS tubes. Second one is a good Ei tube but, those can be heaven or hell and, they are very prone to go microphonics in a very short time.
So, the more consistent new production tube, with outstanding sound (very close to NOS tubes) is the Mullard reissue. A limited run and (a bit expensive) of New Sensor factory. It's a very linear tube and goes best the harder you push it (as happens with the Mullard EL84 reissues of same factory).
So, if you can run your amp really crank, be sure to test this tubes. They are awesome under gain but can sound a bit weak and hi-fi if they aren't pushed enough.
Without any kind of doubt, the best defined note-by-note sound of all tested tubes. It's hard to make it to loose the focus, even under high (very high) gain applications. Takes all pedals with ease, remains quiet in V1, has slightly less gain than the JJ or the Tung Sol, better crunch than the EH or the Svetlana and, goes better the most you drive it.
Overall, the cleans had the right amount of basses, not sounding as bonny as the EH or JJ (compared to the Tung Sol). Trebles were in the leage of Tung Sol or EH or JJ. Has some slight bump in mid-highs that is more noticeable in British voiced amps, as this one. Nothing that cannot be corrected with the right EQ in your amp.
Then, Heaven is on the crunch channel. Takes way easier any pedal and gets a massive amount of gain without loosing the definition. The crunch sound is just perfect and allows you to get nice chops and palm muttings (maybe, Svetlana's ones are slightly better). The fuzz seems to bring back a high feedback (as in other tubes) but, way more controllable than in the rest of tested tubes.
To be honest, after my first try, I wasn't confident that this tube will be the best for this amp but, once again, it does the job in spades, as soon as you can crank your amp enough. Fortunately, that 12AY7 in V2 let you crank the amp without going into ear-destroying loudness levels.
Tests I did in other amps, said that a NOS tube, as the RTF ECC83 can refine slightly more this sound (and, that's hard, since the Mullard RI is awesome) but, I don't feel on the need of do that test. I prefer to save this tube for more simpler designed amps, as the Vox Night Train or the Fender Princeton, where the tube swap is way more noticeable than in the Marshall.
Conclusions
As ever, the Sovtek 12AX7-LPS is a true enhancement of the PI position (V4). It's all about of how do the amp responds to your playing. The LPS gives you immediateness and allows you to play speed riffs. My tests with a 12AT7 in this spot didn't liked me. Even that the 12AT7 has higher transconductance levels, it made the rest of tubes to sound weaker and thinner (maybe because it's draining 10 times what a 12AX7 tube can drain). A Chinese tube can work also good here (I've tested in other amps) but, the LPS is just what the doctor recommended me for PI spots. Glad to see that works also good for the Marshall combo. Just wondering how much will it last, since this is the real issue with this tube.
Even that V3 is a non tone-shaping position, to have a specifications-correct tube there helps to have a responsive tone stack and a good working reverb effect. The Sovtek 12AX7-WC was a good election for this position, even that a Chinese valve can do the job h ere .
I am glad to reviewed my notes and saw the comments of Myles Rose respect of putting that 12AY7 in V2. That changed the vibe of the amp to "vintage" and, helped me to get great sounds at lower loudness levels. The EH 12AY7 is a good new production tube, very close to NOS 12AY7 but, if you want to go for NOS tubes, they can be found at very reasonable price tags.
Respect of the main tone-shaping tube, V1, election can depend on each particular situation.
If you are able to crank your amp enough, don't doubt it: Mullard 12AX7 reissue hands down.
If you aren't able to crank your amp, probably, best election is the Tung Sol, since it can deliver a musical and full bodied sound at lower loudness levels.
EH and JJ work really good as V1 in this amp. Nothing to blame about but, surprisingly, the JJ works even better than the EH (except for the crunch channel, where the special crunch of the EH is more appreciated).
But, at lower settings, I think the best tube is the Svetlana. Has everything you can have in the JJ but, more refined, more silkier and, in the crunch channel is simply outstanding (slightly better than the Mullard but, with less definition note-by-note).
To me, dices are thrown and, my election is clear:
V1: Mullard 12AX7 reissue
V2: EH 12AY7
V3: Sovtek 12AX7-WC
V4: Sovtek 12AX7-LPS
When having some time, I would like to make some video demoing how the amp sounds with this retubing and, how it takes pedals in each channel. Stay tuned!!!.

Everything about electric guitars world
27 January 2013
Amps: retubing Marshall 1923C 85th Anniversary Combo
Introduction
Of my three amps, the Marshall 1923C 85th Anniversary Combo is the most beloved. '70s Hard Rock is what pumps my heart, I guess and, early Marshall's vibe is what I breathed from the cradle. Even that I love so much a clean Fender or a clean or crunchy Vox sound (as many other outstanding sounds), Marshall is were I feel at home, usually.
Paradoxically, I've done extensive tube tests in all my amps (the ones I own know and, the ones already sold) except for that Marshall Combo. For your tone reference, the 85th Anniversary is some kind of DSL50 with a better wood and well paired speakers (one V30 and one Heritage).
This one came from a German store and, even that it was sold as brand new, I am 100% positive, it was hardly used in the Store (blame you!) for demo, testing or whatever. But, it was so nice and good and, a limited run that I wasn't consider to send it back, because was hard to find this amp and, worst to find it at a good price tag.
It sounded like heaven during first weeks then, the first pre-amp tube started to fail so, I had to swap this tube. I hadn't stock of tubes that days so, I've just thrown there a TAD 7025 Highgrade tube (because of low microphonics and noise) and, even, I've found it always piercing, I was so Lazy to swap it, since this means to remove the back metallic grid to access the tubes and, flip the amp to see the pin's gap.
But, after I've totally wamplerized my pedal board, that was time to fine tune that loved amp.
Goals
Certainly, there are a bunch of tube models (few makers) for pre-amp tubes of family 12A or ECC so, first step was to define my goals. What I wanted this amp to do for me.
Respect of the classic / clean channel what I wanted is a nice clean channel with sparkling trebles (but not piercing ones), silk mids and defined basses. Just a nice platform to shape any sound with the help of pedal effects.
Respect of the ultra gain channel / gain 1, I wanted a crunch overdrive in the ball park of the Marshall 1959 (SuperLead). For sure, I cannot get the exact tone but, I wanted be as close as possible.
Both channels should take pedals nice and, the overall loudness should be moved down but retaining the tone. I am not gigging with this amp crank (that would be a dream) but, practicing at home and, I want the tone but without compromising my ears.
Pre-amp tube tests
First attempt
Experience says that a tube that sounds awesome in certain model of amp, shouldn't necessarily sound good in other amp but, I had to start in someway so, during my first try I thought that to put a NOS tube (an RTF ECC83) in V1 would improve the sound of this amp. Mullard 12AX7 reissues are my preferred new production 12AX7 tubes so, I thought in to put a Mullard in V2 (the second gain stage). Since V3 isn't a tone shaping position, I was ok leaving there the stock Marshall tube (probably a JJ ECC83S). For V4 (the PI), I wanted to check how a NOS 12AT7 would work and, therefore, I've put there a RTF ECC81 tube.
So, that was the configuration for this first try:
V1: NOS RTF ECC83
V2: Mullard 12AX7 reissue
V3: Stock Marshall (probably, JJ ECC83S)
V4: NOS RTF ECC81
I was a bit disappointed with the results. The sound had perfect definition note by note but, with a total lack of sustain and, without some "glue". No mojo there. Too much hi-fi and not so inspiring, in my honest opinion. Trebles were also a bit harsh, overall.
I thought: "well, I think those were my best weapons so... what can I do now?".
Second attempt
This was the time to review my notes corresponding to the intensive tests I've done for other amps and, the list of tubes that I've got with comments coming from Myles Rose, Watford Valves and myself.
I've found an interesting note about tube type 12AY7 and Marshall DSL, saying that this tube in V2 will bring the DSL to earlier Marshall tones (JTM45 - 1959) so... I've recalled that I had one EH 12AY7 that I bought some time ago just to test exactly this (but, that I've forgot later).
So, ok, I had a candidate for V2.
This time, I wanted to go over secure with the PI, since I've found the 12AT7 as weakening somewhat the rest of preamp tubes, since it drains considerably higher current (about 10 times the current of a 12AX7) and, the sound was resulting very thin to my taste. I've got two tubes that work specially well in this position (apart of the well known NOS JAN/Philips 12AT7). The best one is the Sovtek 12AX7-LPS and the second one is the Mullard 12AX7 reissue.
Since the LPS tends to go microphonics in combo amps, I am usually leaving it as a PI tube but, I recognize that works really nice in other positions (while it works). LPS I had in some high gain combos lasted very few but, I love how it works as PI so, I've used my last LPS for V4.
V3 is a cathode follower position type and, not directly related to the basis tone of the amp but, I discovered in previous tests that, has a clear impact in how the reverb works or how the tone stack behaves so, I wanted to thrown there a specifications-correct tube, without caring about the tone. This position is typical for cheap Chinese tubes with high gain but, I wanted to put there a Sovtek 12AX7-WC, a tube that Myles Rose identifies as very close to 12AX7 specifications and that, tone-wise, sounded very plain to me (not bad, not exciting).
Well, V1 is the key tube for tone so, I was thinking about how to get a darker tone but, while preserving an even an harmonically rich sound. The TAD 7025-S HighGrade came to my mind. I've remembered this tube as very linear, harmonically rich (just slightly worst than the Mullard re-issue) and, with an overall nice tone and darker than the Mullard (and way darker that the piercing TAD 7025 HighGrade). So, that's what I've chose for V1 this time.
So, the preamp configuration was as follows:
V1: TAD 7025-S HighGrade (Mullard like)
V2: Electro Harmonix 12AY7
V3: Sovtek 12AX7-WC
V4: Sovtek 12AX7-LPS
Overall, the gain of the whole amp went considerably down (I had to raise the gain control between 2 and 3 numbers) to had more or less same sound I had before. This is a direct result of the 12AY7 in V2 (and, it covers one of my goals). The piercing trebles were completely removed and the overall sound went darker and warmer (for tests, I am leaving tone controls always at noon).
The sound was good enough, a tad bumped in mid-lows range, with good representation of trebles (but, without excessive high end) and good representation of basses (but, without going boomy). Everything sounded well glued (as a difference respect of the previous test) but, the clean channel was lacking some of the beauty and silknesss I was after.
Thanks to the 12AY7, it was easier to crank the amp while maintaining acceptable loudness and, that was really good for the Ultra Gain / Gain 1 channel, that is sounding now to '70 Hard Rock.
Third Test
I was absolutely satisfied with the work of tubes in V2, V3 and V4 so, I am in the way of determining the right V1 for this amp. The RTF EEC83 sounded too hi-fi and a bit trebly for this amp. The Mullard is in same ballpark and, it can sound even trebly. JJ ECC83S is what probably was there in the beginning and, even that I like it, it's not my preferred tube usually because it can go very honky, with a very pronounced bump in mids-trebles. I wanted to leave that one for the end. But, I remembered that the Svetlana 12AX7 is somewhat a JJ ECC83S with smoother EQ and silky (even heavenly) cleans.
Even that this is not the most note-by-note defined tube, I liked it in all the tests I've done before and, cleans sounded like heaven in some amps.
The preamp configuration was as follows:
V1: Svetlana 12AX7
V2: EH 12AY7
V3: Sovtek 12AX7-WC
V4: Sovtek 12AX7-LPS
The overall sound was "in-the-spot", I mean, the sound wasn't dark or bright but caught in an even EQ respect of this amp. Good representation along the full frequential range, defined basses, mids and trebles, without a clear bump in any of them.
Gain is lower than in the TAD 7025-S HG. Well, it's a highgrade, what means that is a specifications-correct tube (while the JJ is over specifications, respect of output).
I had to raise one or two numbers gain to be in same gain level.
In the clean channel, the sound isn't so harmonically rich as with the TAD but, sounded more silky and balanced. Maybe, still lacks something or needs just a touch in the EQ controls to be perfect.
But, the sound of the crunch channel (Ultra Gain / Gain 1) was pure heaven. Pure '70 Hard Rock!.
Palm mutes are impressive, defined basses, nice crunch and enough trebles (without going piercing). A tad more undefined note-by-note than in the case of RTF, Mullard reissue or the TAD 7025-S but, the overall sound is excellent.
To be continued
By now, totally satisfied with the work of tubes in V2, V3 and V4. I think those I've choose work perfectly well for my goals. Now, I still have some tubes that I want to check in V1. Up to now, it seems that the Svetlana 12AX7 is giving me what I was looking for but, let see how other tubes work there, because you never know where a certain model of tube will shine by itself in a certain amp and spot.
Tubes that I am planning to test in V1 are: EH 12AX7, JJ ECC83S, Tung Sol 12AX7 reissue and, probably, the Mullard 12AX7 reissue (tested before in V2 and PI positions).
Will post a new entry with the results of those tests and my final election
24 January 2013
Pedals: Stacking my Wampler pedals - the right order
Introduction
If you have one or two Wampler's you still don't have a real headache... by now. Since they are that good, I bet you will end with several of them so... revisit this entry later, if that's the case.
Anyway, I thing there are some tips here that can be applicable to other makers, anytime that the "soul" of the pedal matches the characteristics I will remark here.
Firstly, Wampler pedals have a modern design so, they were planned to be stackable with other Wampler pedals (at least) and, to be placed in whatever place in your pedal chain but, to be honest, the order how do you stack them makes (often) a big difference in sound.
I would like to share with you my findings, after extensively test every combination.
Ilogical logic?
Overall, the standard way of stacking pedals works fine but, there are some surprises around some Wampler pedals, specially amps-in-a-box and the Leviathan Fuzz.
Traditionally, there are two ways of stacking gain pedals (if none of them has some impedance issues because, in that case, the only rule is to put it were it hurts less): from cleaner to dirtier or, from dirtier to cleaner.
First approach is the one giving the best approach to a natural amp's distortion, while the second is basically stacking gain, like in a complex modern front end of a metalhead amp.
Since Wampler pedals are very tube-like sounding, they benefite best of the clean to dirt way, in my honest opinion.
If we have just one overdrive and one distortion, no issues: overdrive before distortion and, we are done.
If we have two or more overdrives... which one goes first, if we plan to stack them together?.
If we have the Euphoria and the Paisley, my answer is: it depends on how do you have each one set up.
You know each of those two overdrives are versatile a lot and, both can sound from very open to saggy and compressed so, there is no short path. Try E -> P and P -> E. But, in my experience, the one sounding opener, with less compression should go the first. Specially, watch out the grain and fatness of distortion, when stacking both together and, get the solution that you like more.
In some point of time I liked more the Euphoria before the Paisley, because the Euphoria was set to smooth mode (dumbleish) but, with little compression, while the Paisley had a big bump in midrange and overdrive.
After cleaning up the voice of the Paisley and droping the gain, I am finding the Paisley as the first gain pedal that likes to push all the rest of gain pedals, bringing that presence in mids that cuts the mix.
Now, let add to this equation those vintage-amps-in-a-box pedals so successful in sales: Tweed '57 and Plexi Drive, by example. If you follow recommendations by Wampler, those seem to have as their natural place the end of your gain chain, using them as "tone shapers". Is that true?.
Definitivelly NOT.
I think it's better to understand it, if you think on that kind of pedals as the single channel section of a vintage amp (clean to crunch distortion). You can put some overdrive in front, to make them sing and get good harmonics and a nice tube break up but, if you wanted further gain, you should go for a gain channel.
Now, consider your distortion pedals as the gain channel for that amps, cascaded after the "normal" channel.
Since those vintage emulations have some kind of sag and compression, to emulate overdriven tubes and the ramp of a tube rectifier, when you stack before a compressed sound, they tend to sound way more compressed and the sound just "overflows" the capacity of the "vintage circuit"..
Do you have a Sovereign Distortion and a Tweed '57. Do a quick test, set both pedals individually to your taste (maintain unitary volume level for each one!) then, try to stack the Sovereign before the Tweed.
Well... not bad...Wampler pedals allow this but... just swap the order, put that Sovereign after the Tweed...
Aha!. Do you see how much the sound improved?. That sounds now like a powerfull full stack with a very organic and dynamic feel!.
And if you also had an overdrive before that Tweed, you can now run the three together to be in Heaven.
Swap the order of Tweed and Sovereign (maintaining the overdrive before the Sovereign) and, you will see how much you loose.
So, this order works awesomely:
OVERDRIVE --> VINTAGE AMP-IN-A-BOX --> DISTORTION
Even that is not usual, if you have more than one vintage amp-in-a-box, it's possible that you will want to experience how they work together, and stacked with other pedals. So, what's the right order?.
I can talk about two of them, the Plexi Drive and the Tweed '57. Without any doubt: Plexi Drive into Tweed '57, otherwise, the sound becames sort of constipated. If you stack them in that order, you can even use both stacked with other gain pedals and, the sound will be still useful.
Now the line of Modern amp-in-a-box pedals of Wampler, like the Pinnacle, the SLOstortion or the Triple Wreck. What's their position?. Then, between the Vintage amp-in-a-box and the distortion.
OVERDRIVE -> VINTAGE AMP-IN-A-BOX -> MODERN AMP-IN-A-BOX -> DISTORTION
Once again, in the group of modern amp-in-a-box pedals, you can find the order that best works for you but, the overall rule is true, get the less constipated sounding combination.
I can talk for just two of those: the Pinnacle and the SLOstortion. I clearly prefer to stack the Pinnacle into the SLOstortion.
Wampler has the nice Leviathan Fuzz. What do we do with this one?.
Traditionally, fuzzes are run at the very beginning of your pedal board, as the very first pedal or following the Wah (if the wah is fuzz-friendly) and that's how I placed my Leviathan... until today!!!.
The Leviathan fuzz is not a clon of any vintage fuzz. It was made from scratch and, has no impedance issues. It doesn't need to be the first pedal in your chain. In fact, the best place is the end of your gain chain.
If you stacked it as the first gain pedal or before any other gain pedal, it's highly compressed signal and thick sound will ruin all your dynamics and you will get a muddy wall of gain.
At the end of the gain chain, it benefites of the lighter compression of previous pedals, sounding way more focused and organic.
Try one overdrive and/or a vintage-amp-in-a-box and/or the Sovereign stacked before the Leviathan. Masive high gain sound but, very tube-like and organic.
Shorting amp-in-a-box as AIAB, the chain is now:
OVERDRIVE -> VINTAGE AIAB -> MODERN AIAB -> DISTORTION -> FUZZ
We have just one type of gain pedal missing in this list: the compressor. Wampler has the amazing EGO Compressor and, this time, its natural order is the right one, that is, at the beginning of the chain.
Main reason is to maintain quieter the chain if you use compression. Stacking gain pedals raises the floor noise and, one of the pedals that raises more that floor noise is just the compressor.
You know the rule, garbage in gargabe out. Compressors expand the quieter parts to leave them closer to the average loudness level so, if you increase the floor noise at its input, expect a big ball of noise at its output. Each gain pedal increases the floor noise so... better to have the compressor at the beginning, in the quietest place as possible.
So, we have now:
COMPRESSOR -> OVERDRIVE -> VINTAGE AIAB -> MODERN AIAB -> DISTORTION -> FUZZ
And this was the tricky part, because rest of pedals follow the rules. After the fuzz you can stack the Nirvana Chorus, the Delay and then, the Reverb.
Before compressor, a tuner and a Wah, by example.
A volume pedal?. Just before your Delay and Reverb (to don't cut tails of sound).
A clean booster?. At the end, if you wanted it to get +3dB during solos. Or after the Compressor, if you wanted it to be switched on with single coils, to make your settings compatible when swapping the guitar.
Reordering my pedalboard
That happens everytime I am including a new pedal or swapping some. I've removed all non-Wampler pedals, except the Wah. I'm finding that I don't need anymore the Xotic EP Booster or the Lovepedal Pickle Vibe (at least, permanently in my pedal board).
I've currently sent the Euphoria for repairing. Once the Euphoria is back, I will determine if i like it more after or before the Paisley, in the meanwhile, this is the order of my current pedalboard, right now.
Looking forward
I saw the new pedal that Wampler is going to offer, the Dual Fusion. Oh my God!, that was my dream!.
To have an Euphoria and a Paisley in the same box, with the possibility to stack A in B or B in A is just awesome. If you still don't have any of those two outstanding overdrives, stop your purchase until the Dual Fusion comes!.
I am thinking on get some of those, because I will save some room and, that possibility of run each alone or stacked in both ways is just awesome. This, together the statement that Brian removed unuseful range of tones from both pedals and took special care into make both totally stackable with only useful tones.
Thinking on the Hot Wired V2 pedal, I think it couldn't be inserted in the best spot in my pedalboard, since it combines an overdrive and a distortion and, I should be able to stack in between those two, those amp-in-a-box pedals (to get the best sound, as experienced).
Let see what cames after that Dual Fusion. I am quite sure something really interesting is in the Kitchen, right now.
Overall tips when stacking pedals
When going to stack several gain pedals, dial each pedal to your taste but, don't overdo the gain, dial just the minimum amount to make the pedal to work by itself alone but, leave some room for the rest of gain pedals.
Tweak your sound with the volume higher than normal then, move down the volume to Unitary volume level in each pedal (so, you wouldn't notice a volume rising or drop when switching on/off the pedal).
Don't be lazy, try A into B and then B into A and get the order that you liked more. They are your pedals, get the best from them and, the best is what will help you to achieve your wanted sounds.
If you have one or two Wampler's you still don't have a real headache... by now. Since they are that good, I bet you will end with several of them so... revisit this entry later, if that's the case.
Anyway, I thing there are some tips here that can be applicable to other makers, anytime that the "soul" of the pedal matches the characteristics I will remark here.
Firstly, Wampler pedals have a modern design so, they were planned to be stackable with other Wampler pedals (at least) and, to be placed in whatever place in your pedal chain but, to be honest, the order how do you stack them makes (often) a big difference in sound.
I would like to share with you my findings, after extensively test every combination.
Ilogical logic?
Overall, the standard way of stacking pedals works fine but, there are some surprises around some Wampler pedals, specially amps-in-a-box and the Leviathan Fuzz.
Traditionally, there are two ways of stacking gain pedals (if none of them has some impedance issues because, in that case, the only rule is to put it were it hurts less): from cleaner to dirtier or, from dirtier to cleaner.
First approach is the one giving the best approach to a natural amp's distortion, while the second is basically stacking gain, like in a complex modern front end of a metalhead amp.
Since Wampler pedals are very tube-like sounding, they benefite best of the clean to dirt way, in my honest opinion.
If we have just one overdrive and one distortion, no issues: overdrive before distortion and, we are done.
If we have two or more overdrives... which one goes first, if we plan to stack them together?.
If we have the Euphoria and the Paisley, my answer is: it depends on how do you have each one set up.
You know each of those two overdrives are versatile a lot and, both can sound from very open to saggy and compressed so, there is no short path. Try E -> P and P -> E. But, in my experience, the one sounding opener, with less compression should go the first. Specially, watch out the grain and fatness of distortion, when stacking both together and, get the solution that you like more.
In some point of time I liked more the Euphoria before the Paisley, because the Euphoria was set to smooth mode (dumbleish) but, with little compression, while the Paisley had a big bump in midrange and overdrive.
After cleaning up the voice of the Paisley and droping the gain, I am finding the Paisley as the first gain pedal that likes to push all the rest of gain pedals, bringing that presence in mids that cuts the mix.
Now, let add to this equation those vintage-amps-in-a-box pedals so successful in sales: Tweed '57 and Plexi Drive, by example. If you follow recommendations by Wampler, those seem to have as their natural place the end of your gain chain, using them as "tone shapers". Is that true?.
Definitivelly NOT.
I think it's better to understand it, if you think on that kind of pedals as the single channel section of a vintage amp (clean to crunch distortion). You can put some overdrive in front, to make them sing and get good harmonics and a nice tube break up but, if you wanted further gain, you should go for a gain channel.
Now, consider your distortion pedals as the gain channel for that amps, cascaded after the "normal" channel.
Since those vintage emulations have some kind of sag and compression, to emulate overdriven tubes and the ramp of a tube rectifier, when you stack before a compressed sound, they tend to sound way more compressed and the sound just "overflows" the capacity of the "vintage circuit"..
Do you have a Sovereign Distortion and a Tweed '57. Do a quick test, set both pedals individually to your taste (maintain unitary volume level for each one!) then, try to stack the Sovereign before the Tweed.
Well... not bad...Wampler pedals allow this but... just swap the order, put that Sovereign after the Tweed...
Aha!. Do you see how much the sound improved?. That sounds now like a powerfull full stack with a very organic and dynamic feel!.
And if you also had an overdrive before that Tweed, you can now run the three together to be in Heaven.
Swap the order of Tweed and Sovereign (maintaining the overdrive before the Sovereign) and, you will see how much you loose.
So, this order works awesomely:
OVERDRIVE --> VINTAGE AMP-IN-A-BOX --> DISTORTION
Even that is not usual, if you have more than one vintage amp-in-a-box, it's possible that you will want to experience how they work together, and stacked with other pedals. So, what's the right order?.
I can talk about two of them, the Plexi Drive and the Tweed '57. Without any doubt: Plexi Drive into Tweed '57, otherwise, the sound becames sort of constipated. If you stack them in that order, you can even use both stacked with other gain pedals and, the sound will be still useful.
Now the line of Modern amp-in-a-box pedals of Wampler, like the Pinnacle, the SLOstortion or the Triple Wreck. What's their position?. Then, between the Vintage amp-in-a-box and the distortion.
OVERDRIVE -> VINTAGE AMP-IN-A-BOX -> MODERN AMP-IN-A-BOX -> DISTORTION
Once again, in the group of modern amp-in-a-box pedals, you can find the order that best works for you but, the overall rule is true, get the less constipated sounding combination.
I can talk for just two of those: the Pinnacle and the SLOstortion. I clearly prefer to stack the Pinnacle into the SLOstortion.
Wampler has the nice Leviathan Fuzz. What do we do with this one?.
Traditionally, fuzzes are run at the very beginning of your pedal board, as the very first pedal or following the Wah (if the wah is fuzz-friendly) and that's how I placed my Leviathan... until today!!!.
The Leviathan fuzz is not a clon of any vintage fuzz. It was made from scratch and, has no impedance issues. It doesn't need to be the first pedal in your chain. In fact, the best place is the end of your gain chain.
If you stacked it as the first gain pedal or before any other gain pedal, it's highly compressed signal and thick sound will ruin all your dynamics and you will get a muddy wall of gain.
At the end of the gain chain, it benefites of the lighter compression of previous pedals, sounding way more focused and organic.
Try one overdrive and/or a vintage-amp-in-a-box and/or the Sovereign stacked before the Leviathan. Masive high gain sound but, very tube-like and organic.
Shorting amp-in-a-box as AIAB, the chain is now:
OVERDRIVE -> VINTAGE AIAB -> MODERN AIAB -> DISTORTION -> FUZZ
We have just one type of gain pedal missing in this list: the compressor. Wampler has the amazing EGO Compressor and, this time, its natural order is the right one, that is, at the beginning of the chain.
Main reason is to maintain quieter the chain if you use compression. Stacking gain pedals raises the floor noise and, one of the pedals that raises more that floor noise is just the compressor.
You know the rule, garbage in gargabe out. Compressors expand the quieter parts to leave them closer to the average loudness level so, if you increase the floor noise at its input, expect a big ball of noise at its output. Each gain pedal increases the floor noise so... better to have the compressor at the beginning, in the quietest place as possible.
So, we have now:
COMPRESSOR -> OVERDRIVE -> VINTAGE AIAB -> MODERN AIAB -> DISTORTION -> FUZZ
And this was the tricky part, because rest of pedals follow the rules. After the fuzz you can stack the Nirvana Chorus, the Delay and then, the Reverb.
Before compressor, a tuner and a Wah, by example.
A volume pedal?. Just before your Delay and Reverb (to don't cut tails of sound).
A clean booster?. At the end, if you wanted it to get +3dB during solos. Or after the Compressor, if you wanted it to be switched on with single coils, to make your settings compatible when swapping the guitar.
Reordering my pedalboard
That happens everytime I am including a new pedal or swapping some. I've removed all non-Wampler pedals, except the Wah. I'm finding that I don't need anymore the Xotic EP Booster or the Lovepedal Pickle Vibe (at least, permanently in my pedal board).
I've currently sent the Euphoria for repairing. Once the Euphoria is back, I will determine if i like it more after or before the Paisley, in the meanwhile, this is the order of my current pedalboard, right now.
- TC Electronics Polytune
- Roger Mayer Vision Wah
- EGO Compressor (in reparation)
- Paisley Overdrive
- Euphoria Overdrive (in reparation)
- Plexi Drive amp-in-a-box
- Tweed '57 amp-in-a-box
- Pinnacle (in reparation) amp-in-a-box
- SLOstortion amp-in-a-box
- Sovereign Distortion
- Leviathan Fuzz
- Nirvana Chorus
- Faux Tape Echo Delay
Looking forward
I saw the new pedal that Wampler is going to offer, the Dual Fusion. Oh my God!, that was my dream!.
To have an Euphoria and a Paisley in the same box, with the possibility to stack A in B or B in A is just awesome. If you still don't have any of those two outstanding overdrives, stop your purchase until the Dual Fusion comes!.
I am thinking on get some of those, because I will save some room and, that possibility of run each alone or stacked in both ways is just awesome. This, together the statement that Brian removed unuseful range of tones from both pedals and took special care into make both totally stackable with only useful tones.
Thinking on the Hot Wired V2 pedal, I think it couldn't be inserted in the best spot in my pedalboard, since it combines an overdrive and a distortion and, I should be able to stack in between those two, those amp-in-a-box pedals (to get the best sound, as experienced).
Let see what cames after that Dual Fusion. I am quite sure something really interesting is in the Kitchen, right now.
Overall tips when stacking pedals
When going to stack several gain pedals, dial each pedal to your taste but, don't overdo the gain, dial just the minimum amount to make the pedal to work by itself alone but, leave some room for the rest of gain pedals.
Tweak your sound with the volume higher than normal then, move down the volume to Unitary volume level in each pedal (so, you wouldn't notice a volume rising or drop when switching on/off the pedal).
Don't be lazy, try A into B and then B into A and get the order that you liked more. They are your pedals, get the best from them and, the best is what will help you to achieve your wanted sounds.
22 January 2013
Guitars: Testing Bareknuckle Mother's Milk pickups - First Contact
Introduction
Note: this entry was already published in my old Spanish version of this blog, around March 2010. I am revisiting it here, with some corrected or added info.
I've started to test some Bareknuckle Pickups (from now, just BKP) when I was in the search of that PAF tone I had in my very first guitar. The closest production pickup I tried till that time was the Seymour Duncan '59, a really nice pickup, with growling complex harmonics but, that can go blurred in mid-basses and basses under certain gain level. I still think they are a very good option for practically everything.
In concept, SD's '59, Gibson's '57 and BKP's The Mule are somewhat similar but, the 3D definition note-by-note, even under high gain of the BKP one, is one or two steps over the rest. The Mule offered to me exactly what I was looking for so, I thought... would it work for my wanted strato sound?.
My main guitar is a Fender American Deluxe HSS Stratocaster, that I left stock while having no other alternative (to cover more ground) but, since I've got already a Charvel SoCal Type 1, with Floyd Rose and a couple of humbuckers, it's time to get my wanted pure Strato sound.
After discussing my needs with Tim Mills, he recommended me a set of Mother's Milks and, that's all about. Did they worth the change?.
First try
As the HSS was really versatile, I wanted to preserve certain versatility level in my Strato but, preserving the classic Strato positions. So, I've designed my own wiring (called Hermetico' Stratosphear 3), with two different modes. First mode corresponds to normal SSS strato positions, while the Alternate mode brings some new combinations to the axe.
I've prepared a brand new pickguard, with new components and the new BKPs so, I just had to swap the old pickguard with the new loaded pickguard.
I went with a friend of mine to test the changes. I've left the amp and pedal settings as they were last day, when playing the HSS Strato, plugged the guitar and... FFS!, everything sounded really bright and piercing, even removing all the trebles in the amp side.
Rolled off a bit the tone pot (to remove the no-load thing) and, no way.
There wasn't any way to make it sound right. Piercing trebles everywhere!.
Back at home
I went back home really disappointed. How can this sound so bad?. What's the issue?.
I wrote Tim, asking about if the kind of sound I was obtaining was the expected one. Tim was really surprised since, the way he describes Mother's Milk tone is as "woody", dark instead of bright.
So, I've down the pickups, at pickguard level and started to raise them 1/4 of turn each time and, I've realized that the far the pickups were, the less trebles. So this pickups want to be far away the strings and, closer to your pickguard.
I changed the wiring, substituting the no-load pot with a regular CTS pot, and with modern volume wiring, since I know the other options increase the brightness of the sound.
Second Try
With the modded mod (now, Hermetico's Stratosphear 4), I've tested this pickups just some hours ago.
Just in the same moment I've plugged it, it started to sound really good.
I've took this time a while to fine set pickup highs, beginning with the bridge pickup (that has a less range of sweet spot) and, from there, middle and neck one to balance output levels.
And, how did they sound, after all?
ORGASMIC !!!
In standard mode, each traditional positions sounded as expected and clearly different of the other 4, with its own character. The sound is extremely detailed, each string sounds very clear during chord, even under high distortion and with hard chops. Attack is nice, not piercing but explosive, so it remembered me that micro-explosions that The Mule seem to produce in amp's tubes.
I've tried the alternative mode, with following comments:
Gear used in the Test
Guitar was the Fender American Deluxe HSS Stratocaster, modded as described above.
The amp was a Vox Night Train with it's paired 1x12 cab (Celestion G12H speaker).
In the pedal board, following chain of pedals:
This second try, finished with myself being very satisfied so, thanks Tim for your recommendation. I've got what I was looking for my Strato.
My own learnings
I've learnt something, during this mod:
Note: this entry was already published in my old Spanish version of this blog, around March 2010. I am revisiting it here, with some corrected or added info.
I've started to test some Bareknuckle Pickups (from now, just BKP) when I was in the search of that PAF tone I had in my very first guitar. The closest production pickup I tried till that time was the Seymour Duncan '59, a really nice pickup, with growling complex harmonics but, that can go blurred in mid-basses and basses under certain gain level. I still think they are a very good option for practically everything.
In concept, SD's '59, Gibson's '57 and BKP's The Mule are somewhat similar but, the 3D definition note-by-note, even under high gain of the BKP one, is one or two steps over the rest. The Mule offered to me exactly what I was looking for so, I thought... would it work for my wanted strato sound?.
My main guitar is a Fender American Deluxe HSS Stratocaster, that I left stock while having no other alternative (to cover more ground) but, since I've got already a Charvel SoCal Type 1, with Floyd Rose and a couple of humbuckers, it's time to get my wanted pure Strato sound.
After discussing my needs with Tim Mills, he recommended me a set of Mother's Milks and, that's all about. Did they worth the change?.
First try
As the HSS was really versatile, I wanted to preserve certain versatility level in my Strato but, preserving the classic Strato positions. So, I've designed my own wiring (called Hermetico' Stratosphear 3), with two different modes. First mode corresponds to normal SSS strato positions, while the Alternate mode brings some new combinations to the axe.
- Neck in parallel with Bridge (like center position of a Tele)
- Neck in series with Middle (Virtual neck humbucker, a bit dark)
- The 3 pickups in parallel (Weak, very acoustic, even and round sound)
- Middle in series with Bridge (Virtual bridge humbucker, a bit brighter)
- Neck in serie with Bridge (Like the 4th position of a modded Tele)
I've prepared a brand new pickguard, with new components and the new BKPs so, I just had to swap the old pickguard with the new loaded pickguard.
I went with a friend of mine to test the changes. I've left the amp and pedal settings as they were last day, when playing the HSS Strato, plugged the guitar and... FFS!, everything sounded really bright and piercing, even removing all the trebles in the amp side.
Rolled off a bit the tone pot (to remove the no-load thing) and, no way.
There wasn't any way to make it sound right. Piercing trebles everywhere!.
Back at home
I went back home really disappointed. How can this sound so bad?. What's the issue?.
I wrote Tim, asking about if the kind of sound I was obtaining was the expected one. Tim was really surprised since, the way he describes Mother's Milk tone is as "woody", dark instead of bright.
So, I've down the pickups, at pickguard level and started to raise them 1/4 of turn each time and, I've realized that the far the pickups were, the less trebles. So this pickups want to be far away the strings and, closer to your pickguard.
I changed the wiring, substituting the no-load pot with a regular CTS pot, and with modern volume wiring, since I know the other options increase the brightness of the sound.
Second Try
With the modded mod (now, Hermetico's Stratosphear 4), I've tested this pickups just some hours ago.
Just in the same moment I've plugged it, it started to sound really good.
I've took this time a while to fine set pickup highs, beginning with the bridge pickup (that has a less range of sweet spot) and, from there, middle and neck one to balance output levels.
And, how did they sound, after all?
ORGASMIC !!!
In standard mode, each traditional positions sounded as expected and clearly different of the other 4, with its own character. The sound is extremely detailed, each string sounds very clear during chord, even under high distortion and with hard chops. Attack is nice, not piercing but explosive, so it remembered me that micro-explosions that The Mule seem to produce in amp's tubes.
I've tried the alternative mode, with following comments:
- Neck in parallel with Bridge: Very nice, bright but not piercing, delightful, crystal clear. Very useful for acoustic-like parts.
- Neck in series with Middle: Dark and powerful. Very interesting for Palm Muttings. Total destruction with a distortion of type Mesa Boogie. Infinite sustain, with powerful basses.
- Three pickups in parallel: Weakest of the combos. Light quack, well balanced, clear and round sounding.
- Middle in series with Bridge: Like a Bridge humbucker but, without going so sharp. Awesome under distortion. Cuts as a knife with a distortion type Mesa Boogie. Infinite sustain, powerful basses and big trebles..
- Neck in series with Bridge: The cleanest of the three virtual humbuckers. More defined and clear sounding. Not so powerful as the other two but way more detailed and useful when you want just a touch of controlled power.
Gear used in the Test
Guitar was the Fender American Deluxe HSS Stratocaster, modded as described above.
The amp was a Vox Night Train with it's paired 1x12 cab (Celestion G12H speaker).
In the pedal board, following chain of pedals:
- MXR MC-401 boost/line driver
- Vox 847 re-issue Wah
- Voodoo Labs Vibe
- AMT California
- Korg Pitchblade+
- Fulltone OCD V3
- Line 6 Verbzilla
This second try, finished with myself being very satisfied so, thanks Tim for your recommendation. I've got what I was looking for my Strato.
My own learnings
I've learnt something, during this mod:
- Makes no sense to do mods to increase brightness or high end to a guitar that is bright by nature. No-load pots add some high end; they work fine with humbuckers or darker guitars but, didn't liked in my Strato. '50 Style tone increases high end also, as well as a treble bleed mod.
- BKP pickups like to stay far from strings. This is my second BKP set and, I've realized that, if they are close enough, they catch everything is happening around. While other pickups seem to go darker when you move them up to the strings, BKPs seems to increase their high end.
Pedals: Testing EH Hum Debugger, Ibanez TS-808 and Line6 Verbzilla
Introduction
Note: this entry was already published in my old Spanish version of this blog, around January 2010. I am revisiting it here, with corrected comments.
I am every time more and more happy with my Vox Night Train. I am really enjoying that little joy but, this amp has its own limitations. Just one channel, no foot switch and no reverb effect.
So, I wanted some OD to push the tubes harder and, use it as if it was a second channel and, some reverb or delay to add some ambiance to the sound.
Also, I wanted to test the Electro-Harmonix hum debugger to help me to minimize or totally remove the noise.
Yesterday, I had a magical afternoon with my loved Night Train.
Setting the amp
I wanted to dial that typical cleans of Vox, silky, in the border of tube break up.
Pedal board
I went for an smaller pedal board this time, with following pedals, and in that order:
After discussing with some known tone-chasers, they recommended me the Line6 Tone Core Verbzilla as the best reverb unit to put in front an amp (the NT hasn't a FX Loop).
I was interested also on the TS-808, because it seems that everybody must have one to push his tubes. I've already had the OCD V3 but, they are two very different kind of overdrives. The TS tends to sound warmer and with some roll off in basses and trebles, while the OCD is cooler, aggressiver and sharper.
I bought the Hum Debugger after seen in some videos that it was clearly removing the floor noise without affecting the sound (sure, ha, ha, ha, more about this below!).
Guitar
Mi first thought was to use the PRS 513 for this test, because it has 5 single-coils but, I had to remove the whole wardrobe to get the guitar and I was so lazy to do it so, I've finally got the Fender American Deluxe HSS. Even that SCN pickups are really quiet, the humbucker is really noisy when split so, I thought it would be enough to test the Hum Debugger.
Comparing two Overdrives: OCD and TS-808
Both are usefull but, both are very different animals.
The TS-808 has a very low output, sounds very middy, with a clear roll off in high and low frequencies. Sound is warm but, small and tends to dark. Note-by-note isn't so defined as the OCD (with higher dynamic range, thanks to its 18V).
To get TS' maximum output, you just need the OCD volume at half. Sound is cristal clear, compared to the TS and, the dynamic range is higher and, with a greater representation of frequencies along the spectrum.
The weird thing is that I previously saw some comparison videos with those two pedals and, I preferred the TS in those videos; the opposite to what I prefer now, after trying both in real life. So, probably, the amp is a great variable of this equation.
Maybe, can be due to the fact that most of people is working with its OCD at 9V, what reduces a lot the dynamic range of this unit.
With the OCD V3 at 18V, I have no doubts: OCD wins hands down.
But, running both pedals stacked worth the try. TS into OCD delivered a wonderful sound..
The amp started to show a sweet, musical and comfortable feedback that made me enjoy a lot, improvising over a backing track around "Machine Gun".
I've enjoyed the feedback during the rest of the session; eternal sustain, controlled feedback... you know... orgasmic!.
EH Hum Debugger
GET OFFA THAT PEDAL!!!
Probably the worst pedal effect I've ever tried in my whole life!.
Does it remove the hum?
CERTAINLY, YES.
So, what's the point?
This pedal is introducing strange artifacts, as some kind of metallic slap echo or some kind of ring modulator sound that totally ruins your sound. As soon as you switch it on and, even in the "normal" position, is generating that kind of metallic or robotic voice, like if your guitar was enclosed inside a tin, with an ugly metallic echo.
I cannot understand how they are able to sell something like this!.
Even a Noise Gate (that I usually hate) works better and affects less to the tone!.
I am serious: forget this pedal!.
Line 6 Verbzilla
I wasn't testing this pedal in depth, because it has a lot of possibilities. I was mainly interested on to just give some ambiance to the sound, without overdoing the effect.
I liked what I heard. I didn't heard the typical "digititis", no digital artifacts affecting the sound, in principle. This pedal added very smoothly the needed ambiance, very transparently and, helped me to "push the amp inside the mix (backing track)".
Sure, it has a lot more of possibilities than I will ever need but, for now, I am happy with how I set up it, it works for what I wanted to.
Conclusion
Absolutely upset with the Hum Debugger (I am even thinking on to burn this pedal!). I never felt myself so ridiculous after buying some gear!.
A bit disappointed with the TS-808, taking into account its high price, against what you get. I've hoped something more for that price, honestly. To have it as the only OD in your board maybe isn't a good idea.
The opposite occurs with the OCD, with a controlled gain, sounds way clearer, defined, fuller and powerfuller than the TS. With excessive gain can go mushy and confusing but, within the gain range of the TS, the OCD wins hands down.
But, the good discover was to stack both pedals, with their respective gains lowered a bit. Sound was awesome, with a musical and controlled feedback that made me to play like a crazy.
For a future, I am thinking in to swap the TS with a Xotic EP Booster and stack both together... we will see.
The Verbzilla did a flawless work. There are still lot of possibilities in this pedal but, I am satisfied with the results enough.
Note: this entry was already published in my old Spanish version of this blog, around January 2010. I am revisiting it here, with corrected comments.
I am every time more and more happy with my Vox Night Train. I am really enjoying that little joy but, this amp has its own limitations. Just one channel, no foot switch and no reverb effect.
So, I wanted some OD to push the tubes harder and, use it as if it was a second channel and, some reverb or delay to add some ambiance to the sound.
Also, I wanted to test the Electro-Harmonix hum debugger to help me to minimize or totally remove the noise.
Yesterday, I had a magical afternoon with my loved Night Train.
Setting the amp
I wanted to dial that typical cleans of Vox, silky, in the border of tube break up.
- Gain: 4
- Volume: 7,5
- Bass: 6
- Middle: 7,5
- Treble: 4
- Channel: Bright
- Mode: Pentode
Pedal board
I went for an smaller pedal board this time, with following pedals, and in that order:
- Electro-Harmonix Hum Debugger
- Vox Wah 847 re-issue
- Ibanez TS-808 re-issue
- Fulltone OCD V3, working at 18V (just to compare it against the TS)
- Korg Pitchblade+, tuner
- Line6 Verbzilla
After discussing with some known tone-chasers, they recommended me the Line6 Tone Core Verbzilla as the best reverb unit to put in front an amp (the NT hasn't a FX Loop).
I was interested also on the TS-808, because it seems that everybody must have one to push his tubes. I've already had the OCD V3 but, they are two very different kind of overdrives. The TS tends to sound warmer and with some roll off in basses and trebles, while the OCD is cooler, aggressiver and sharper.
I bought the Hum Debugger after seen in some videos that it was clearly removing the floor noise without affecting the sound (sure, ha, ha, ha, more about this below!).
Guitar
Mi first thought was to use the PRS 513 for this test, because it has 5 single-coils but, I had to remove the whole wardrobe to get the guitar and I was so lazy to do it so, I've finally got the Fender American Deluxe HSS. Even that SCN pickups are really quiet, the humbucker is really noisy when split so, I thought it would be enough to test the Hum Debugger.
Comparing two Overdrives: OCD and TS-808
Both are usefull but, both are very different animals.
The TS-808 has a very low output, sounds very middy, with a clear roll off in high and low frequencies. Sound is warm but, small and tends to dark. Note-by-note isn't so defined as the OCD (with higher dynamic range, thanks to its 18V).
To get TS' maximum output, you just need the OCD volume at half. Sound is cristal clear, compared to the TS and, the dynamic range is higher and, with a greater representation of frequencies along the spectrum.
The weird thing is that I previously saw some comparison videos with those two pedals and, I preferred the TS in those videos; the opposite to what I prefer now, after trying both in real life. So, probably, the amp is a great variable of this equation.
Maybe, can be due to the fact that most of people is working with its OCD at 9V, what reduces a lot the dynamic range of this unit.
With the OCD V3 at 18V, I have no doubts: OCD wins hands down.
But, running both pedals stacked worth the try. TS into OCD delivered a wonderful sound..
The amp started to show a sweet, musical and comfortable feedback that made me enjoy a lot, improvising over a backing track around "Machine Gun".
I've enjoyed the feedback during the rest of the session; eternal sustain, controlled feedback... you know... orgasmic!.
EH Hum Debugger
GET OFFA THAT PEDAL!!!
Probably the worst pedal effect I've ever tried in my whole life!.
Does it remove the hum?
CERTAINLY, YES.
So, what's the point?
This pedal is introducing strange artifacts, as some kind of metallic slap echo or some kind of ring modulator sound that totally ruins your sound. As soon as you switch it on and, even in the "normal" position, is generating that kind of metallic or robotic voice, like if your guitar was enclosed inside a tin, with an ugly metallic echo.
I cannot understand how they are able to sell something like this!.
Even a Noise Gate (that I usually hate) works better and affects less to the tone!.
I am serious: forget this pedal!.
Line 6 Verbzilla
I wasn't testing this pedal in depth, because it has a lot of possibilities. I was mainly interested on to just give some ambiance to the sound, without overdoing the effect.
I liked what I heard. I didn't heard the typical "digititis", no digital artifacts affecting the sound, in principle. This pedal added very smoothly the needed ambiance, very transparently and, helped me to "push the amp inside the mix (backing track)".
Sure, it has a lot more of possibilities than I will ever need but, for now, I am happy with how I set up it, it works for what I wanted to.
Conclusion
Absolutely upset with the Hum Debugger (I am even thinking on to burn this pedal!). I never felt myself so ridiculous after buying some gear!.
A bit disappointed with the TS-808, taking into account its high price, against what you get. I've hoped something more for that price, honestly. To have it as the only OD in your board maybe isn't a good idea.
The opposite occurs with the OCD, with a controlled gain, sounds way clearer, defined, fuller and powerfuller than the TS. With excessive gain can go mushy and confusing but, within the gain range of the TS, the OCD wins hands down.
But, the good discover was to stack both pedals, with their respective gains lowered a bit. Sound was awesome, with a musical and controlled feedback that made me to play like a crazy.
For a future, I am thinking in to swap the TS with a Xotic EP Booster and stack both together... we will see.
The Verbzilla did a flawless work. There are still lot of possibilities in this pedal but, I am satisfied with the results enough.
20 January 2013
Home Studio: IK Multimedia Amplitube 3 plugin - first contact
Introduction
Note: this entry was already published in my old Spanish version of this blog, around February 2010. I am revisiting it here, with added comments.
Alright!, the "Tone King", as IK Multimedia's guys name it, took a while to be ready but, it was finally released and, I've got it, downloaded to my PC and in testing phase.
Major enhancements?
Respect of Amplitube 2, I think that Amplitube 3 shines specially in two areas:
Cab / Speakers control
This new area of Amplitube 3 is simply awesome.
Not a new idea, indeed; Sweeden company Softube already developed a virtual system of micking amps, in their amp simulation plugins. I always wanted to buy Softube' stuff but, I've found their products expensive enough and, even more taken into account the short list of amp models included in each plugin.
Now, it is posible to apply this new virtual micking system to all your well known amp models, as well as the few new models that came with this new version.
A wonderfull way to suit the sound to your like.
Just swap the mics and the sound changes. Move any mic around and the sound changes.
Typical phase cancellation issues occurs, as in the real world and, this is not necesarely bad, since it can help you to remove unwanted extreme frequencies or even get some weird and freaky effect.
You can select the output level of each mic, as well as its panoramization in the stereo image.
Additionally to this, there are two ambient mics but, for those, you can just change the gap between both, what wides or narrows the stereo ambience.
It also includes 4 convolutive ambience models, to emulate rooms of different sizes.
Those two mics can be mixed together with the cab's mics to taste, helping to make the amp simulator to sound as real as in a recording sesion.
I think IK Multimedia did an awesome work here but, to be perfect, I would like this plugin to have the possibiliy to route each mic to an independent track or bus in your DAW.
In that way, you could process individually each mic, even with different audio processors, depending on the needs.
Currently the micking system gives to you infinite possibilities to sculpt your amp' sound to taste but, that additional control over different tracks in the DAW would give to IK Multimedia the real name of "King of Tone".
Dynamics
One of the things that were very clear in Amplitube 2 amp and effect models was a real lack of dynamics. Models response was very uniform and independent of your picking stregth. Models were sounding overall good but, with a complete lack of sensibility respect of your picking technique.
In this new version, amp models have a very dynamic respnse. To play lightly can put the sound under the tube break-up point and, picking hard you can make the "valve" to explode in harmonics, like in real amps.
Effects are also more sensible and, knobs are really responsive and closer to real world. Now, they make real changes in the pedal effect, while in Amplitube 2 each knob had just 3 positions: right, middle and left.
Amp models
Most of the amp models are those that were already included in following packs: Amplitube 2, Jimi Hendrix and Amplitube Metal. Some of models disapeared but, most of them are there.
As new, some Orange (OR30, if memory doesn't fail), some other version of a Vox AC30 (copper pannel), a Mesa Boggie MKIII, three new bass amplifiers (very nice to escape from Ampeg, from time to time!) and, very few else.
Any other Amplitube's pack that you had installed continues working fine but, this time integrated in Amplitube 3 and, with all those enhancements already discussed above.
X-Gear follows working flawless but, it makes more sense to use the new, clearer and powerfuller interface of Amplitube 3.
I am missing some mythical amps of several makers as:
Something I don't like about the plugin and drives me crazy with some amp models (very specially, AC30 ones) is that there is no way to select a "pure" amp and tweak its controls. You have several versions of an amp: Clean, Crunch, etc and, for each one, some knobs are available, some don't so, there is no way to work on the whole pannel of your amp, switching the channel and tweaking each knob as in real world.
Even that the different "sides" of an amp do the job, it seems an unnatural way of doing things.
Cabs and speakers
In this version, you can clearly see which cab mounts each amp so, it's very easy to test different cabs and learn which cab better matches which amp, when looking for that tone.
This, together with the micking subsystem, brings to you huge oportunities to catch your tone.
It would be just DA BOMB if, for each cab you could choose the speakers and their configuration (parallel, series, X, etc).
This area was really nicely enhanced and I love the changes!.
Automatization
More or less, equal to Amplitube 2 but, made way easier.
There is a knob named AUTO where you assign each knob or characteristic (bypass, mute, gain, tone, etc.) to some parameter. In other place, you assign a pedal, effect or whatever to such a parameter. Then, you can use the possibilites of automatization inside your DAW, by example, to activate or deactivate some effect during reproduction.
By the way, the most interesting from the point of view of playing would be to have some kind of controller to do it in real time. I think IK Multimedia will release son control pedalboard for Amplitube 3, around June 2010, what would be nice.
Today, it's possible to work with other units but, they are both, audio interfaces and controllers. I don't need audio interfaces, because I've got mine, or superior quality.
Conclusions
For an user that already has all Amplitube 2 packs... worths it the change?.
ABSOLUTELLY YES!.
All the micking subsystem opens a new borad horizont in the ways you can modelate the sound within Amplitube 3. This is the Key Stone of this new version.
Even that most of amps were already available in several Amplitube 2 packs, now all them have a more authentic behavior, more "real", dynamic and responsive and, the micking system makes them more convincent.
For new users, price tag can be a bit too much but, a crossgrade or upgrade still have an attractive price as to move on this. For new users that have to choose between version 3 or old version 2 packs, if they were interested in more than one version 2 pack (what's very probable), it's better to go for version 3.
Amplitube Fender and Amplitube Ampeg AREN'T included in Amplitube 3, because they had already most of the modeling technology that has been used later to re-modelate gear in Amplitube 3.
If you already have those, you can still benefite of the enhancement of the cab and mic subsystems.
In my honest opinion, for the price tag of this new Amplitube version, all the old packs should be included by default, leaving for the future new packs to include those boutique amps that I am always missing in Amplitube plugins.
The micking subsystem would be perfect with an individual routing of each independent mic to a separate track of your DAW.
The possibility to record the clean signal y one single track and, all the automatisms of the pedalboard in a separate track could be of real utility for live playing, as well as for live recordings, with the possibility of giving a final touch later, in the mix.
So, in my opinion an awesome PRINCE but, still not a KING.
Dont' be fooled, this is a GREAT PRODUCT but, once you see all those new possibilites, you start to think that they could probably went some steps further.
IK Multimedia people is doing it REALLY GOOD so, let wait for new enhancements!.
Note: this entry was already published in my old Spanish version of this blog, around February 2010. I am revisiting it here, with added comments.
Alright!, the "Tone King", as IK Multimedia's guys name it, took a while to be ready but, it was finally released and, I've got it, downloaded to my PC and in testing phase.
Major enhancements?
Respect of Amplitube 2, I think that Amplitube 3 shines specially in two areas:
- Dynamics of amps and effects models
- Micking system for cabs and speakers
Cab / Speakers control
This new area of Amplitube 3 is simply awesome.
Not a new idea, indeed; Sweeden company Softube already developed a virtual system of micking amps, in their amp simulation plugins. I always wanted to buy Softube' stuff but, I've found their products expensive enough and, even more taken into account the short list of amp models included in each plugin.
Now, it is posible to apply this new virtual micking system to all your well known amp models, as well as the few new models that came with this new version.
A wonderfull way to suit the sound to your like.
Just swap the mics and the sound changes. Move any mic around and the sound changes.
Typical phase cancellation issues occurs, as in the real world and, this is not necesarely bad, since it can help you to remove unwanted extreme frequencies or even get some weird and freaky effect.
You can select the output level of each mic, as well as its panoramization in the stereo image.
Additionally to this, there are two ambient mics but, for those, you can just change the gap between both, what wides or narrows the stereo ambience.
It also includes 4 convolutive ambience models, to emulate rooms of different sizes.
Those two mics can be mixed together with the cab's mics to taste, helping to make the amp simulator to sound as real as in a recording sesion.
I think IK Multimedia did an awesome work here but, to be perfect, I would like this plugin to have the possibiliy to route each mic to an independent track or bus in your DAW.
In that way, you could process individually each mic, even with different audio processors, depending on the needs.
Currently the micking system gives to you infinite possibilities to sculpt your amp' sound to taste but, that additional control over different tracks in the DAW would give to IK Multimedia the real name of "King of Tone".
Dynamics
One of the things that were very clear in Amplitube 2 amp and effect models was a real lack of dynamics. Models response was very uniform and independent of your picking stregth. Models were sounding overall good but, with a complete lack of sensibility respect of your picking technique.
In this new version, amp models have a very dynamic respnse. To play lightly can put the sound under the tube break-up point and, picking hard you can make the "valve" to explode in harmonics, like in real amps.
Effects are also more sensible and, knobs are really responsive and closer to real world. Now, they make real changes in the pedal effect, while in Amplitube 2 each knob had just 3 positions: right, middle and left.
Amp models
Most of the amp models are those that were already included in following packs: Amplitube 2, Jimi Hendrix and Amplitube Metal. Some of models disapeared but, most of them are there.
As new, some Orange (OR30, if memory doesn't fail), some other version of a Vox AC30 (copper pannel), a Mesa Boggie MKIII, three new bass amplifiers (very nice to escape from Ampeg, from time to time!) and, very few else.
Any other Amplitube's pack that you had installed continues working fine but, this time integrated in Amplitube 3 and, with all those enhancements already discussed above.
X-Gear follows working flawless but, it makes more sense to use the new, clearer and powerfuller interface of Amplitube 3.
I am missing some mythical amps of several makers as:
- Hiwatt
- Conford
- Matchless
- Bogner
- Soldano
- Diezel
- Dumble
- Dr. Z
Something I don't like about the plugin and drives me crazy with some amp models (very specially, AC30 ones) is that there is no way to select a "pure" amp and tweak its controls. You have several versions of an amp: Clean, Crunch, etc and, for each one, some knobs are available, some don't so, there is no way to work on the whole pannel of your amp, switching the channel and tweaking each knob as in real world.
Even that the different "sides" of an amp do the job, it seems an unnatural way of doing things.
Cabs and speakers
In this version, you can clearly see which cab mounts each amp so, it's very easy to test different cabs and learn which cab better matches which amp, when looking for that tone.
This, together with the micking subsystem, brings to you huge oportunities to catch your tone.
It would be just DA BOMB if, for each cab you could choose the speakers and their configuration (parallel, series, X, etc).
This area was really nicely enhanced and I love the changes!.
Automatization
More or less, equal to Amplitube 2 but, made way easier.
There is a knob named AUTO where you assign each knob or characteristic (bypass, mute, gain, tone, etc.) to some parameter. In other place, you assign a pedal, effect or whatever to such a parameter. Then, you can use the possibilites of automatization inside your DAW, by example, to activate or deactivate some effect during reproduction.
By the way, the most interesting from the point of view of playing would be to have some kind of controller to do it in real time. I think IK Multimedia will release son control pedalboard for Amplitube 3, around June 2010, what would be nice.
Today, it's possible to work with other units but, they are both, audio interfaces and controllers. I don't need audio interfaces, because I've got mine, or superior quality.
Conclusions
For an user that already has all Amplitube 2 packs... worths it the change?.
ABSOLUTELLY YES!.
All the micking subsystem opens a new borad horizont in the ways you can modelate the sound within Amplitube 3. This is the Key Stone of this new version.
Even that most of amps were already available in several Amplitube 2 packs, now all them have a more authentic behavior, more "real", dynamic and responsive and, the micking system makes them more convincent.
For new users, price tag can be a bit too much but, a crossgrade or upgrade still have an attractive price as to move on this. For new users that have to choose between version 3 or old version 2 packs, if they were interested in more than one version 2 pack (what's very probable), it's better to go for version 3.
Amplitube Fender and Amplitube Ampeg AREN'T included in Amplitube 3, because they had already most of the modeling technology that has been used later to re-modelate gear in Amplitube 3.
If you already have those, you can still benefite of the enhancement of the cab and mic subsystems.
In my honest opinion, for the price tag of this new Amplitube version, all the old packs should be included by default, leaving for the future new packs to include those boutique amps that I am always missing in Amplitube plugins.
The micking subsystem would be perfect with an individual routing of each independent mic to a separate track of your DAW.
The possibility to record the clean signal y one single track and, all the automatisms of the pedalboard in a separate track could be of real utility for live playing, as well as for live recordings, with the possibility of giving a final touch later, in the mix.
So, in my opinion an awesome PRINCE but, still not a KING.
Dont' be fooled, this is a GREAT PRODUCT but, once you see all those new possibilites, you start to think that they could probably went some steps further.
IK Multimedia people is doing it REALLY GOOD so, let wait for new enhancements!.
19 January 2013
Pedals: Wampler Tweed '57 in depth testing
Introduction
Probably, this is the pedal from Wampler that drove me crazy for a longer time. I wasn't sure how to achieve my "Tweed" sound, until I've carefuller read the user's manual.
This pedal is tricky, indeed. To know which goals were behind its design and, how Brian Wampler designed the controls to work to let you achieve your wanted Tweed sound, is key to get the best from this pedal.
Once, I've understood how every control works (despite of its name), things were way easier.
I would like to share with you my experience tweaking this pedal, with an in-depth demo that you can watch in the video attached at the end.
The Tweed Sound
Firstly, we need to understand that there is not such a Tweed sound. Tweed amps were those early Fender amps with a cream colored cotton twill and a circuitry slightly different to the ones designed for Blackface Fenders (with black tolex). I think the main change was in the negative feedback circuit implemented for Blackfaces that gave them a compresser and thicker sound.
Maybe, there are some common characteristics behind all Tweed era amps. Most have a very mid ranged voice, more in the dark side than in the bright side. They were very dynamic, getting all the nuances of your picking technique and driving he tubes accordingly. The overall sound was warm and silky, with nice harmonics in the tube break up borders and with a dense saggy basses when pushed really hard.
Some of the models you can think on are: the Bassman, Champ, Deluxe and Twin, by example. All sizes, paired with different cabs and speakers, different power, slight differences in circuitry or tubes... so... they were all similar but different, at the end.
When you as for the Tweed sound, everyone has it's own in mind and, that depends on which one made the job for him. From low powered studio combos with single 10" or 12" speaker to powerfuller heads paired with a 4x12" or 4x10" cab. Mounted speakers have also a clear impact in the sound, depending on if they were ElectroVoice or Jensen, by example, or which models were used.
So, to make a Tweed sounding pedal has a wrong starting point for design, since there is not such a thing, there is not just a single and clearly defined Tweed sound.
Brian Wampler's approach
Brian wanted to bring together all those Tweed sounds and, make a pedal versatile enough to be able to emulate the different Tweed models and their differently paired cabs and speakers.
That was a very ambitious project but, If successful, could leave to each player to exactly nail the Tweed tone he was after.
And how Brian designed pedal's controls to achieve this goals?. That's the key to get the best from this pedal. Let explain it a bit.
The key Knob is the Middle one. Forget for a while that has a clear impact on the notch frequency around which middle frequencies are being bumped. Imagine it as a Tweed model selector and, move that knob until you hear the foundational tone of that Tweed you have in mind.
For sure, you will have to revisit this knob several times, while working with rest of controls, since there is a high interaction between all them but, you get the idea...
Now, think on the Treble knob as if it was an speaker selector. Small speakers had a higher projection of trebles so, move it to right hand if you are after that kind of speakers or, move it to left hand if you are after bigger speakers.
Then, think on the Bass knob as the cab selector. Small combos will have a cab that projects less basses and, very specially if its mounting a single 10" speaker so, move that knob to left hand if you are after such a kind of cab. Big cabs and, very specially closed back ones, projected powerfull basses so, move that knob to your right hand if you are after such a kind of cab.
Sure, those three tone shaping knobs work closely together (and affect and are affected also by the Gain knob) so, it would take a while of revisiting all them together to leave you were you wanted but, I am very positive that you will get what you were after.
Now, the Gain knob. Maybe, this is the knob where I find I would like more clean headroom and a smoother transition between clean, break up and distortion.
In my opinion, the Gain at minimum gives the only "clean" this pedal has and, it's a dirty clean anyway. But, that's ok. I always heard those Tweed cleans as warm broken-cleans with nice and full harmonics.
If you are planning to use the Tweed '57 just to shape your overall tone, I like the gain at minimum, because, it just colors the signal and leaves you to stack any pedal before, as if you were playing in front a Tweed.
That broken cleans sound as heaven and are very dynamic and responsive to your picking technique.
Pedal cleans really nice with your guitar's knob, specially in normal and bright channels and, not so good in the linked option. This allows you to work a la old school and therefore, setting your Tweed pedal to the maximum gain you will need and, regulate the break up level with the help of your guitar's knob, in a way quite similar as you'd do in a real amp of that time.
Last tone shaping control that Brian implemented is the Input Simulator. Most of Tweed amps had two channels (with a pair of inputs each one), that were named Normal and Bright. The behaviour and particular voice of such a channels is being reproduced in this pedal unit so, they make a clear difference when you switch the Input Simulator to one or the other.
Finally, a very common practice those days was to jumper both channels together (by example, from input 2 of normal channel to input 1 of bright channel) so you've got a thicker and complexer voice. This is being reproduced with the Linked option of the Input Simulator.
So, you have there all the tools to achieve your wanted Tweed sound and, now, you know how controls were planned to work to get the right results.
Do this pedal achieve Tweed sounds?.
I cannot really answer that, since all tweeds I've heard were owned by others and, even that you can hear those in lots of recordings, you know that studio work masks the real thing so, I really don't know.
What I can say is that this pedal sounds purely awesome (once you understand how it works) and, it delivers wonderful sounds and, leaves my to get the Tweed I have in my mind (that shouldn't necessarily be your Tweed!).
The Video
The sound is better to hear than to explain. This video discusses a bit what was already discussed above in the blog entry and, starts demoing how he different controls help to achieve the tone, as described above.
Finally, an small channel by channel comparison.
It's around 30 mins long so, get your pop corns a beer, relax, push the volume button and watch it or, leave it for when you have time.
18 January 2013
Pedals: Wampler '57 Tweed and Wampler Leviathan Fuzz
Introduction
As a Wampler's fan, I am interested on every pedal that Brian Wampler makes, even that I recognize that not all its pedals are workhorses for each song or gig.
Wampler has a line of awesome all purpose pedals, as the Euphoria OD, the Sovereign Distortion, Faux Tape Echo, EGO Compressor, Nirvana Chorus and, even the Paisley OD.
But, it also has a line of one pony trip pedals, that are after nailing a particular sound, like the Pinnacle, Plextortion, SLOstortion, Blackface, Triple Wreck, etc.
Well, the '57 Tweed is some kind of amp-in-a-box, like the Plexi Drive and, a pedal that is being designed to be at the end of your gain chain, to give that color to your sound as if you were playing into a Fender Tweed amp and, this is a bit complex, since under the Tweed umbrella we can find different amps (Bassman, Champ, Deluxe, Twin...) and, despite that all them have a warm and saggy voice, not all them have the same headroom or break up character.
So, firstly, is there a Tweed sound?. I am sure the answer is not. If you ask for the Tweed sound you will get a different answer, depending on which of the Tweed amps that particular person liked more (a Bassman with a 4x10" cab, a Tweed Champ, ...) but, there are some characteristic that could be common to all them and, in my opinion, I think that's what Brian Wampler tried to catch in this pedal, providing a wide range of gain, three different channels (normal, brigth and bridged) and a complete tone stack that follows the behaviour of the tone stack in those amps.
Then, we have the Leviathan fuzz. As per Brian descriptions, this is fuzz designed from scratch and, that tries to cover every kind of fuzz and go beyond. One of the things that can surprise you more is that the clipping is achieved with diodes, instead of transistors (classic) or IC chips (as moderner takes).
An ambitious project, trying to cover all the ground but, without being based in any old or modern fuzz and, removing all the impedance issues that classic fuzz have, being able to place the pedal whenever you want in your pedalboard. Sounds interesting, indeed.
I am a lover of Fuzz effects but, I am always fighting with my love for fuzzes and the odd issues that introduce in my pedalboard (positive ground, impedance issues, instability, ..) so, I wanted to give a try to this new design.
Presentation
On the line of the rest of Wampler's pedals. Both come in a discrete white carton box, with some sticker on the front, with a picture of the pedal and Wampler's logo. Each pedal comes inside a fabric bag and wrapped on bubble plastic. Inside the box, as ever, a single-sheet "user's manual", one sticker with Wampler's logo and some info about other pedals.
Pedals seems built as a tank with the appeal of a racing car.
'57 Tweed
Controls
Volume
Sets the overall output level of the pedal. It's is better to leave it a bit over the unitary level, while dialing the wanted tone and then, to set up to Unitary Volume Level.
Gain
Sets the distortion level and character but is highly influenced by all the rest of controls and, specially by the Input simulator switch
Input Simulator switch
This switch provides three modes that correspond to the two channels available for some models (normal and bright) and the linked option of both channels (as it was often used).
Highs
This one is some kind of highs contour knob. It gives the overall character when you are searching for one or another Tweed amp. For sound similar to 10" speakers, raise the highs, for deeper and warmer cabs, lower the highs.
Middle
Tweed were all about midrange and, this knob is the key to achieve the exact tweed tone you are after. This is the key knob and, it's the one you have to put your hard work.
Bass
This takes care of the low end, helping to shape the Tweed sound you are after. It has a great impact in body and distortion grain.
Playing it
I would say that this was the hardest to tweak pedal of all Wampler's.
Firstly, the Gain control leaves very few clean headroom. The pedal gives an instant break up with very low gain positions and goes to full saggy saturation so, to get just that sweet spot, in the borders of tube break up with warm harmonics singing was a challenge.
Secondly, as discussed, which Tweed tone do you like is a very personal matter so, it took me a while to find the right settings for tone controls.
Depending on your settings, the pedal can sound lost in the mix or cutting the mix with authority so, you should take your time to adjust the pedal to your rig and, if you can, test it with some backing tracks.
In my tests, the pedal seems to always have some break up level so, I found no way to just get a warm clean sound, it goes dirty very soon.
With the gain very low, it lacks some sustain, what forces me to raise the gain (and obtain break up, again). Probably, the best is to tweak it to the maximum distortion level you will use and then, to control the headroom with your guitar's knob (in the old way). It cleans nicely when you roll off your guitar's volume.
I've tested it with some blues backing tracks and loved the sound. I am quite sure I am still not getting the best of this pedal but, I just need time to exactly get what I am after.
I've focused mainly in the normal channel voice and, I still have to check in depth the other two voices and, very specially the linked one (because it was the most used mode in these amps).
If you are facing this pedal for your very first time, my recommendations are:
Leviathan Fuzz
Controls
Volume
This sets the overall output level of the pedal.
Gain
This one controls the level of the fuzz effect and, the amount of available gain depends also on which fuzz mode is active. In its lower settings you can achieve classic Fuzz sounds while set at full you can go beyond Big Muff settings.
Treble
Shapes the high frequencies. Roar mode has more high end representation than the Rumble mode. It works very interactively with the Bass knob.
Bass
Controls the low end. Adds body and modifies the fatness of the distortion. Overdone, can be a mess. Highly related to Treble, Gain and Mode.
Rumble / Roar toggle switch (mode)
This switch allows the Fuzz to work in two very different modes: Germanium (Roar) or Silicon (Rumble) and, it does it without the positive ground or impedance issues of the classic fuzzes!!!.
The Roar (GE) mode is louder, more raw and unpredictable (what I love) and covers from Tone Bender fuzzes to high gain razor fuzzes.
The Rumble (SI) mode is quieter, more synthetic sounding, more stable, with more refined voice and, covers from Fuzz Face sounds to high gain muff.
Playing it
I need more time with this pedal. It goes from very subtle fuzzes to high gain muffs, with everything in between. You can get razor-like sounds or deep and muddy ones. All controls have a high dependency so, to achieve a certain sound, you need to tweak and tweak and tweak.
Manual comes with 4 sample settings that will allow you to get the overall possibilities of the fuzz.
I've tried first classic tones: a la Tone Bender and a la Fuzz Face. I wouldn't say that I was able to nail the tone of those fuzzes. I've got a Tone Bender MKII clon (Stroll On) and, they don't feel the same, in my opinion. You go close but you don't get exactly that tone.
Silicon tones are easier to nail, since silicon transistor delivered a more consistent tone, while Germanium was always very unpredictable.
Anyway, no impedance problems!. I can place the fuzz where I want with no issues and that's really good.
It sounds quieter than traditional fuzzes, even at high gain levels and, its tone controls allows you to exactly dial the amount of body, distortion grain or cutting highs you need. In that way, the available range of tones is so huge that makes it difficult to choose which one to use.
Since I ever found Silicon fuzzes as very "processed" and even "synthetized", I focused my experiments firstly in the Roar mode so, I still have to investigate harder the Rumble mode.
I am not sure to get exact classic fuzzes (by now) but, maybe I even don't need those. I just want a flexible fuzz (in all senses) to engage it on demand and that can be compatible with rest of my pedalboard.
The sounds I can get from the Leviathan satisfy me and, I am happy to forgot all the issues I've got with classic designs so, I finally have a Fuzz!.
Video
Since I am still not mastered in those two pedals (that I am still discovering), I wanted to set up them for an usable sound and make some tests with some backing tracks.
The Tweed is being used in the three songs and, the Leviathan just in the last one, with a more fusion approach than classic.
There are other videos already covering several settings of those two pedals so, please, watch those if you wanted a complete review of such a pedals. I was more interested on to know if they were capable of being integrated in my pedalboard and be of help in my songs.
I honestly thing that they have a place in my pedalboard but, I need more experimentation with both pedals to get the best from them.
As a Wampler's fan, I am interested on every pedal that Brian Wampler makes, even that I recognize that not all its pedals are workhorses for each song or gig.
Wampler has a line of awesome all purpose pedals, as the Euphoria OD, the Sovereign Distortion, Faux Tape Echo, EGO Compressor, Nirvana Chorus and, even the Paisley OD.
But, it also has a line of one pony trip pedals, that are after nailing a particular sound, like the Pinnacle, Plextortion, SLOstortion, Blackface, Triple Wreck, etc.
Well, the '57 Tweed is some kind of amp-in-a-box, like the Plexi Drive and, a pedal that is being designed to be at the end of your gain chain, to give that color to your sound as if you were playing into a Fender Tweed amp and, this is a bit complex, since under the Tweed umbrella we can find different amps (Bassman, Champ, Deluxe, Twin...) and, despite that all them have a warm and saggy voice, not all them have the same headroom or break up character.
So, firstly, is there a Tweed sound?. I am sure the answer is not. If you ask for the Tweed sound you will get a different answer, depending on which of the Tweed amps that particular person liked more (a Bassman with a 4x10" cab, a Tweed Champ, ...) but, there are some characteristic that could be common to all them and, in my opinion, I think that's what Brian Wampler tried to catch in this pedal, providing a wide range of gain, three different channels (normal, brigth and bridged) and a complete tone stack that follows the behaviour of the tone stack in those amps.
Then, we have the Leviathan fuzz. As per Brian descriptions, this is fuzz designed from scratch and, that tries to cover every kind of fuzz and go beyond. One of the things that can surprise you more is that the clipping is achieved with diodes, instead of transistors (classic) or IC chips (as moderner takes).
An ambitious project, trying to cover all the ground but, without being based in any old or modern fuzz and, removing all the impedance issues that classic fuzz have, being able to place the pedal whenever you want in your pedalboard. Sounds interesting, indeed.
I am a lover of Fuzz effects but, I am always fighting with my love for fuzzes and the odd issues that introduce in my pedalboard (positive ground, impedance issues, instability, ..) so, I wanted to give a try to this new design.
Presentation
On the line of the rest of Wampler's pedals. Both come in a discrete white carton box, with some sticker on the front, with a picture of the pedal and Wampler's logo. Each pedal comes inside a fabric bag and wrapped on bubble plastic. Inside the box, as ever, a single-sheet "user's manual", one sticker with Wampler's logo and some info about other pedals.
Pedals seems built as a tank with the appeal of a racing car.
'57 Tweed
Controls
Volume
Sets the overall output level of the pedal. It's is better to leave it a bit over the unitary level, while dialing the wanted tone and then, to set up to Unitary Volume Level.
Gain
Sets the distortion level and character but is highly influenced by all the rest of controls and, specially by the Input simulator switch
Input Simulator switch
This switch provides three modes that correspond to the two channels available for some models (normal and bright) and the linked option of both channels (as it was often used).
Highs
This one is some kind of highs contour knob. It gives the overall character when you are searching for one or another Tweed amp. For sound similar to 10" speakers, raise the highs, for deeper and warmer cabs, lower the highs.
Middle
Tweed were all about midrange and, this knob is the key to achieve the exact tweed tone you are after. This is the key knob and, it's the one you have to put your hard work.
Bass
This takes care of the low end, helping to shape the Tweed sound you are after. It has a great impact in body and distortion grain.
Playing it
I would say that this was the hardest to tweak pedal of all Wampler's.
Firstly, the Gain control leaves very few clean headroom. The pedal gives an instant break up with very low gain positions and goes to full saggy saturation so, to get just that sweet spot, in the borders of tube break up with warm harmonics singing was a challenge.
Secondly, as discussed, which Tweed tone do you like is a very personal matter so, it took me a while to find the right settings for tone controls.
Depending on your settings, the pedal can sound lost in the mix or cutting the mix with authority so, you should take your time to adjust the pedal to your rig and, if you can, test it with some backing tracks.
In my tests, the pedal seems to always have some break up level so, I found no way to just get a warm clean sound, it goes dirty very soon.
With the gain very low, it lacks some sustain, what forces me to raise the gain (and obtain break up, again). Probably, the best is to tweak it to the maximum distortion level you will use and then, to control the headroom with your guitar's knob (in the old way). It cleans nicely when you roll off your guitar's volume.
I've tested it with some blues backing tracks and loved the sound. I am quite sure I am still not getting the best of this pedal but, I just need time to exactly get what I am after.
I've focused mainly in the normal channel voice and, I still have to check in depth the other two voices and, very specially the linked one (because it was the most used mode in these amps).
If you are facing this pedal for your very first time, my recommendations are:
- raise your volume level over the unitary volume level
- rest of knobs at noon
- focus first in the Middle knob, set the middles were you wanted them
- focus then in the Highs knob, choose your "speakers".
- focus then in the Bass knob, choose your "cab".
Leviathan Fuzz
Controls
Volume
This sets the overall output level of the pedal.
Gain
This one controls the level of the fuzz effect and, the amount of available gain depends also on which fuzz mode is active. In its lower settings you can achieve classic Fuzz sounds while set at full you can go beyond Big Muff settings.
Treble
Shapes the high frequencies. Roar mode has more high end representation than the Rumble mode. It works very interactively with the Bass knob.
Bass
Controls the low end. Adds body and modifies the fatness of the distortion. Overdone, can be a mess. Highly related to Treble, Gain and Mode.
Rumble / Roar toggle switch (mode)
This switch allows the Fuzz to work in two very different modes: Germanium (Roar) or Silicon (Rumble) and, it does it without the positive ground or impedance issues of the classic fuzzes!!!.
The Roar (GE) mode is louder, more raw and unpredictable (what I love) and covers from Tone Bender fuzzes to high gain razor fuzzes.
The Rumble (SI) mode is quieter, more synthetic sounding, more stable, with more refined voice and, covers from Fuzz Face sounds to high gain muff.
Playing it
I need more time with this pedal. It goes from very subtle fuzzes to high gain muffs, with everything in between. You can get razor-like sounds or deep and muddy ones. All controls have a high dependency so, to achieve a certain sound, you need to tweak and tweak and tweak.
Manual comes with 4 sample settings that will allow you to get the overall possibilities of the fuzz.
I've tried first classic tones: a la Tone Bender and a la Fuzz Face. I wouldn't say that I was able to nail the tone of those fuzzes. I've got a Tone Bender MKII clon (Stroll On) and, they don't feel the same, in my opinion. You go close but you don't get exactly that tone.
Silicon tones are easier to nail, since silicon transistor delivered a more consistent tone, while Germanium was always very unpredictable.
Anyway, no impedance problems!. I can place the fuzz where I want with no issues and that's really good.
It sounds quieter than traditional fuzzes, even at high gain levels and, its tone controls allows you to exactly dial the amount of body, distortion grain or cutting highs you need. In that way, the available range of tones is so huge that makes it difficult to choose which one to use.
Since I ever found Silicon fuzzes as very "processed" and even "synthetized", I focused my experiments firstly in the Roar mode so, I still have to investigate harder the Rumble mode.
I am not sure to get exact classic fuzzes (by now) but, maybe I even don't need those. I just want a flexible fuzz (in all senses) to engage it on demand and that can be compatible with rest of my pedalboard.
The sounds I can get from the Leviathan satisfy me and, I am happy to forgot all the issues I've got with classic designs so, I finally have a Fuzz!.
Video
Since I am still not mastered in those two pedals (that I am still discovering), I wanted to set up them for an usable sound and make some tests with some backing tracks.
The Tweed is being used in the three songs and, the Leviathan just in the last one, with a more fusion approach than classic.
There are other videos already covering several settings of those two pedals so, please, watch those if you wanted a complete review of such a pedals. I was more interested on to know if they were capable of being integrated in my pedalboard and be of help in my songs.
I honestly thing that they have a place in my pedalboard but, I need more experimentation with both pedals to get the best from them.
16 January 2013
Accessories: Test of picks or plectros
Introduction
Everything between yourself and the output of speakers is affecting the sound in any way. Sometimes, very subtly, sometimes dramatically. Picks (or plectros) are some of those things that a guitarist is often unconsidered by the guitarist as something that can affect his sound.
In fact, I am quite sure I bought a wide variety of picks along my life, of different makers and with different characteristic and that, maybe at some point of time, I had my own preferences but, I really forgot it.
One day, I saw a thread in Seymour Duncan, discussing about pics and, it took my attention.
Can a pick be so determining in my playing?.
Nowadays, we have a huge offer of different makers, models, with very different shapes, materials, stiffness. Do they make any difference?.
Materials
Nowadays, picks are made of a bunch of different materials, as Cellulose, Delrin, Ultex, Nylon, Bone, Wood, Copper, Aluminium, Shell, to name a few.
Material affects to the touch and, interacts directly with the string, transmitting our movements in different ways. Some materials seem to have some grip and, seem to hijack the string (for milliseconds, if you want) while you are playing. Other materials seem to release strings easily, allowing you smoother pick down/ pick up stuff. By example, I've got a wooden pick that seems to hijack the string, making it really difficult to do something speedy there. Something similar happens with a bull-horn pick I've got. Dunlop's Tortex and Nylon picks have this effect in a lesser degree but, in higher degrees that same picks of other materials.
So, they are affecting to how fluid is your playing.
Materials are also affecting the attack and sustain phases of your sound. By example, Nylon has a sweet attack and, the resulting sound is somewhat more mitigated; this can be a wanted thing for certain songs but, I personally don't like the resulting sound. I've got a copper pick with a really hard attack, even making the strings jumping as crazy, even altering the pitch of those. It gives a hard bite, adding some metallic high end to the sound. I know Brian May plays with a penny coin of copper but, I personally cannot stand the results. The copper pick, together with the bull-horn pick are the ones with the harder attack and bite.
In my memory, Cellulose or Shell picks were working better but, I've got none to test and, maybe, they are not of my taste, nowadays. Who knows!.
Personally, I like more picks made of synthetic materials, with a very well sanded surface, were you can feel your finger sliding smoothly on its surface. That usually corresponds to a pick that easily releases the string.
Something else to consider about materials: some are really soft and weak and, therefore, last less time. Also pick' shape will be lost earlier in time.
Stiffness
This little detail affects a lot on how do you play. If it is thin enough, it seems to get trapped between strings, when jumping from one to the next one and, this is independent on of which material it was made.
If it is stiff enough, the strings are attacked so hard that, they seem to jump out of the guitar's nut.
It seems that, the more stiffer the pick is, the easier is to play speedy riffs but, as always, the stiffness that works for some people cannot be the one you need.
I am finding also that certain stiffness are more valid to play a certain type of music so, even each musical style can have a stiffness range that better suits its needs, depending on what are you after (bite, attack, smoothness, warm...).
Shape
You can think that Shape is just an aesthetic thing but, it isn't in any single way.
Some of the shapes are a real mess to my playing technique. Big shapes are specially bad for me, specially those big triangular picks. The bigger they go, the bad for my own needs.
By example, the Dunlop Stubby Triangle (purple), with an stiffness of 2.0 is made of a material that I like but, I cannot stand the shape, it's a real mess. The point of the pick stands so far away my finger that is really difficult to get some good overharmonic, by example.
One more example is one of those V-Picks (expensive as hell). I've got one Shredder, with a perfect triangle shape. The tree points are well finished, with a very sharp profile. It's a very rigid pick and, with excessive attack to my taste (stiffness 3.0).
I usually prefer Tear-Drop shaped picks and, the smaller the best. I like them with a softer point, not so sharped as the ones of V-Picks, by example.
I've found that the shape named "stiffo" by Dunlop is the one that best suits my needs.
The Dunlop Jazz III Stiffo is perfect in shape but, I don't like the material so much. Maybe, same shape with the material used for the Stubby Triangle or the one used in V-Pickup would be my natural election.
The Jazz III seems less finished, with its margins not so well sanded as the Stubby or V-Picks or, even the Ultex ones by Dunlop but, this pick has a nice grip and its the most similar to play without a pick.
Currently, I am using the Jazz III Ultex, that convinces me more than the traditional Jazz III.
Conclusion
To choose the right pick for everyone isn't so easy as you can think. It's incredible how much you can improve your playing technique with the right pick and, this is one of the cheapest "mods" you can buy.
Lot of people is spending lot of money trying to sound better and focusing in expensive things that add way little to the sound than a simple change of pick.
By example, to upgrade your caps from ceramic disk to sprage orange drop has a ridiculous impact in your sound, compared to the effect that a different pick will bring to you.
I've personally reached to the conclusion that the kind of picks I like more are made of very well polished synthetic material, with an small tear drop shape, with a not so excessive sharp point and, with an stiffness between 1.0 and 2.0.
The best pick I've tried up to now (for my needs!) is the Dunlop Jazz III Ultex.
Home Studio: Making of the video "Charvel SoCal Type 1 demo"
Introduction
Note: this entry was already publishe during January 2010 in my old Spanish version of this blog. I am sharing it here since I think it could be of interest.
If you already read my previous entry in this blog and, saw the video demoing the guitar Charvel SoCal Type 1, improvising over a free downloadable backing track based on Steve Vai's "For the Love of God", you could be interested on to know how it was made.
So, this entry is just a plain "Making Of" such a video and, contains information about Home Studio tools I've used for this particular video, focusing mainly in Pro Tools stuff.
I am currently using Pro Tools 8.0 LE as DAW, with a Digidesign Rack 003 as sound card and, I've got a single pre-amp: SPL Track One. Even that the Track One is more vocals-oriented, since in Pro Tools you cannot regulate the input volume (instead of that, you must change the output volume of your input source). the Track Pro gives me greater control over that input level.
I am hearing the output with a pair of near field monitors: Dynaudio BM5A but, usually, I cannot mix at a right loudness level (neighbors) so, most of the work I must do it using my headphones (Sony MDR-7509HD). As the headphones image differs a bit from the monitors one, I am using the plugin Redline Monitor for silent tasks, which works psychoacuostically to emulate a stereo image close to the one you can hear coming from your monitors. Even not being perfect, this plugin is of a great help.
During my first steps with this small Home Studio, I've realized that I wasn't able to get a right mix. When I made it to sound good across monitors, after trying it in a typical home audio set, the results were just horrible. That's when I've learnt about the convenience of having a right acousticall treated room but, after reaching the conclusion that I cannot do such a thing in my small room, I went for IK Multimedia's ARC System to get rid of most of issues and, yes, it helped me a lot.
Some other useful tools I'm often using are: RNDigital Inspector XL plugin (to monitorize several important aspects of the sound: correlation, loudness by frequency range, sound shape, peak frequencies, etc.) and, the TTL Dynamic Range Meter (that helps me to raise the mix loudness, at the end, while I am sure it's preserving a reasonable Dynamic Range).
After long tests, I went for Sonnox Elite pack and IK Multimedia stuff and, all those are the weapons I used for this video.
Making Of
Organizing the job
First thing I did was to recharge videocam batteries and to prepare the minimal tracks in Pro Tools to start working on this project. The idea was to record the full sesion with the videocam, telling the number of the take I was going to record everytime and, then, pushing the ProTools recording button for each take.
I've armed several guitar tracks. You know that, once you want to record, you go nervous and, start to make the most silly errors in the most simple parts so, to have a bunch of tracks ready is a good trick to save you a lot of work.
The Backing Track was inserted in one more track, without processing.
All guitar's takes tracks were send to a "guitar buss", to be able to insert there the amp emulation plugins, in a separate auxiliar track, common to all the takes, what saves lots of CPU consumption.
In next picture, you can see the final state of all mixing tracks.
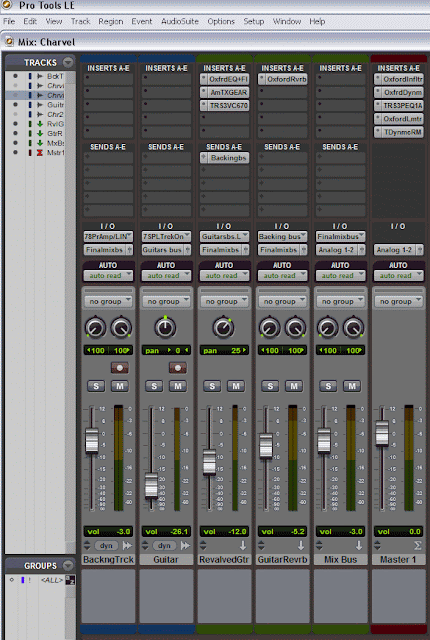
But, the initial state was to have just the "backingtrack" track, several "guitar" tracks and, an auxiliary track named "guitar revalve".
The only active plugin was inserted in "Guitar Revalve" track and, it was an emulation of an Amplitube's amp, a Marshall 100W model, as you can see in the following image:
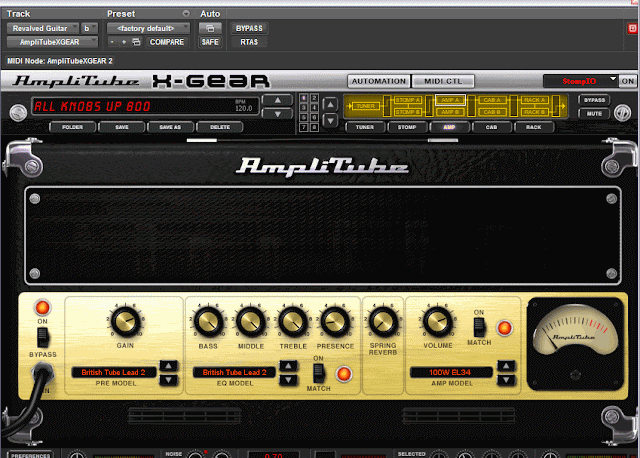
as stompbox, just an overdrive (emulation of a TS-9):
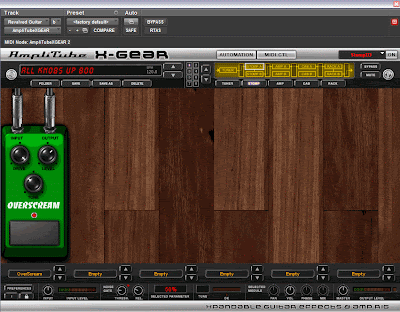
All guitar takes were recorded clean in a track named "Guitar #num" and, all them were sent to the auxiliary track "Guitar Revalved", where the amp emulation was. In that way, I was executing a single instance of such a plugin, releasing CPU resources and, additionaly, I would be able to swap the amp model at any time, later or, just fine tune the several parameters (tone stack, presence, etc.).
With that initial environment, I've started to record 4 different takes, one by one, in a row and, recording those simulteneusly in Pro Tools and the videocam, that got a wrong sound, since it was placed behind the montinors, but I was interested just on the image and a little sound to synchronize image and sound later.
Selecting the best take
Next step was to choose the best take. I've prepared a sheet with 4 rows (one by track) and, about 10 columns (corresponding to 10 song's parts). I've heard each track, valuating each part of the song separatelly and, giving a value between 1 and 5.
Once done, the track with higher score was the right one.
Suiting the guitar in the mix
Since the backingtrack had a good quality, all my job was concentrated into suit my guitar into such a mix, in the right 3D space, in a way that would look like it was part of such a backing track.
First I had to do is to tweak the amp's parameters, until I had a good sound and then, I've followed with the most basic task, to panoramize the guitar (I leaved it dialed to 24 right).
But, guitar' sound still needed of a greater help to suit the mix. Some frequencies were partially masking Guitar Bass and Drums so, I had to give some room for Bass and Drums frequencies, using some corrective EQ. I've choosed Sonnox Equalization plugin for this task.
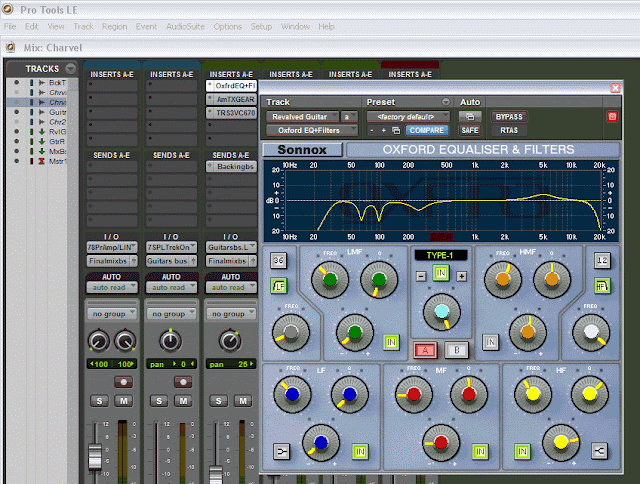
First action was to remove frequencies under 30 Hz.
Since the Kick drum has its fundamental frequencies around 65 Hz, I've dipped guitar's frequency around there to give some room to the Kick drum.
Bass Guitar was peaking around 90 Hz so, I've dipped guitar's frequencies also around this center frequency, to give room to the Bass. Since Toms are sharing also near frequencies, those were instantanely enhanced, also.
Snare was well represented around 240 Hz so, I've dipped guitar frequency around this center one but, with not so dramatically and with a wide Q.
I've pushed frequencies around center frequency of 4 KHz, to give some presence to the guitar and, finally, I cutted off frequencies above 15 KHz.
After this job, guitar and rest of instruments were better individually indentified.
Next step was to use IK Multimedia's Fairchild 670 to give a bit of color and compression to the guitar. I don't like to compress too much the guitar's sound, I prefer to maintain a wide Dynamic Range and, I was more interested on to give that vintage touch that the Fairchild has.
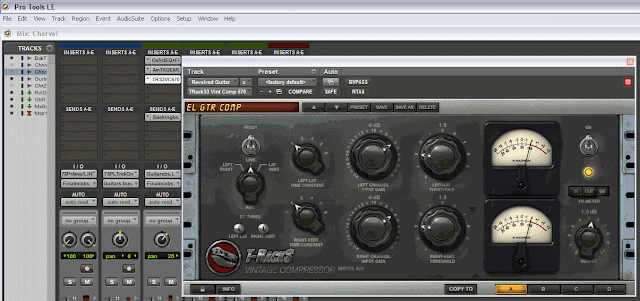
Please, notice that I first did the corrective EQ, to remove unwanted frequencies and, then, the amp simulator to amplify wanted frequencies, followed by the compressor, to give some body to the sound and to raise the quietest parts.
After this, the guitar was sounding really nice but, too much "in your face" so, I needed to push back a bit the guitar, deeper in the mix' image and, adding some ambience.
I've sent the output of this track to one more auxiliary track, named "guitar reverb", with the only goal of adding some reverberation effect that helped to put the guitar some steps back in the image.
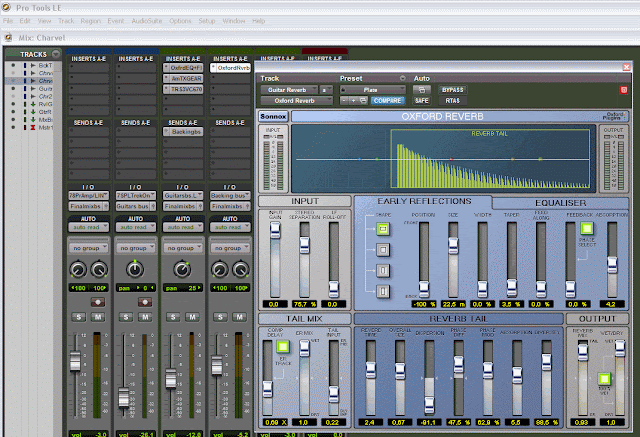
I've choosed Sonnox Reverb, since I like how it sounds and its interface is really smart and easy to use to exactly achieve what you are looking for. I've set up a reverberation of type Plate and, leaved the plugin output 100% wet.
I like to work the reverberatiion effect in a separate auxiliary track. The guitar track is mono, while the reverberation effect is stereo. Adjusting the volume of the reverb, I was able to put the guitar on the right depth in the mix.
"Masterizing"
Once I had an acceptable mix, it was the moment for the final touch.
Tracks named "backing track", "revalve" and "reverb" were routed to an stereo track named "Mix Bus", where I can adjust their individual loudness before sending all the mix to the "Master Bus".
I've prepared the Master Bus with those plugins I thought I would need for that final touch.
First plugin in the chain was the Sonnox Inflator:
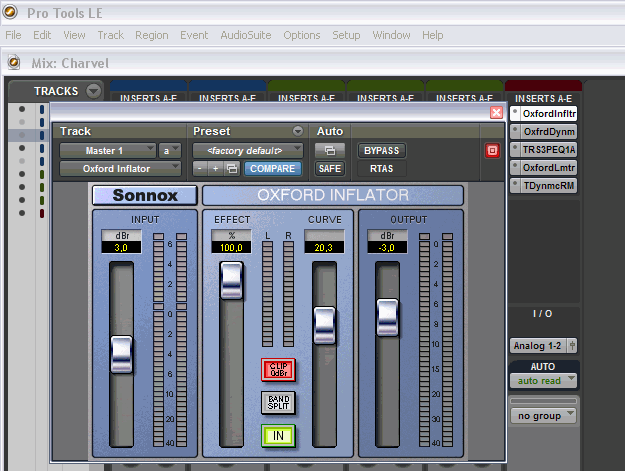
The Inflator adds harmonical information to the program so, pysichoacoustically, it seems to make it louder, while isn't really altering the final volume. It also adds some kind of tube-like warm and, helps to "glue" the mix.
Next one in the chain was the Sonnox Dynamics:
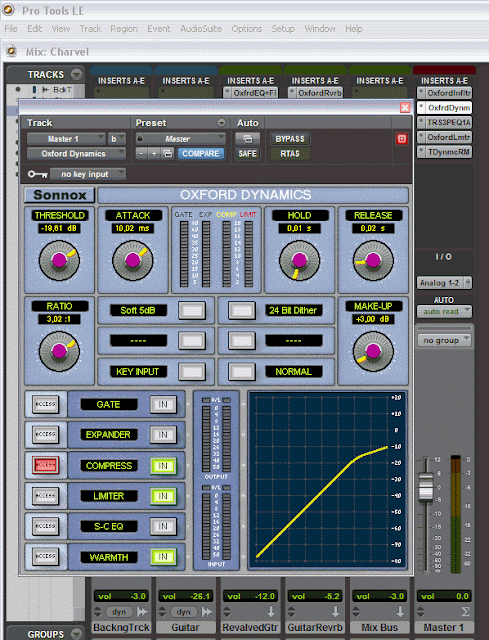
I love to use this plugin mainly to give an overall gain to the mix. The presetting named Master1 is a nice starting point. I just added +3dB of gain, leaving the rest of work to the Limiter.
Next plugin was the IK Multimedia Pulteq EQP-1A:
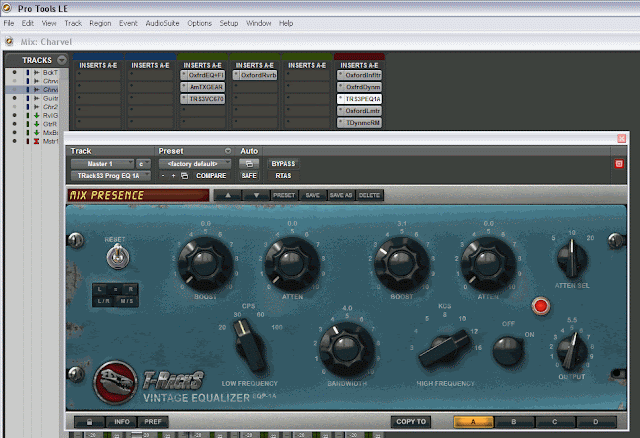
Just an small touch of Pulteq can give some presence to the full mix and, helps to recover some of the lost ambience (after using the compressor). I like this effect practically always in my master chain (and even in some instrument track). Is one of those pluging with some magic, if you don't overdo it. It helps also to give some kick to Bass Guitar and Kick drum, with a result that sounds always warm and musical.
Finaly, last plugin was the Sonnox Limiter, to push the loudness of the mix up to reasonable levels without loosing excesive Dynamics.
During the masterizing process, the TT Dynamic Range plugin was always active:
Which I use in several ways:
First, the dynamic meters allow me to use the controls of dynamics plugins, raising the volume of the track, without loosing more dynamic range than wanted. The Dyanmic Range (Peak RMS minus Average RMS) it's being updated in real time so, it's quite easy to see how every change in dynamics plugins affects to the dynamic range.
Second, the button named Mono allows me to check if there is some comb filter effect, that can maks the mix when heard in mono mode. Usually, you can get rid of this issue just narrowing the panoramo of certain tracks, specially those with effects based on time (reberbs, delays, etc.).
The Original backing track had a Dynamic Range of 9dB, a bit compressed but, good for a Rock song with nice kick and, that was the range I tried to preserve in the final result.
Well, still learning to mix and master. I would prefer to just play the guitar but, I recognize that all this helps me to better understand the sound and to educate my ears, what at the end helps me in my performances.
Note: this entry was already publishe during January 2010 in my old Spanish version of this blog. I am sharing it here since I think it could be of interest.
If you already read my previous entry in this blog and, saw the video demoing the guitar Charvel SoCal Type 1, improvising over a free downloadable backing track based on Steve Vai's "For the Love of God", you could be interested on to know how it was made.
So, this entry is just a plain "Making Of" such a video and, contains information about Home Studio tools I've used for this particular video, focusing mainly in Pro Tools stuff.
I am currently using Pro Tools 8.0 LE as DAW, with a Digidesign Rack 003 as sound card and, I've got a single pre-amp: SPL Track One. Even that the Track One is more vocals-oriented, since in Pro Tools you cannot regulate the input volume (instead of that, you must change the output volume of your input source). the Track Pro gives me greater control over that input level.
I am hearing the output with a pair of near field monitors: Dynaudio BM5A but, usually, I cannot mix at a right loudness level (neighbors) so, most of the work I must do it using my headphones (Sony MDR-7509HD). As the headphones image differs a bit from the monitors one, I am using the plugin Redline Monitor for silent tasks, which works psychoacuostically to emulate a stereo image close to the one you can hear coming from your monitors. Even not being perfect, this plugin is of a great help.
During my first steps with this small Home Studio, I've realized that I wasn't able to get a right mix. When I made it to sound good across monitors, after trying it in a typical home audio set, the results were just horrible. That's when I've learnt about the convenience of having a right acousticall treated room but, after reaching the conclusion that I cannot do such a thing in my small room, I went for IK Multimedia's ARC System to get rid of most of issues and, yes, it helped me a lot.
Some other useful tools I'm often using are: RNDigital Inspector XL plugin (to monitorize several important aspects of the sound: correlation, loudness by frequency range, sound shape, peak frequencies, etc.) and, the TTL Dynamic Range Meter (that helps me to raise the mix loudness, at the end, while I am sure it's preserving a reasonable Dynamic Range).
After long tests, I went for Sonnox Elite pack and IK Multimedia stuff and, all those are the weapons I used for this video.
Making Of
Organizing the job
First thing I did was to recharge videocam batteries and to prepare the minimal tracks in Pro Tools to start working on this project. The idea was to record the full sesion with the videocam, telling the number of the take I was going to record everytime and, then, pushing the ProTools recording button for each take.
I've armed several guitar tracks. You know that, once you want to record, you go nervous and, start to make the most silly errors in the most simple parts so, to have a bunch of tracks ready is a good trick to save you a lot of work.
The Backing Track was inserted in one more track, without processing.
All guitar's takes tracks were send to a "guitar buss", to be able to insert there the amp emulation plugins, in a separate auxiliar track, common to all the takes, what saves lots of CPU consumption.
In next picture, you can see the final state of all mixing tracks.

But, the initial state was to have just the "backingtrack" track, several "guitar" tracks and, an auxiliary track named "guitar revalve".
The only active plugin was inserted in "Guitar Revalve" track and, it was an emulation of an Amplitube's amp, a Marshall 100W model, as you can see in the following image:

as stompbox, just an overdrive (emulation of a TS-9):

All guitar takes were recorded clean in a track named "Guitar #num" and, all them were sent to the auxiliary track "Guitar Revalved", where the amp emulation was. In that way, I was executing a single instance of such a plugin, releasing CPU resources and, additionaly, I would be able to swap the amp model at any time, later or, just fine tune the several parameters (tone stack, presence, etc.).
With that initial environment, I've started to record 4 different takes, one by one, in a row and, recording those simulteneusly in Pro Tools and the videocam, that got a wrong sound, since it was placed behind the montinors, but I was interested just on the image and a little sound to synchronize image and sound later.
Selecting the best take
Next step was to choose the best take. I've prepared a sheet with 4 rows (one by track) and, about 10 columns (corresponding to 10 song's parts). I've heard each track, valuating each part of the song separatelly and, giving a value between 1 and 5.
Once done, the track with higher score was the right one.
Suiting the guitar in the mix
Since the backingtrack had a good quality, all my job was concentrated into suit my guitar into such a mix, in the right 3D space, in a way that would look like it was part of such a backing track.
First I had to do is to tweak the amp's parameters, until I had a good sound and then, I've followed with the most basic task, to panoramize the guitar (I leaved it dialed to 24 right).
But, guitar' sound still needed of a greater help to suit the mix. Some frequencies were partially masking Guitar Bass and Drums so, I had to give some room for Bass and Drums frequencies, using some corrective EQ. I've choosed Sonnox Equalization plugin for this task.

First action was to remove frequencies under 30 Hz.
Since the Kick drum has its fundamental frequencies around 65 Hz, I've dipped guitar's frequency around there to give some room to the Kick drum.
Bass Guitar was peaking around 90 Hz so, I've dipped guitar's frequencies also around this center frequency, to give room to the Bass. Since Toms are sharing also near frequencies, those were instantanely enhanced, also.
Snare was well represented around 240 Hz so, I've dipped guitar frequency around this center one but, with not so dramatically and with a wide Q.
I've pushed frequencies around center frequency of 4 KHz, to give some presence to the guitar and, finally, I cutted off frequencies above 15 KHz.
After this job, guitar and rest of instruments were better individually indentified.
Next step was to use IK Multimedia's Fairchild 670 to give a bit of color and compression to the guitar. I don't like to compress too much the guitar's sound, I prefer to maintain a wide Dynamic Range and, I was more interested on to give that vintage touch that the Fairchild has.

Please, notice that I first did the corrective EQ, to remove unwanted frequencies and, then, the amp simulator to amplify wanted frequencies, followed by the compressor, to give some body to the sound and to raise the quietest parts.
After this, the guitar was sounding really nice but, too much "in your face" so, I needed to push back a bit the guitar, deeper in the mix' image and, adding some ambience.
I've sent the output of this track to one more auxiliary track, named "guitar reverb", with the only goal of adding some reverberation effect that helped to put the guitar some steps back in the image.

I've choosed Sonnox Reverb, since I like how it sounds and its interface is really smart and easy to use to exactly achieve what you are looking for. I've set up a reverberation of type Plate and, leaved the plugin output 100% wet.
I like to work the reverberatiion effect in a separate auxiliary track. The guitar track is mono, while the reverberation effect is stereo. Adjusting the volume of the reverb, I was able to put the guitar on the right depth in the mix.
"Masterizing"
Once I had an acceptable mix, it was the moment for the final touch.
Tracks named "backing track", "revalve" and "reverb" were routed to an stereo track named "Mix Bus", where I can adjust their individual loudness before sending all the mix to the "Master Bus".
I've prepared the Master Bus with those plugins I thought I would need for that final touch.
First plugin in the chain was the Sonnox Inflator:

The Inflator adds harmonical information to the program so, pysichoacoustically, it seems to make it louder, while isn't really altering the final volume. It also adds some kind of tube-like warm and, helps to "glue" the mix.
Next one in the chain was the Sonnox Dynamics:

I love to use this plugin mainly to give an overall gain to the mix. The presetting named Master1 is a nice starting point. I just added +3dB of gain, leaving the rest of work to the Limiter.
Next plugin was the IK Multimedia Pulteq EQP-1A:

Just an small touch of Pulteq can give some presence to the full mix and, helps to recover some of the lost ambience (after using the compressor). I like this effect practically always in my master chain (and even in some instrument track). Is one of those pluging with some magic, if you don't overdo it. It helps also to give some kick to Bass Guitar and Kick drum, with a result that sounds always warm and musical.
Finaly, last plugin was the Sonnox Limiter, to push the loudness of the mix up to reasonable levels without loosing excesive Dynamics.

During the masterizing process, the TT Dynamic Range plugin was always active:

Which I use in several ways:
First, the dynamic meters allow me to use the controls of dynamics plugins, raising the volume of the track, without loosing more dynamic range than wanted. The Dyanmic Range (Peak RMS minus Average RMS) it's being updated in real time so, it's quite easy to see how every change in dynamics plugins affects to the dynamic range.
Second, the button named Mono allows me to check if there is some comb filter effect, that can maks the mix when heard in mono mode. Usually, you can get rid of this issue just narrowing the panoramo of certain tracks, specially those with effects based on time (reberbs, delays, etc.).
The Original backing track had a Dynamic Range of 9dB, a bit compressed but, good for a Rock song with nice kick and, that was the range I tried to preserve in the final result.
Well, still learning to mix and master. I would prefer to just play the guitar but, I recognize that all this helps me to better understand the sound and to educate my ears, what at the end helps me in my performances.
Subscribe to:
Posts (Atom)