Note: this entry was already publishe during January 2010 in my old Spanish version of this blog. I am sharing it here since I think it could be of interest.
If you already read my previous entry in this blog and, saw the video demoing the guitar Charvel SoCal Type 1, improvising over a free downloadable backing track based on Steve Vai's "For the Love of God", you could be interested on to know how it was made.
So, this entry is just a plain "Making Of" such a video and, contains information about Home Studio tools I've used for this particular video, focusing mainly in Pro Tools stuff.
I am currently using Pro Tools 8.0 LE as DAW, with a Digidesign Rack 003 as sound card and, I've got a single pre-amp: SPL Track One. Even that the Track One is more vocals-oriented, since in Pro Tools you cannot regulate the input volume (instead of that, you must change the output volume of your input source). the Track Pro gives me greater control over that input level.
I am hearing the output with a pair of near field monitors: Dynaudio BM5A but, usually, I cannot mix at a right loudness level (neighbors) so, most of the work I must do it using my headphones (Sony MDR-7509HD). As the headphones image differs a bit from the monitors one, I am using the plugin Redline Monitor for silent tasks, which works psychoacuostically to emulate a stereo image close to the one you can hear coming from your monitors. Even not being perfect, this plugin is of a great help.
During my first steps with this small Home Studio, I've realized that I wasn't able to get a right mix. When I made it to sound good across monitors, after trying it in a typical home audio set, the results were just horrible. That's when I've learnt about the convenience of having a right acousticall treated room but, after reaching the conclusion that I cannot do such a thing in my small room, I went for IK Multimedia's ARC System to get rid of most of issues and, yes, it helped me a lot.
Some other useful tools I'm often using are: RNDigital Inspector XL plugin (to monitorize several important aspects of the sound: correlation, loudness by frequency range, sound shape, peak frequencies, etc.) and, the TTL Dynamic Range Meter (that helps me to raise the mix loudness, at the end, while I am sure it's preserving a reasonable Dynamic Range).
After long tests, I went for Sonnox Elite pack and IK Multimedia stuff and, all those are the weapons I used for this video.
Making Of
Organizing the job
First thing I did was to recharge videocam batteries and to prepare the minimal tracks in Pro Tools to start working on this project. The idea was to record the full sesion with the videocam, telling the number of the take I was going to record everytime and, then, pushing the ProTools recording button for each take.
I've armed several guitar tracks. You know that, once you want to record, you go nervous and, start to make the most silly errors in the most simple parts so, to have a bunch of tracks ready is a good trick to save you a lot of work.
The Backing Track was inserted in one more track, without processing.
All guitar's takes tracks were send to a "guitar buss", to be able to insert there the amp emulation plugins, in a separate auxiliar track, common to all the takes, what saves lots of CPU consumption.
In next picture, you can see the final state of all mixing tracks.
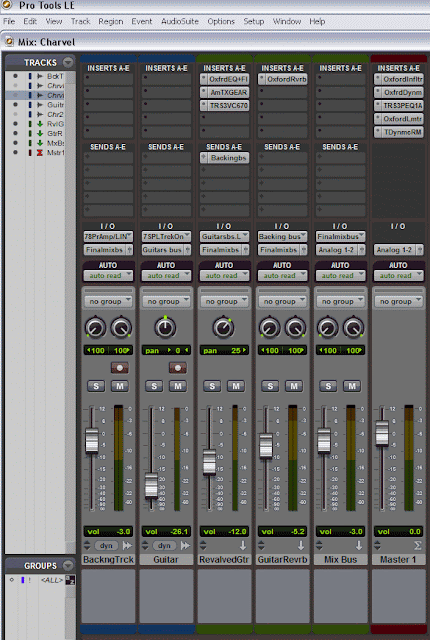
But, the initial state was to have just the "backingtrack" track, several "guitar" tracks and, an auxiliary track named "guitar revalve".
The only active plugin was inserted in "Guitar Revalve" track and, it was an emulation of an Amplitube's amp, a Marshall 100W model, as you can see in the following image:
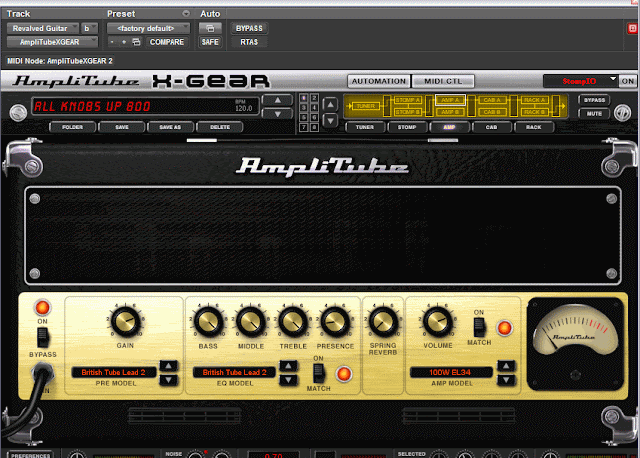
as stompbox, just an overdrive (emulation of a TS-9):
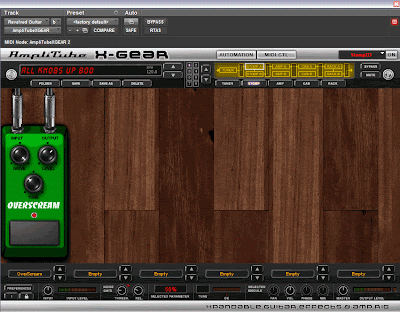
All guitar takes were recorded clean in a track named "Guitar #num" and, all them were sent to the auxiliary track "Guitar Revalved", where the amp emulation was. In that way, I was executing a single instance of such a plugin, releasing CPU resources and, additionaly, I would be able to swap the amp model at any time, later or, just fine tune the several parameters (tone stack, presence, etc.).
With that initial environment, I've started to record 4 different takes, one by one, in a row and, recording those simulteneusly in Pro Tools and the videocam, that got a wrong sound, since it was placed behind the montinors, but I was interested just on the image and a little sound to synchronize image and sound later.
Selecting the best take
Next step was to choose the best take. I've prepared a sheet with 4 rows (one by track) and, about 10 columns (corresponding to 10 song's parts). I've heard each track, valuating each part of the song separatelly and, giving a value between 1 and 5.
Once done, the track with higher score was the right one.
Suiting the guitar in the mix
Since the backingtrack had a good quality, all my job was concentrated into suit my guitar into such a mix, in the right 3D space, in a way that would look like it was part of such a backing track.
First I had to do is to tweak the amp's parameters, until I had a good sound and then, I've followed with the most basic task, to panoramize the guitar (I leaved it dialed to 24 right).
But, guitar' sound still needed of a greater help to suit the mix. Some frequencies were partially masking Guitar Bass and Drums so, I had to give some room for Bass and Drums frequencies, using some corrective EQ. I've choosed Sonnox Equalization plugin for this task.
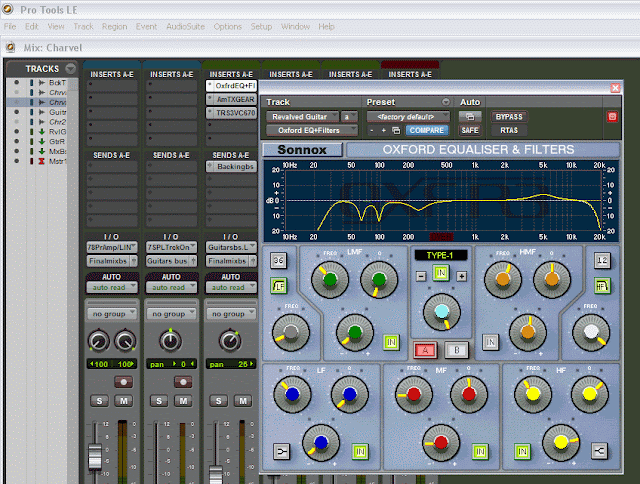
First action was to remove frequencies under 30 Hz.
Since the Kick drum has its fundamental frequencies around 65 Hz, I've dipped guitar's frequency around there to give some room to the Kick drum.
Bass Guitar was peaking around 90 Hz so, I've dipped guitar's frequencies also around this center frequency, to give room to the Bass. Since Toms are sharing also near frequencies, those were instantanely enhanced, also.
Snare was well represented around 240 Hz so, I've dipped guitar frequency around this center one but, with not so dramatically and with a wide Q.
I've pushed frequencies around center frequency of 4 KHz, to give some presence to the guitar and, finally, I cutted off frequencies above 15 KHz.
After this job, guitar and rest of instruments were better individually indentified.
Next step was to use IK Multimedia's Fairchild 670 to give a bit of color and compression to the guitar. I don't like to compress too much the guitar's sound, I prefer to maintain a wide Dynamic Range and, I was more interested on to give that vintage touch that the Fairchild has.
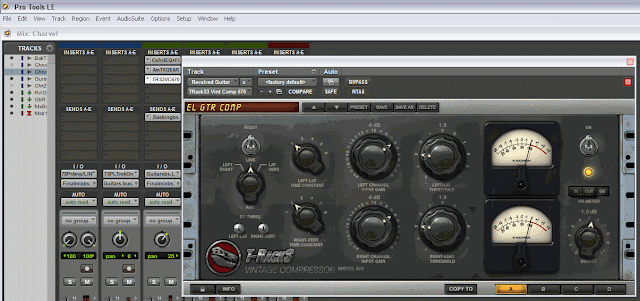
Please, notice that I first did the corrective EQ, to remove unwanted frequencies and, then, the amp simulator to amplify wanted frequencies, followed by the compressor, to give some body to the sound and to raise the quietest parts.
After this, the guitar was sounding really nice but, too much "in your face" so, I needed to push back a bit the guitar, deeper in the mix' image and, adding some ambience.
I've sent the output of this track to one more auxiliary track, named "guitar reverb", with the only goal of adding some reverberation effect that helped to put the guitar some steps back in the image.
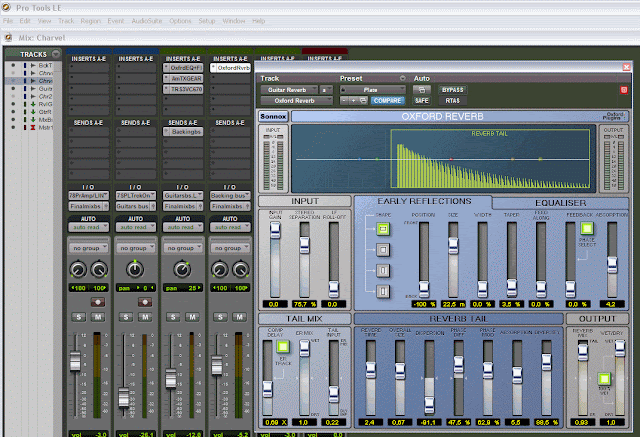
I've choosed Sonnox Reverb, since I like how it sounds and its interface is really smart and easy to use to exactly achieve what you are looking for. I've set up a reverberation of type Plate and, leaved the plugin output 100% wet.
I like to work the reverberatiion effect in a separate auxiliary track. The guitar track is mono, while the reverberation effect is stereo. Adjusting the volume of the reverb, I was able to put the guitar on the right depth in the mix.
"Masterizing"
Once I had an acceptable mix, it was the moment for the final touch.
Tracks named "backing track", "revalve" and "reverb" were routed to an stereo track named "Mix Bus", where I can adjust their individual loudness before sending all the mix to the "Master Bus".
I've prepared the Master Bus with those plugins I thought I would need for that final touch.
First plugin in the chain was the Sonnox Inflator:
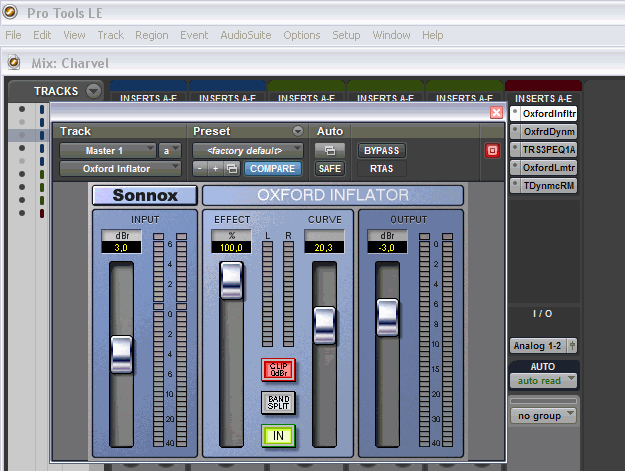
The Inflator adds harmonical information to the program so, pysichoacoustically, it seems to make it louder, while isn't really altering the final volume. It also adds some kind of tube-like warm and, helps to "glue" the mix.
Next one in the chain was the Sonnox Dynamics:
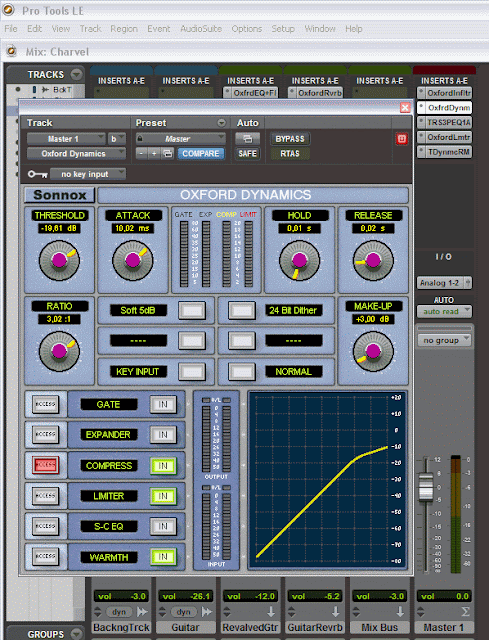
I love to use this plugin mainly to give an overall gain to the mix. The presetting named Master1 is a nice starting point. I just added +3dB of gain, leaving the rest of work to the Limiter.
Next plugin was the IK Multimedia Pulteq EQP-1A:
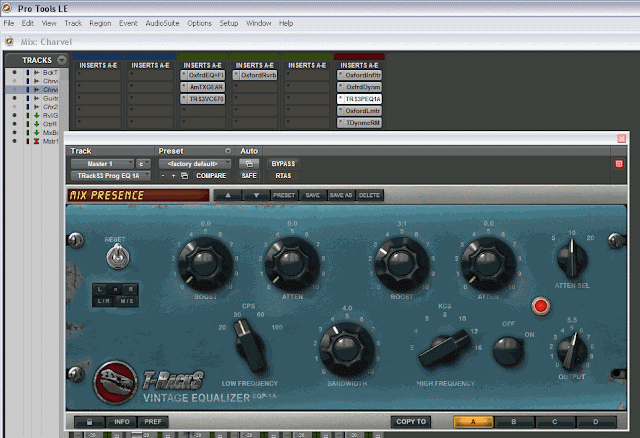
Just an small touch of Pulteq can give some presence to the full mix and, helps to recover some of the lost ambience (after using the compressor). I like this effect practically always in my master chain (and even in some instrument track). Is one of those pluging with some magic, if you don't overdo it. It helps also to give some kick to Bass Guitar and Kick drum, with a result that sounds always warm and musical.
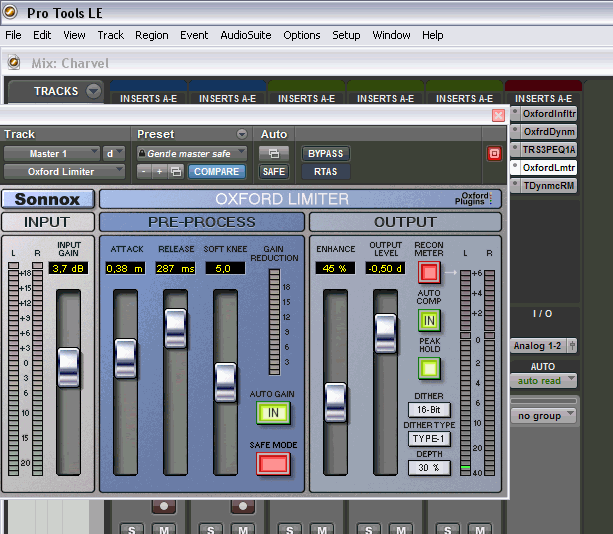
Finaly, last plugin was the Sonnox Limiter, to push the loudness of the mix up to reasonable levels without loosing excesive Dynamics.
During the masterizing process, the TT Dynamic Range plugin was always active:
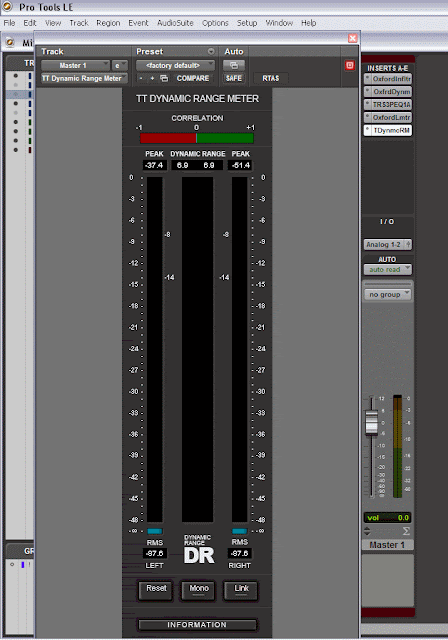
Which I use in several ways:
First, the dynamic meters allow me to use the controls of dynamics plugins, raising the volume of the track, without loosing more dynamic range than wanted. The Dyanmic Range (Peak RMS minus Average RMS) it's being updated in real time so, it's quite easy to see how every change in dynamics plugins affects to the dynamic range.
Second, the button named Mono allows me to check if there is some comb filter effect, that can maks the mix when heard in mono mode. Usually, you can get rid of this issue just narrowing the panoramo of certain tracks, specially those with effects based on time (reberbs, delays, etc.).
The Original backing track had a Dynamic Range of 9dB, a bit compressed but, good for a Rock song with nice kick and, that was the range I tried to preserve in the final result.
Well, still learning to mix and master. I would prefer to just play the guitar but, I recognize that all this helps me to better understand the sound and to educate my ears, what at the end helps me in my performances.

No comments:
Post a Comment
Please, feel free to add your comments.