Introduction
There are a lot of new things that I wanted to share with you all but, I'm not having personal free time enough lately. I really wanted to go for an individual pedal by pedal complete review but, I'm running out of time lately so, I had some time to do an overall review of my current rig, which includes all the new incomes.
In that way, instead on focus on every little detail related to every pedal, I can describe why I've choose these and, what I am trying to achieve with the complete rig.
After a bunch of years chasing my tone, I think I've reached the end of the search, with a very satisfactory gear. Unfortunately, there is only one true in Audio: you got what you paid. Audio is expensive as hell but, most of time I regret of spending lot of little money in cheap pedals that never satisfied me. But, even going for the expensive stuff, it's really difficult to get what you really need and, what you need depends only on your own.
The gear I'm introducing here was selected to suit my personal needs. If you have similar needs, this can be a good opportunity to plan your next acquisitions. If you don't have similar needs, to know how each pedal sounds can help you to definitively discard them.
Amp
The amp is a Fender '59 Bassman LTD. I've substituted the stock GT tubes with a set of tubes from Watford Valves, which I find that sound better.
Current production Jensen' speakers lack the magic that original ones had. I am always finding that new Jensen sound really nice alone but, they are lost in the mix, as soon as you play in a band context or with backing tracks.
I wanted to swap the four P10R speakers with four Celestion Gold but, unfortunately, the amp's chassis perfectly fits the carved rectangular shape of the Jensen's cone and, therefore, the round cone of the Celestions doesn't work there. So, I finally ended with a couple of Celestion Gold at the bottom of the cab and, a pair of P10R above.
After trying several amps, of any kind, what I've decided is to go for an amp with exceptional cleans that can take any pedal with ease and that don't mask my guitar's foundational tone.
The Bassman has some magic in its simplicity. Remember that the first Marshall (JMP 45) was based in a Bassman and, that both are mythical because of their tone.
The Bassman gives me one of the best Fender's clean tones and, it's so kind that takes any pedal with ease. This makes it a good platform to build any wanted sound with the help of some pedals.
But, it's an amp that needs some time to get what you wanted.
The normal channel is somewhat fat and a bit blurred, while the Bright channel is excesivelly bright.
I'm using it with both channels linked and, with the volume of bright channel more or less at 3, and the normal channel more or less at 1.
After tweaking a lot its controls, I find that the control that better definition gives to the sound is the Presence control so, I am setting it barelly to max.
For a balanced tone, tone controls (middle, treble and bass) work better for me around 7.
It took me a long while until I went to this recipe!.
Each amp has its sweet spots and, I find the Bassman is perfect with these settings.
Guitar
I've already introduced my new number 1 in previous entries.
My preferred guitar, now, it's my make-to-order custom Southern Belle Guitars Strato.
I've ordered the guitar to satisfy my requirements. I wanted the sound of a pure Strato but, with all the little details that can improve the original model and, it worthed the money!.
If you want to know more about it, just read the previous entry in this blog.
Cables and Patch Cords
I've already discussed about this in previous entries but, not a bad idea to remember it.
I'm using Eminence Audio' stuff, only.
Sound quality is top notch and, they have a for-life-warranty. That means that if your cable breaks, they send to you a brand new cable. So you expend the money just once. And, it works like this (it happened to me)!!!.
For guitar-to-pedalboard or pedalboard-to-amp, I'm using their The Forte MKII.
For Patch cords, I'm using their Monorail, with SIS plugs (very easy to make your own cords!).
Pedalboard
The pedalboard has evolved year by year. I think what I've got right now is the best combination I've ever had and, perfectly combines with my preferred guitar and amp.
Tuner - Peterson Classic Stomp
Not too much to say about the tuner. It's just the most accurated and, it has the possibility to use it as a DI box for Studio Recording.
Wah - Roger Mayer Vision Wah
Not my preferred Wah. I find its rocker's range as a bit short to my taste.
Soundwise, it's a great sounding wah and, highly tweakable.
You can select between 16 different wah voices, you can fine-tune the Q-Filter for each one and, you even have a booster or gain control.
But, what I really like about this wah is that is really quiet, compared to most of Wahs, which tend to introduce floor noise and which tend to introduce unwanted feedback. The RM's is one of the quietests of the market.
Vibe - Dry Bell Machine
My preferred all-the-times Vibe.
It has every original feature and, the original sound and, it goes beyond the original.
It's one of the best vibe sounds of the market and, it offers something that no others offer: a very friendly pedalboard size (except the Lovepedal Pickle Vibe, which doesn't sound as good).
It's easy to control, nice sounding and small enough.
This is a keeper for life.
Buffer / Enhancer - Klon KTR
Well, you know. There is so much hype with the Klon Centaur that, I had to check a Klon pedal.
Honestly, the prices of Centaurs are ridiculous high and, I cannot pay such a money for a single pedal.
But, Ok, I went to the web of his creator and, read about the KTR. According to his creator, he spent lot of years trying massive production components to achieve the same sound with the KTR as the original Centaur units.
Well, I cannot talk about this, because I hadn't the oportunity to check the three pedals in a row so, I can only opine about what the KTR does and, how it fits my needs.
I don't like the KTR used as an Overdrive. Reason is that it introduces a very fat distortion grain, somewhat confussing and compressed, at least with middle amp's volume. Maybe it can make wonderful things with the amp really kranked but, I don't like that way.
In the other side, with the gain at 0, it's an awesome buffer and, helps you to round the sound, making it nicer but, without affecting your instrument's foundational tone.
It remembers me the combination of a Xotic EP Booster and a buffer or, the Wampler's Decibel+.
But, differently to both, the KTR has a tone control that helps to remove excesive highs and, to better round the final result. Used this way, I complete love this pedal and, it's on all the way, being part of my clean foundational tone.
The KTR has a switchable output buffer, which honestly works better switched on. This helps to feed the rest of the chain.
Compressor - Bogner Harlow
This pedal will be loaded out of my pedalboard. It's a mix of overdrive and compressor but, the bad side of all this is that you cannot control each effect separately, which is a mess.
As you add compression with the Bloom control, you are also adding what they called 'grit' but, if you go beyond 12 o'clock in the bloom control, the pedal introduces a very dirty, fat grain distortion that I don't like. Maybe, as in the case of the KTR, this could sound awesome in a really kranked amp but, it doesn't work fine in my case.
I'm planning to load in back the Wampler's EGO, which is an awesome compressor.
Overdrive 1 - Lovepedal Kalamazoo
I wanted to thank you to Rafa, by Auvisa, to introduce me to this pedal.
It's an awesome overdrive, super-versatile.
I think this pedal is on the line of the kind of pedals introduced by Mad Professor, with his Sweet Honey Overdrive. So, this is a warm pedal, with a very bluesy core.
Appart of Gain and Volume, if you play with Tone and Glass controls, you can achieve a wide range of overdrive tones.
It can go really dark and compressed, remembering me most of the Dumble-alike pedals (as the Hermida Audio Zendrive or Weehbo Dumbledore) or, it can go very clean Tweed, as most of Bassman-alike pedals (Wamplers '59 Tweed, etc).
Some people says that it can nails the better tones of a Centaur.
I don't think so, honestly, because what I like from the KTR is the clean tone and, what I love from the Kalamazoo is just the dirty tone.
The pedal alone is gorgeous sounding but, stacked into the Bogner Wessex is pure Hard Rock Heaven.
Overdrive 2 - Bogner Wessex
If the Kalamazoo is needed for bluesy old-school tones, the Wessex is needed for old-school crunchy tones. It's a very marshallish pedal, very crunchy.
The Kalamazoo into the Wessex produces an incredible nice old-school Hard Rock tone that I love.
The Wessex into the Bogner Burnley creates a Marshallish wall of sound, real hi gain tone.
Alone, has its own use but, I love it combined more combined with other pedals.
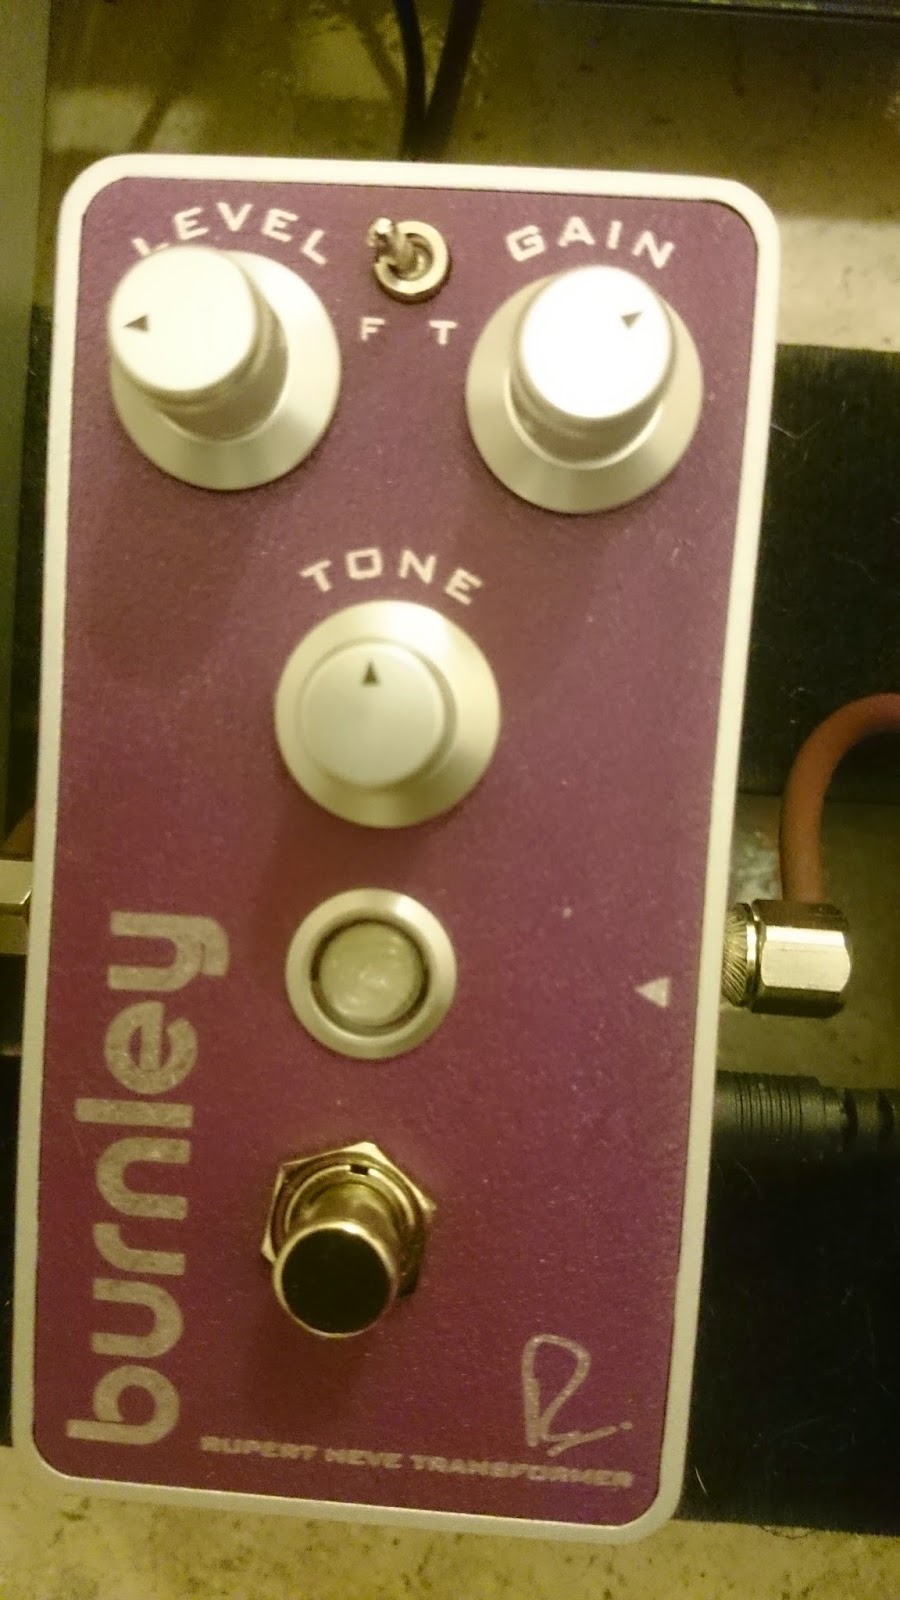
Hi Gain - Bogner Burnley
It's similar to the Shur Riot in any single sense, even the color but, the Burnley has a more refinated sound to my taste, with a very musical feedback, specially when pushed by some other pedal behind it.
As I've explained in other entries, Bogner's pedals have an OT designed by Neve, which make a great difference in sound and feel. They realy feel like an amp, in the way that the sound manifestates itself.
I've tested really good pedals, as the Wampler's, Mesa Boogie's or the Weehbo's and, all them were sounding awesome, until I've heard and played the Bogner's. End of story.
Volume Pedal - Boss
Well, to be honest, I even don't remember the exact model. It's just a passive volume control pedal.
I'm using it after the gain section to control the overall loudness, once the original sound was already processed by the gain pedals.
I want it to match the loudness to the backing tracks o to the particular sound I'm working at a time.
Of course, it can be used for sweelings but, not my case.
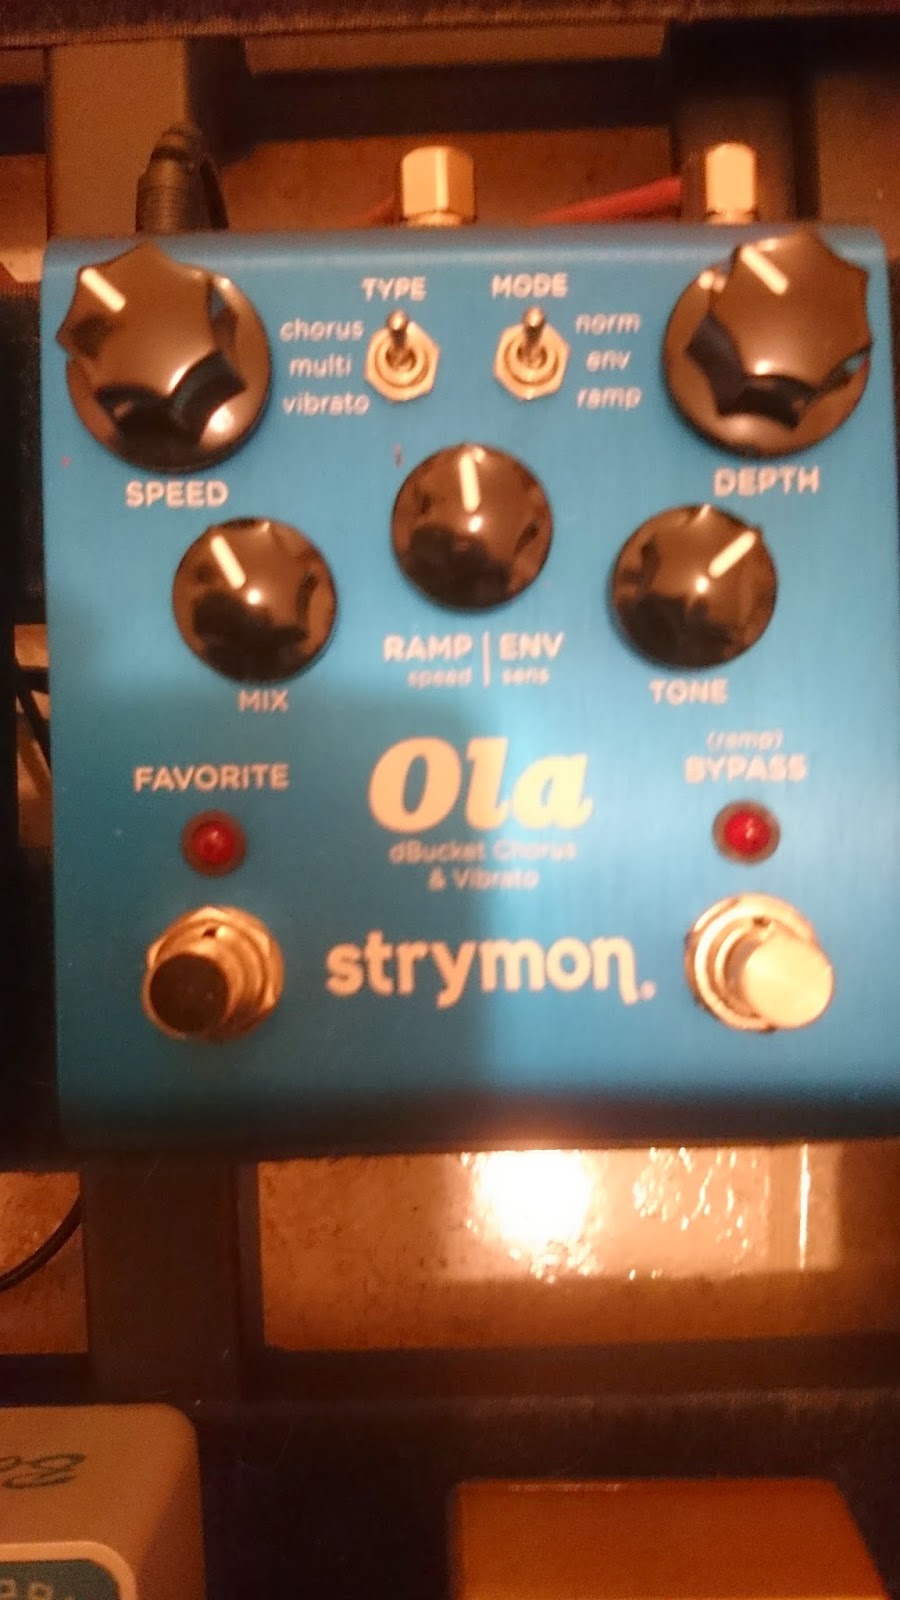
Chorus - Strymon Ola
I really need a Chorus in very few songs. The Strymon has a studio quality in all their pedals and, this one isn't different. I'm using a fixed chorus mode, very wide and clean sounding. Nothing special, but really nice.
Reverb - Strymon Bluesky
There are a couple of my amps that doesn't have a built reverb effect and, unfortunatelly, the Bassman is one of them.
I'm running the typical Springs Reverb mode in the Bluesky and, it helps me (together with the delay) to put my guitar in the right depth of the mix.
Delay - Strymon El Capistan
A great sounding Tape Echo pedal. I'm using just a fixed setting and, together with the Strymon Bluesky, its used to put my sound in the right depth of the mix.
The Bluesky, the El Capistan and the KTR are part of my foundational clean sound.
I'm sculpting the rest of sounds over those three pedals, which are active all the time.
Video
This video has two parts.
The first part, I'm talking about my rig and sharing with you same comments you can read above so, you can skip that part, in any case.
Second part, I'm demoing the sounds of the rig, in clean and then, by adding some other pedals. Probably, the most interesting part for you, if you've read what I write above.

Everything about electric guitars world
06 June 2015

17 March 2015
My custom Southern Belle Guitars' Strato is here!
Introduction
One day many months ago, I was viewing some demo video about a new set of pickups that David Allen was releasing. Such pickups were mounted in a guitar that sounded really killer. It was a Southern Belle Guitars' Cabronita (Tele).
Just discussing about it with David, He said me that those guitars were fantastic and, that He wanted to buy a couple for his store and, asked me I was interested on having a guitar from them. Well, some days after, He introduced me to Morgan Mitcham, who runs Southern Belle Guitars. I justed wanted to know if She could make some kind of hot rodded Strato to my specifications and, since She had no issues, we had an agreement.
If it's difficult to see a woman playing electric guitars, it's even more difficult to know a woman that works building guitars !!!. That made the decision even more interesting to me.
4 or 5 months since I've ordered Her, 1 more month in Customs clearing and, half month for the final setup. Was a looooong waiting time and, when her finally came home I had a mix of feelings: exciting because her was here and, worried... would her sound that good?, worthed her the time and money?. I made some risky decision, would her be comfortable?.
My specifications
I wanted the following:
What I wanted is to preserve the good things of a Fender Deluxe Strato and, to fix the things that I don't like so much.
By example, the soft-V neck provides just the right amount of extra wood, compared to a modern C-shaped neck, to add body and resonance to the instrument.
The beveling of the neck pocket of the Deluxe is of help but, not enough to my taste.
I don't like the LRS nut, because I find it as adding to much hi end, and giving a very metallic touch to the sound.
I don't like the micro-tilt system, because it creates a dumb area around frets 14-17 and, strings 2 to 5, that kill the sustain of the notes. The carved area and that metallic mechanism kills the overall sustain and, very specially affects to mentioned frets.
I find that a good bone nut makes the attack more snappy, something I like.
Maybe the color cannot be a key decision respect of sound, but I never liked any of the colors that Fender released for Deluxe Stratos and, I particularly love that Cherry Burst.
David Allen was going to provide a set of Furys (think on Robin Thrower) for this axe but, maybe we didn't clarified this point to Morgan so, the axe came with a set of Dovers (which are one of the best sets of DA Pickups).
Opening the box
 The guitar came with neck and body separated. This is an overall look of the neck and fretboard. The fretwork was perfect (well leveled, sanded and crowned). The touch of the satinated nitro was really good, as suggested by Morgan.
 A detail of the nut and peghead. Morgan decide to make the nut of Tusq, since She considers that Stratos sound better with such a material. I still want to check the sound with a bone nut. Maybe, I will come back to tusq, who knows it!.
 And, this is an overall view of the body. That Cherry Burst looked killer, among the rest of components.

And, here a detail of the special shape of the neck pocket and area around, which allows a better access to low frets.
Testing sound and feeling
The guitar plays like a dream and, the sound is perfect. Her has a nice resonance, body and sustain and, bell-like sounds that are a pleasure. Compared with an Eric Johnson model I've tested in a Store, is maybe 3 steps over and, compared to the moded Deluxes I and my friend own, is a couple of steps over.
One of the things that firstly called my attention was her weight. She is surprisingly lighter than any other Strato I've ever tested. Maybe the wood has more open cells, I dunno.
Since I was experimenting D'Addario NYXL1046 strings for a couple of months in my Deluxe, and loved the results, that's the set of strings I've mounted in this axe, as well. I find this NY series as having more tuning stability and, third and second strings seem more consistently sounding.
I wanted that my fellow friend Robert Tirado make the demo of this axe, because this man has a magical touch that can get everything from an axe and, this axe owe it. I was just hearing the guitar, which is a more objective way of analyzing the sound.
My other fellow friend, Alex Tirado, brother of the former one, was the luthier doing the final setup, before the demo / test. I wanted to make the test with my regular gig.
Robert went first demoing the typical five strato positions, from neck to bridge, in clean.
After we heard really excited all the bells, we wanted to see if the guitar was able to aggressively roar and, we tested it with a high gain configuration. Total craziness!. The sound was hitting hard our guts and, there was a really nice feedback effect; not uncontrolled whistles but, a really nice feedback effect.
Finally, Robert improvised over some backing tracks. The video has just two of the many that were played that day.
After I was fully satisfied with what I've heard, it was my time but, nothing was recorded then. This will be my #1 from now so, any new video will be made with this axe (if a Strato is involved).
This is the video...
And the Gear...
The amp is a Fender '59 Bassman LTD, with a retrofitting set from Watford Valves, that includes a couple of NOS JAN/Philips 6L6 (well, in fact, they are 5881) tubes. The two lower stock Jensen P10R speakers where swapped with a couple of Celestion Gold. Here you are the settings:




One day many months ago, I was viewing some demo video about a new set of pickups that David Allen was releasing. Such pickups were mounted in a guitar that sounded really killer. It was a Southern Belle Guitars' Cabronita (Tele).
Just discussing about it with David, He said me that those guitars were fantastic and, that He wanted to buy a couple for his store and, asked me I was interested on having a guitar from them. Well, some days after, He introduced me to Morgan Mitcham, who runs Southern Belle Guitars. I justed wanted to know if She could make some kind of hot rodded Strato to my specifications and, since She had no issues, we had an agreement.
If it's difficult to see a woman playing electric guitars, it's even more difficult to know a woman that works building guitars !!!. That made the decision even more interesting to me.
4 or 5 months since I've ordered Her, 1 more month in Customs clearing and, half month for the final setup. Was a looooong waiting time and, when her finally came home I had a mix of feelings: exciting because her was here and, worried... would her sound that good?, worthed her the time and money?. I made some risky decision, would her be comfortable?.
My specifications
I wanted the following:
- Mapple neck and fretboard
- Compound radius (9.5" - 14")
- Soft-V neck profile
- Strato body with a beveled neck pocket, for easier access to lower frets
- Cherry Burst color
- Perloid pickguard
- Black knobs and pickup covers
- Staggered locking tuning keys, Schaller, preferently (as the Fender Deluxe Strato)
- Fender Deluxe floating bridge or alike (Ultra Strat bridge).
- My own wiring design, with an S-1 switch/pot
- Bone nut
- Absolutely not micro-tilt system
- Preserve the purest strato sound, choosing the woods
Morgan guided me about the finishing (satinated nitro) and, presented several options, during our agreements.
What I wanted is to preserve the good things of a Fender Deluxe Strato and, to fix the things that I don't like so much.
By example, the soft-V neck provides just the right amount of extra wood, compared to a modern C-shaped neck, to add body and resonance to the instrument.
The beveling of the neck pocket of the Deluxe is of help but, not enough to my taste.
I don't like the LRS nut, because I find it as adding to much hi end, and giving a very metallic touch to the sound.
I don't like the micro-tilt system, because it creates a dumb area around frets 14-17 and, strings 2 to 5, that kill the sustain of the notes. The carved area and that metallic mechanism kills the overall sustain and, very specially affects to mentioned frets.
I find that a good bone nut makes the attack more snappy, something I like.
Maybe the color cannot be a key decision respect of sound, but I never liked any of the colors that Fender released for Deluxe Stratos and, I particularly love that Cherry Burst.
David Allen was going to provide a set of Furys (think on Robin Thrower) for this axe but, maybe we didn't clarified this point to Morgan so, the axe came with a set of Dovers (which are one of the best sets of DA Pickups).
Opening the box
The guitar came with neck and body separated. This is an overall look of the neck and fretboard. The fretwork was perfect (well leveled, sanded and crowned). The touch of the satinated nitro was really good, as suggested by Morgan.And, here a detail of the special shape of the neck pocket and area around, which allows a better access to low frets.
Testing sound and feeling
The guitar plays like a dream and, the sound is perfect. Her has a nice resonance, body and sustain and, bell-like sounds that are a pleasure. Compared with an Eric Johnson model I've tested in a Store, is maybe 3 steps over and, compared to the moded Deluxes I and my friend own, is a couple of steps over.
One of the things that firstly called my attention was her weight. She is surprisingly lighter than any other Strato I've ever tested. Maybe the wood has more open cells, I dunno.
Since I was experimenting D'Addario NYXL1046 strings for a couple of months in my Deluxe, and loved the results, that's the set of strings I've mounted in this axe, as well. I find this NY series as having more tuning stability and, third and second strings seem more consistently sounding.
I wanted that my fellow friend Robert Tirado make the demo of this axe, because this man has a magical touch that can get everything from an axe and, this axe owe it. I was just hearing the guitar, which is a more objective way of analyzing the sound.
My other fellow friend, Alex Tirado, brother of the former one, was the luthier doing the final setup, before the demo / test. I wanted to make the test with my regular gig.
Robert went first demoing the typical five strato positions, from neck to bridge, in clean.
After we heard really excited all the bells, we wanted to see if the guitar was able to aggressively roar and, we tested it with a high gain configuration. Total craziness!. The sound was hitting hard our guts and, there was a really nice feedback effect; not uncontrolled whistles but, a really nice feedback effect.
Finally, Robert improvised over some backing tracks. The video has just two of the many that were played that day.
After I was fully satisfied with what I've heard, it was my time but, nothing was recorded then. This will be my #1 from now so, any new video will be made with this axe (if a Strato is involved).
This is the video...
And the Gear...
The amp is a Fender '59 Bassman LTD, with a retrofitting set from Watford Valves, that includes a couple of NOS JAN/Philips 6L6 (well, in fact, they are 5881) tubes. The two lower stock Jensen P10R speakers where swapped with a couple of Celestion Gold. Here you are the settings:
And, here an overall view of the pedalboard:
The gain section is absolutely new. The three Bogner's and the Lovepedal Kalamazoo make a killer combination. I will probably swap the position of the Kalamazoo with the Harlow but, alone or combined these pedals rock hard !.
And here, the settings for each individual pedal, so you don't need to ask.
03 March 2015
Bogner Wessex - First impressions
Introduction
Not so long before, Bogner released three pedals (Ecstasy Blue, Red and Uberschall) that had a good acceptance by musical world. Those three were designed to cover mythical Bogner amps' tones and, they deliver such tones really nicely.
Now, Bogner seems interested into create a line of pedals that don't try to mime Bogner amps' tones. The aim of these new pedals is to interactuate with your amp and, provide virtual "channels" but, respecting the soul of your amp.
This new line has something really interesting. Each pedal works with an audio transformer designed by the studio guru Rupert Neve. In studio's outboard devices and, in amps, transformers are a key part of the sound and, the finest audio devices have very carefully designed ones.
The only pedal that I personally remember having a transformer is the Butler Audio Tube Driver. It's a toroidal transformer, maybe, needed because of the 12AU7 tube that drives the tone. Maybe, other tube-based drive pedals have one, I dunno.
The fact is that the new line of Bogner pedals catch my attention a lot more than their Ecstasy line. This line of Bogner-Neve pedals had the Harlow (a booster with some compression available), the Oxford (Flexdrive, whatever it means), the Wessex (Overdrive) and the Burnley (Distortion).
It seems that the Oxford finally dropped out of the series.
I was accidentally in a musical store (Auvisa) and, tried the Wessex (the only one they had there). Well, the pedal finally came with me to home!.
Presentation

Everything in this pedal, from the box to the pedal itself is classy. The pedal is built like a tank but, with a very clean and cute design (case, knobs, everything). There are versions of this pedals with the top of the case in bubinga wood. Not mine.
Knobs are: Level, Gain, Treble and Bass and, there is a two positions switch that changes the circuit behavior from Normal (N) to Enhanced (E) modes.
Components are first class. You just need to read the tech specs to understand that every component was carefully choose to achieve the tone Bogner had in mind.
Everything smells quality and, it's probably one of the best made pedals I've owned or seen.
Sound
It's a very transparent overdrive, in the sense that every string is clearly heard, even with complex inharmonic chords.
The voice is crunchy, uncompressed, clear and defined. But, it respects the soul of your amp and guitar, anyway.
Tone controls have a wide range and, allow you to fine tune your sound.
The gain range is surprisingly short, specially in Normal mode (the most transparent EQ). If you are after an overdrive with a good amount of gain, this is not your pedal. In every sense, it remembers me the Xotic BB pedal but, with a better sound. The amount of gain is similar and, the voice of the pedal is alike, very crunchy (but, one of the best crunches I've heard).
The Enhanced mode adds some low and high end to your sound and, provides a bit more of gain.
Use
I see it to be used to put tubes on their sweet spot and, it covers very well light overdrive tones. Provides a nice 'crunch' virtual channel and, it's very suitable for Rock & Roll songs.
It can be used to feed other gain pedals also, but, it hasn't gain enough itself for dirty lead tones.
Imagine a Wampler Euphoria on its crunch mode or, a Xotic BB and, you are in the ballpark, respect of overall sound and gain levels but, the Wessex has its own sound and, I liked it more than the former ones. I'm just missing a pinch more of gain, maybe.
I'm waiting three more pedals that I would like to test combined with the Wessex: Lovepedal Kalamazoo, Bogner Harlow and Bogner Burnley. Will do some video with them, after I find the best combinations of all them.
A bit more about the Neve transformer
It seems that the transformer designed by Rupert Neve is used in the same way an Output Transformed is used in every amp, to deliver the final sound to the speakers.
If you are familiar with amp's OTs, you already know that transformers are a key piece for that final sound and feeling of the amp and, every great amp designer takes very seriously the OT.
Swapping the transformer can be a great enhancement. You will know a lot of people going for Mercury transformers to upgrade their Marshall amps, by example.
Probably, it shouldn't be part of the tone, according to pure electrical magnitudes but, the truth is that they are part of the tone of an amp.
Exactly the same occurs with studio gear, where the magic of Rupert Neve (among a very short group of gurus) is worldwide acclaimed.
It seems that Neve's design was oriented to provide nice musical harmonics on high and low ends.
The Enhanced mode of the Wessex is clearly different from the Natural mode. In the former one, the harmonical content is specially rich in the high end range of frequencies and, the sound is, overall, beautifuler and, cuts the mix with a better attitude. It remembers me as the magic that happens when you switch on the Xotic EP Booster, everything seems to be the same but, the sound is just better, without understanding what goes in the background.
I think Butler Audio, in his Tube Driver, is using that toroidal transformer as an Input Transformer, instead of an Output Transformer, because the pedal is being directly plugged to your wall socket.
If that's true then, Bogner's pedals with designed by Neve OT pedals are unique in pedal effects world. No one, before Bogner, used that approach.
Youtube videos always lost quality and, specially in the range of frequencies that have the finest nuances. I would recommend you to test this line of pedals in a physical store. Better if you do that with a guitar equal or similar to yours and, in an amp that's equal or similar to yours. They deliver some harmonic richness that is difficult to find in other pedals (even previous Bogner's ones!), while maintaining a great string-by-string, note-by-note separation.
The final sound can or cannot be your wanted sound but, they worth the time to try them.
Not so long before, Bogner released three pedals (Ecstasy Blue, Red and Uberschall) that had a good acceptance by musical world. Those three were designed to cover mythical Bogner amps' tones and, they deliver such tones really nicely.
Now, Bogner seems interested into create a line of pedals that don't try to mime Bogner amps' tones. The aim of these new pedals is to interactuate with your amp and, provide virtual "channels" but, respecting the soul of your amp.
This new line has something really interesting. Each pedal works with an audio transformer designed by the studio guru Rupert Neve. In studio's outboard devices and, in amps, transformers are a key part of the sound and, the finest audio devices have very carefully designed ones.
The only pedal that I personally remember having a transformer is the Butler Audio Tube Driver. It's a toroidal transformer, maybe, needed because of the 12AU7 tube that drives the tone. Maybe, other tube-based drive pedals have one, I dunno.
The fact is that the new line of Bogner pedals catch my attention a lot more than their Ecstasy line. This line of Bogner-Neve pedals had the Harlow (a booster with some compression available), the Oxford (Flexdrive, whatever it means), the Wessex (Overdrive) and the Burnley (Distortion).
It seems that the Oxford finally dropped out of the series.
I was accidentally in a musical store (Auvisa) and, tried the Wessex (the only one they had there). Well, the pedal finally came with me to home!.
Presentation

Everything in this pedal, from the box to the pedal itself is classy. The pedal is built like a tank but, with a very clean and cute design (case, knobs, everything). There are versions of this pedals with the top of the case in bubinga wood. Not mine.
Knobs are: Level, Gain, Treble and Bass and, there is a two positions switch that changes the circuit behavior from Normal (N) to Enhanced (E) modes.
Components are first class. You just need to read the tech specs to understand that every component was carefully choose to achieve the tone Bogner had in mind.
Everything smells quality and, it's probably one of the best made pedals I've owned or seen.
Sound
It's a very transparent overdrive, in the sense that every string is clearly heard, even with complex inharmonic chords.
The voice is crunchy, uncompressed, clear and defined. But, it respects the soul of your amp and guitar, anyway.
Tone controls have a wide range and, allow you to fine tune your sound.
The gain range is surprisingly short, specially in Normal mode (the most transparent EQ). If you are after an overdrive with a good amount of gain, this is not your pedal. In every sense, it remembers me the Xotic BB pedal but, with a better sound. The amount of gain is similar and, the voice of the pedal is alike, very crunchy (but, one of the best crunches I've heard).
The Enhanced mode adds some low and high end to your sound and, provides a bit more of gain.
Use
I see it to be used to put tubes on their sweet spot and, it covers very well light overdrive tones. Provides a nice 'crunch' virtual channel and, it's very suitable for Rock & Roll songs.
It can be used to feed other gain pedals also, but, it hasn't gain enough itself for dirty lead tones.
Imagine a Wampler Euphoria on its crunch mode or, a Xotic BB and, you are in the ballpark, respect of overall sound and gain levels but, the Wessex has its own sound and, I liked it more than the former ones. I'm just missing a pinch more of gain, maybe.
I'm waiting three more pedals that I would like to test combined with the Wessex: Lovepedal Kalamazoo, Bogner Harlow and Bogner Burnley. Will do some video with them, after I find the best combinations of all them.
A bit more about the Neve transformer
It seems that the transformer designed by Rupert Neve is used in the same way an Output Transformed is used in every amp, to deliver the final sound to the speakers.
If you are familiar with amp's OTs, you already know that transformers are a key piece for that final sound and feeling of the amp and, every great amp designer takes very seriously the OT.
Swapping the transformer can be a great enhancement. You will know a lot of people going for Mercury transformers to upgrade their Marshall amps, by example.
Probably, it shouldn't be part of the tone, according to pure electrical magnitudes but, the truth is that they are part of the tone of an amp.
Exactly the same occurs with studio gear, where the magic of Rupert Neve (among a very short group of gurus) is worldwide acclaimed.
It seems that Neve's design was oriented to provide nice musical harmonics on high and low ends.
The Enhanced mode of the Wessex is clearly different from the Natural mode. In the former one, the harmonical content is specially rich in the high end range of frequencies and, the sound is, overall, beautifuler and, cuts the mix with a better attitude. It remembers me as the magic that happens when you switch on the Xotic EP Booster, everything seems to be the same but, the sound is just better, without understanding what goes in the background.
I think Butler Audio, in his Tube Driver, is using that toroidal transformer as an Input Transformer, instead of an Output Transformer, because the pedal is being directly plugged to your wall socket.
If that's true then, Bogner's pedals with designed by Neve OT pedals are unique in pedal effects world. No one, before Bogner, used that approach.
Youtube videos always lost quality and, specially in the range of frequencies that have the finest nuances. I would recommend you to test this line of pedals in a physical store. Better if you do that with a guitar equal or similar to yours and, in an amp that's equal or similar to yours. They deliver some harmonic richness that is difficult to find in other pedals (even previous Bogner's ones!), while maintaining a great string-by-string, note-by-note separation.
The final sound can or cannot be your wanted sound but, they worth the time to try them.
25 January 2015
Waiting for my Southern Belle Guitar
The story...
David Allen introduced Morgan Mitcham, who runs Southern Belle Guitars and, she only uses David Allen's pickups, what in fact means that Morgan cares about tone.
I don't usually buy luthier's guitars, since they have no value if you think that you could resell them later. But, I am thinking on the specifications of my dreamed guitar since long time ago. After testing several guitars of any kind, now I knew what I wanted and, unfortunately isn't in the market at a reasonable price. Therefore, this was a golden opportunity to have my dreamed guitar at a reasonable price.
Well, I've watched the very few videos where you can hear a Southern Belle Guitar sounding and, I loved the sound and sustain of such guitars, and very specially, the sound of a Tele Cabronita, with a couple of David Allen's Rebels (Fitertones). So, I thought that if she could build my guitar with such a big tone, I would be fully satisfied and, probably the seek for my number one guitar will finish.
I was in contact with Morgan to check if my specifications were feasible and, since they were, I've ordered the guitar. David is providing me a set of Furys (think on Robin Trower) for that axe, which I expect will work for my personal style.
My Specifications
But... what I wanted?.
I wanted, basically a Stratocaster but, with some twists.
The body should have some carving or beveling on the area of the neck's pocket, to allow a better access to lower frets. Morgan show me some body model that had such a beveling but, without altering the classic look of a Strato. First smile.
The neck should have a soft-V profile, with a maple fretboard and compound radius, starting on 9.5", as any regular modern Strato. No issues?. Nice, second smile.
Tuning Keys should be auto-locking staggered ones. No issues?. Awesome, third smile.
This is one of the things I love in the Deluxe Strato.
Bone nut, please. Right.
I want the Deluxe floating bridge and tremolo bar. No problem.
This is the second thing I love in the Deluxe Strato.
I want Pearl pickguard and strings cover. No problem.
I want black knobs and pickups covers. No problem.
I want her painted in Cherry Sunburst. No problem.
I want to wire it following my own Wiring Design. No problem.
Please, I want not the Micro-Tilt system. No problem.
This is one of the two things I hate in Deluxe Strato.
Building process
It took a long while but, the good things take longer times so...
Here you can see some pictures about how she was taking her final look.
First, Morgan was focused on the neck...


She's coming and, I am counting the days to put my hands on this beauty.
I will make some demo video of the guitar, once the final setup is made and, everything goes as expected.
David Allen introduced Morgan Mitcham, who runs Southern Belle Guitars and, she only uses David Allen's pickups, what in fact means that Morgan cares about tone.
I don't usually buy luthier's guitars, since they have no value if you think that you could resell them later. But, I am thinking on the specifications of my dreamed guitar since long time ago. After testing several guitars of any kind, now I knew what I wanted and, unfortunately isn't in the market at a reasonable price. Therefore, this was a golden opportunity to have my dreamed guitar at a reasonable price.
Well, I've watched the very few videos where you can hear a Southern Belle Guitar sounding and, I loved the sound and sustain of such guitars, and very specially, the sound of a Tele Cabronita, with a couple of David Allen's Rebels (Fitertones). So, I thought that if she could build my guitar with such a big tone, I would be fully satisfied and, probably the seek for my number one guitar will finish.
I was in contact with Morgan to check if my specifications were feasible and, since they were, I've ordered the guitar. David is providing me a set of Furys (think on Robin Trower) for that axe, which I expect will work for my personal style.
My Specifications
But... what I wanted?.
I wanted, basically a Stratocaster but, with some twists.
The body should have some carving or beveling on the area of the neck's pocket, to allow a better access to lower frets. Morgan show me some body model that had such a beveling but, without altering the classic look of a Strato. First smile.
The neck should have a soft-V profile, with a maple fretboard and compound radius, starting on 9.5", as any regular modern Strato. No issues?. Nice, second smile.
Tuning Keys should be auto-locking staggered ones. No issues?. Awesome, third smile.
This is one of the things I love in the Deluxe Strato.
Bone nut, please. Right.
I want the Deluxe floating bridge and tremolo bar. No problem.
This is the second thing I love in the Deluxe Strato.
I want Pearl pickguard and strings cover. No problem.
I want black knobs and pickups covers. No problem.
I want her painted in Cherry Sunburst. No problem.
I want to wire it following my own Wiring Design. No problem.
Please, I want not the Micro-Tilt system. No problem.
This is one of the two things I hate in Deluxe Strato.
Building process
It took a long while but, the good things take longer times so...
Here you can see some pictures about how she was taking her final look.
First, Morgan was focused on the neck...
Then, it was the turn to paint the body...
Yeeees!. That's the look I wanted. Beautiful!.
Working on the wiring. This is how it would look, more or less...
Aha!. This is exactly the look I wanted. Perfect!.
She's coming and, I am counting the days to put my hands on this beauty.
I will make some demo video of the guitar, once the final setup is made and, everything goes as expected.
Testing David Allen Echoes set
Introduction
Quality of David Allen' stuff can never worry me. The big issue is to choose between hes different sets of pickups. He tends to create sets of pickups that remember a certain tone and, he does that with the best materials and taking care about tone, independently if materials to achieve it are vintage-correct or not.
The distance between poles, their size, shape and material can change from pickup model to model. In fact, you cannot reuse any replacement Strato pickup cover for DA pickups because of his approach to tone.
While most pickups makers offer sets of pickups where the three or, at least two, are exactly the same (usually neck and middle are exactly the same and the one that's different is the bridge one), David, instead, engineers each position individually, to get the best on each one.
His sets are well balanced respect to the tone he's after for every set.
In this entry, we are going to make some comments about DA Echoes set, which is after the tone of David Gilmour and, tries to cover from early vintage tones to the most saturated recent ones.
David Allen's Echoes
As usual, the set comes "complete". Appart of the pickups herself, the box comes with a PIO .0047 mF cap and, with a pull/push 250K pot to control the two taps of the bridge Echoes pickup.
The Echoes bridge pickup is one of the very few that DA brings to you with some tap. In this case, we have a very vintage bridge pickup when using the regular output tap and, a strong and beefy bridge pickup when using the hot output tap, which helps you to saturate gain stages and, achieve a creamy and thick lead sound.
For early Pink Floyd sounds, the regular tap is the most useful while for more modern stuff (think on Sorrow and alike) the hotter tap is the one you wanted.
The question is, can DA Echoes nail David Gilmour tones?.
Well, the pickups can but, can you?. Not an easy player to copy. I did my best in the demo video but, Gilmour is Gilmour.
But, we want pickups that can cover a broader territory than just DG tones, right?.
How they deliver tones for other tones / styles?.
Well, I did some video that starts with Pink Floyd' Shine on you crazy diamonds but, it continues with other stuff and, as I designed a very particular wiring for this axe, I can check how DA Echoes work when making special combinations (Virtual Neck Humbucker, Virtual Tele SS middle position, Virtual Humbuckers in parallel, Virtual HS middle position, Virtual Bridge Humbucker).
And, certainly, this set can really cover lot of ground with ease.
The Video
I could do a video showing the pickups direct to amp, clean to demo their own sound but, this is a way I personally don't like. What I really want is a set of pickups that can sound good, cutting the mix, doing the real job.
I've found many times stuff that sounds impressive alone but, once you use it with the rest of your gear, the sound simply doesn't cuts the mix.
That's why I always try anything with the help of backing tracks and, testing the several pedal effects I've got in my pedalboard before to determine if such stuff does its job for me.
Well, not surprise here. As with practically any DA set I've tested, the job is covered with spades.
The video was recorded, as always, taking the room' sound directly with a Zoom Q3HD recorded. There is no post-processing. I am not using Pro-Tools to make it more studio-alike, by example.
I'm just using the Classic Compressor and the Brickwall Limiter by IK Multimedia in the video editor to restore the original loudness (since I have the Zoom's mic in low sensibility, to avoid limiting) and, avoid overs in peaks.
No Noise Gate or whatever, not delay or reverb added. So, what you hear is what you would hear if you were in same room as myself.
The video has some improvisations over backing tracks (sorry, not my best day):
Shine on you crazy diamonds (Pink Floyd)
Middle funky blues (unknown)
Jazzy blues (unknown)
Stairway to heaven (Led Zeppelin, to check alternate positions)
Talk to your mother (unknown)
The Gear
I am using a Fender Deluxe American Stratocaster, that originally was an HSS type with Samarian Cobalt pickups. For this set of pickups, I have designed my own wiring, to achieve 10 different sounds that should help me to cover most of musical styles.
The axe has the 5 regular Strato tones but, it has 5 more alternate combinations, that allow me to add a virtual LP and, two virtual Tele middle positions (SS and HS).
Also, since the Echoes bridge has a hot tap, in whatever alternate combo where the bridge pickup is involved, I can get more modern tones by selecting such a tap.
This time, I am checking a new set of strings, NYXL model, which differentiates from standard XL models because provides different stress to some of the strings of the set. It seems to me that the G and B strings are more "consistent" with this approach and, also, the D string seems less stressed.
I don't feel big mechanical differences while playing, but the sound seems to be improved somewhat.
For cables and patch cords I am using Evidence Audio stuff. As explained in previous entries, it's expensive but, it's a one-time expense and, EA covers your cables for the whole life.
The amp I am using is a Fender '59 Bassman LTD but, since I find the new Jensen P10R speakers sounding good alone but, lost in the mix, I've tried to swap those with 4 Celestion Gold. I've failed, since you can simply don't swap the upper speakers. The amp's chasing lies just over one of the two horizontal cuts that those P10R have so, once I've put there the Celestions, I wasn't able to fit the amp's chasing. Because of this, the amp is now working with two Jensens on top and, two Celestion Gold below. The amp cuts the mix way better now.
I'm using a Watford Valves' retrofit set of valves, which include some NOS Philips 6L6 (well, in fact, they are 5881).
On pedalboard, I'm using the following array of pedals:
Peterson Classic Stomp (Tuner)
Wampler Decibel + (Buffer to help to drive the rest of pedals)
Real McCoy RMC4 Picture Wah
Wampler Ego (Compressor)
Dry Bell Vibe Machine V1 (Vibe)
Jetter Jetdrive (double Overdrive)
Mesa Boogie Throttle Box (Hi gain distortion)
Boss FV-500-H (Volume pedal, to adapt the loudness to each backing track)
Strymon Ola (Chorus)
Strymon Bluesky (Reverb)
Strymon El Capistan (Delay)
I'm not using the Mesa Boogie one in this demo and, the Boss FV-500-H was set once for the whole video.
Quality of David Allen' stuff can never worry me. The big issue is to choose between hes different sets of pickups. He tends to create sets of pickups that remember a certain tone and, he does that with the best materials and taking care about tone, independently if materials to achieve it are vintage-correct or not.
The distance between poles, their size, shape and material can change from pickup model to model. In fact, you cannot reuse any replacement Strato pickup cover for DA pickups because of his approach to tone.
While most pickups makers offer sets of pickups where the three or, at least two, are exactly the same (usually neck and middle are exactly the same and the one that's different is the bridge one), David, instead, engineers each position individually, to get the best on each one.
His sets are well balanced respect to the tone he's after for every set.
In this entry, we are going to make some comments about DA Echoes set, which is after the tone of David Gilmour and, tries to cover from early vintage tones to the most saturated recent ones.
David Allen's Echoes
As usual, the set comes "complete". Appart of the pickups herself, the box comes with a PIO .0047 mF cap and, with a pull/push 250K pot to control the two taps of the bridge Echoes pickup.
The Echoes bridge pickup is one of the very few that DA brings to you with some tap. In this case, we have a very vintage bridge pickup when using the regular output tap and, a strong and beefy bridge pickup when using the hot output tap, which helps you to saturate gain stages and, achieve a creamy and thick lead sound.
For early Pink Floyd sounds, the regular tap is the most useful while for more modern stuff (think on Sorrow and alike) the hotter tap is the one you wanted.
The question is, can DA Echoes nail David Gilmour tones?.
Well, the pickups can but, can you?. Not an easy player to copy. I did my best in the demo video but, Gilmour is Gilmour.
But, we want pickups that can cover a broader territory than just DG tones, right?.
How they deliver tones for other tones / styles?.
Well, I did some video that starts with Pink Floyd' Shine on you crazy diamonds but, it continues with other stuff and, as I designed a very particular wiring for this axe, I can check how DA Echoes work when making special combinations (Virtual Neck Humbucker, Virtual Tele SS middle position, Virtual Humbuckers in parallel, Virtual HS middle position, Virtual Bridge Humbucker).
And, certainly, this set can really cover lot of ground with ease.
The Video
I could do a video showing the pickups direct to amp, clean to demo their own sound but, this is a way I personally don't like. What I really want is a set of pickups that can sound good, cutting the mix, doing the real job.
I've found many times stuff that sounds impressive alone but, once you use it with the rest of your gear, the sound simply doesn't cuts the mix.
That's why I always try anything with the help of backing tracks and, testing the several pedal effects I've got in my pedalboard before to determine if such stuff does its job for me.
Well, not surprise here. As with practically any DA set I've tested, the job is covered with spades.
The video was recorded, as always, taking the room' sound directly with a Zoom Q3HD recorded. There is no post-processing. I am not using Pro-Tools to make it more studio-alike, by example.
I'm just using the Classic Compressor and the Brickwall Limiter by IK Multimedia in the video editor to restore the original loudness (since I have the Zoom's mic in low sensibility, to avoid limiting) and, avoid overs in peaks.
No Noise Gate or whatever, not delay or reverb added. So, what you hear is what you would hear if you were in same room as myself.
The video has some improvisations over backing tracks (sorry, not my best day):
Shine on you crazy diamonds (Pink Floyd)
Middle funky blues (unknown)
Jazzy blues (unknown)
Stairway to heaven (Led Zeppelin, to check alternate positions)
Talk to your mother (unknown)
The Gear
I am using a Fender Deluxe American Stratocaster, that originally was an HSS type with Samarian Cobalt pickups. For this set of pickups, I have designed my own wiring, to achieve 10 different sounds that should help me to cover most of musical styles.
The axe has the 5 regular Strato tones but, it has 5 more alternate combinations, that allow me to add a virtual LP and, two virtual Tele middle positions (SS and HS).
Also, since the Echoes bridge has a hot tap, in whatever alternate combo where the bridge pickup is involved, I can get more modern tones by selecting such a tap.
This time, I am checking a new set of strings, NYXL model, which differentiates from standard XL models because provides different stress to some of the strings of the set. It seems to me that the G and B strings are more "consistent" with this approach and, also, the D string seems less stressed.
I don't feel big mechanical differences while playing, but the sound seems to be improved somewhat.
For cables and patch cords I am using Evidence Audio stuff. As explained in previous entries, it's expensive but, it's a one-time expense and, EA covers your cables for the whole life.
The amp I am using is a Fender '59 Bassman LTD but, since I find the new Jensen P10R speakers sounding good alone but, lost in the mix, I've tried to swap those with 4 Celestion Gold. I've failed, since you can simply don't swap the upper speakers. The amp's chasing lies just over one of the two horizontal cuts that those P10R have so, once I've put there the Celestions, I wasn't able to fit the amp's chasing. Because of this, the amp is now working with two Jensens on top and, two Celestion Gold below. The amp cuts the mix way better now.
I'm using a Watford Valves' retrofit set of valves, which include some NOS Philips 6L6 (well, in fact, they are 5881).
On pedalboard, I'm using the following array of pedals:
Peterson Classic Stomp (Tuner)
Wampler Decibel + (Buffer to help to drive the rest of pedals)
Real McCoy RMC4 Picture Wah
Wampler Ego (Compressor)
Dry Bell Vibe Machine V1 (Vibe)
Jetter Jetdrive (double Overdrive)
Mesa Boogie Throttle Box (Hi gain distortion)
Boss FV-500-H (Volume pedal, to adapt the loudness to each backing track)
Strymon Ola (Chorus)
Strymon Bluesky (Reverb)
Strymon El Capistan (Delay)
I'm not using the Mesa Boogie one in this demo and, the Boss FV-500-H was set once for the whole video.
04 November 2014
Pickups: AUVISA Launches David Allen Pickups in Europe - Demoing DA AlleyCat pickups
Introduction
David Allen is a top notch Boutique Pickups maker. His pickups have a lot of interest for many reasons but, without any doubt, the most I like is that they deliver outstanding tone with an affordable price (if you compare them to other boutiquers).My contact with DA pickups was just casual, because one of my Wiring Design Service's customer (now a good friend of mine) wanted to pay my work with a set of DA pickups, which I didn't know at that time.
Things went like good things go and, step by step, DA was sending me some pickups to test and, asked me if I knew of a good Music Store in Spain to distribute his pickups. He was really picky and, didn't wanted a store that just distributes (that moves boxes). He wanted a good Store with knowledgeable people that could give support to customers and, to help them to make their best decision.
Thinking on it, there was just one Spanish Music Store that I was 100% sure that would fit the requirements and, that was Auvisa (http://www.auvisa.com). I had a very good friend of mine that lived close to Auvisa and, that had a lot of contact with them so, I was introduced to Auvisa people and, went there with a couple of guitars, loaded with two different Strato single coil sets (StratCats and Dovers).
We did a short demo, with some backing tracks and, leaved to Rafa (awesome player, full of techniques but, also full of feeling) to test the pickups. He instantaneously understood the goodness of such pickups and, wanted to check commercial conditions.
My role there was just to put both parts in contact and, this should be clear from the beginning: WITH NO COMMERCIAL INTEREST FROM MY SIDE. I've received absolutely not a cent!!!.
I'm just a guitar enthusiasts that loves to share with others what I find specially interesting.
It took a while to have everything sorted and, a bit more to have the opportunity to record some demo video but, everything starts at some point and, this is the official kick off for DA Pickups in Europe!.
This blog's entry is just to let you know that DA Pickups are available in Europe. What means for you?: less lead delivery time, less money (you don't need to pay Customs fees), less shipping fees.
A nice friendship was born after all and, we were always willing to record some demo videos to let the people to get the particular tone of each pickups set. To be honest, my impression is that Rafa (your contact in Auvisa for David Allen Pickups and, anything else related to guitar's world) is able to demo anything at anytime, with attitude and that, I cannot add anything else of value but, He insisted in involve me in video demos and, well, I do anything for friends.
To start, you will find here the review and demo video of one of DA's humbuckers sets, the AlleyCats.
Making of's tales
To doesn't interrupt the regular business, we were forced to make the videos during lunch time. Rafa can be free just that time, while not interrupted by store's customers.
Rafa did choose a Victory The Earl (50W EL34) amp to do the demos of DA AlleyCats pickups.
Auvisa prepared three guitars, with three different sets of DA pickups: a Chinese Tokai loaded with AlleyCats (which sounded gorgeous); a Squier Strato with Voodoo Blues and, I honestly doesn't remember the last one, since we didn't tested it.
I also carried on with my American Charvel SoCal Type 1 loaded with HellCats and, my Luthier and Bassist friend Alex came with his American Fender Precision loaded with a P-Bass and a J-Bass pickups.
Even that we were trying everything, just the first hours were productive and, therefore, we are just going to introduce, as the very first video, those AlleyCats in a Tokai.
To record the event, we used two cams. First is a Zoom Q2HD device (because its sound recording) and a Sony HandyCam (to get a different visual point of view).
To edit the video, we used Sony Vegas 12 Pro software and, only two audio plugins were used for the sound, IK Multimedia's Classic Compressor and Brickwall Limiter. The idea was to bring back the loudness heard in the room but, without compressing the original sound and, avoiding overlay audio events, to provide the sound as close as possible to the one you would hear in the room.
There is no further audio post-processing. No EQ, Exciter or any other kind of outboard or in-a-box plugin.
Also no Noise-Gate. If the amp was hissing, the hiss is there. If pickups were hauling, the haul is there.
This is how I approach every video, trying to be accurate to the original sound in the room, with its good and bad things.
David Allen AlleyCats
Well, in this video you will hear AlleyCats under drive situations. You would usually expect to hear them in clean and, to be honest, we missed this important part of the demo but, for you to be quite, every DA Pickup sounds awesome in clean and, AlleyCats aren't an exception. I'm quite sure you will find some other videos that will let you hear AlleyCats that way.
My personal impression is that AlleyCats can be classified under the title of Vintage-Hot PAF pickups.
Neck pickup is wooffier than a Vintage PAF. It sounds very guttural and vocalish. with a darker nature than the bridge pickup. Basses are fat and rich but, well defined.
Bridge pickup has an awesome bite, with well represented middle and high frequencies but, never going harsh or ice-picky, a very fair bridge pickup.
Both pickups complement really good and, you don't need to alter your amp's EQ to prioritize one over the other. Both take gain with ease and have a nice sustain,while maintaining note-to-note definition. But, the amount of gain they can take is limited. Beginning at certain spot of gain, they can start to squeal.
I don't see these pickups ready for Hi Gain territory, because of the squealing issues but, those completely cover anything, from Vintage to Medium Gain and, sound awesome in Blues, Rock and Hard Rock applications. In LPs they are just perfect.
Well. Stop talking. Just hear the video below and judge by yourself. Enjoy it (well, what Rafa does, forget myself).
21 September 2014
Pedals: ISP Technologies G-String Decimator
Introduction
Note: this entry was already published in my old Spanish version of this blog, around January 2012. I'm translating it here.
During the tests I did with my pedalboard based in Mad Professor's range of pedals, the level of the floor noise raised really high.
I've checked first the ISP Decimator pedal, trying to get rid of the noise but, such a pedal, completely removed the noise but with the drawback of destroy the tail of my sounds (decay).
Every noise gate directly affects sound's dynamics. As a compressor works over volume peaks, noise gates work as a downstream compressor, pushing to zero the signals below threshold's value.
Most noise gates are real tone-suckers, not just affecting artificially to the decay of the notes but, even modifying the character or the sound, making it sharper, hollow or altering its frequential content.
ISP Technologies' noise gates are well known as, probably, the most transparent and natural noise gates available.
The Decimator works just over a single spot in your chain of effects and, it seems to be enough if you have very few gain pedals.
But, the G-String seems to work way better in longer chains, where the Decimator isn't able to do the same work.
After discovering myself that the Decimator version isn't enough for my needs and, after reading some good reviews about the G-String. I decided to go ahead with the G-String.
I've tested it and, this is all about this blog's entry: my impressions with the G-String.
Presentation
This pedal comes perfectly packed and with an user's manual short but good enough.
It looks as sturdy as his "little brother", the Decimator.
When you look at pictures, its size could seem similar to a Boss pedal but, is bigger in every dimension.
The swap of the battery is so comfortable as in Boss pedals. Practical. There is no need for a screwdriver.
It seems to have an iron core inside, because it weights considerably, like the Decimator.
Externally, it looks like the same as the Decimator. Differences can be found in the jacks. This pedal has 4 jacks, 3 on its right side (Guitar In, Guitar Out, Dec IN) and 1 on its left side (Dec Out).
As in the case of the Decimator, there is just a single control (Threshold). There are no other controls to fine tune the attack, door delay, compression level, etc.
Using it
While the Decimator seemed to work better at the end of the gain pedals, the G-String is the first and last pedal in the "protected" chain of pedals.
The idea is more or less like follows: the guitar will be connected to Guit In; the Guit Out goes to the first pedal to be "protected" and then, from the last pedal in the protected chain we go to the Dec In input. From Dec Out we go to the amp or to the first pedal unprotected before the amp's input.
So, I've put inside the protected chain from the Wah to the Fuzz and, out of protection, reverberation and delay.
Alternatively, you can link the output of the Fx loop to Dec In and, the input of the Fx loop to Dec Out.
G-String seems to analyze the original signal (the one coming by Guit In) and, it proportionally adjusts the noise level inside the protection loop (Dec In to Dec Out).
User's manual points you to select the threshold level with the guitar plugged and no other effect pedal active, just to remove the floor noise coming from your pickups and the cable between your guitar and the G-String.
My tests say that this works really nice in clean but, that you have to fine tune the threshold once your noisy gain pedals are being switched on.
What I did instead was to switch on the noisiest of my pedals, leaving the strings open and untouched and, gently working on the threshold until the floor noise disappeared.
Results were... IMPRESSIVE !!!
Same operation with the Decimator doesn't works. If I set the threshold level to get rid of the floor noise that the fuzz introduces and, I switch on one more gain pedal before, the noise level raises and the gate opens, creating some intermittencies.
With the G-String, just to test it in depth, I was able to switch off EVERY gain pedal simultaneously and, after mutting the strings, the sound and noise completely quieted.
In the negative side is the decay of the sound. While with chords everything seems to work fine, I had some issues with some sustained bendings and, while doing a vibrato while bending.
In those cases, sometimes the gate is being triggered and the tail of the sound suddenly deads.
Paradoxically, maintaining same threshold in clean, it doesn't seem to affect the continuity and natural character of the sound. The Decimator, with same Threshold affected really hard the dynamics of the clean sound.
Conclusions
I don't know of a better noise gate, in a pedal format. I don't mean that there is no better, just that I don't know any better one.
Before going for the G-String, I was visiting lots of forums where there were discussing about the few noise gates available and, it seemed that the MXR Noise Clamp didn't worked so good and, that the Boss NS2 was a tone-sucker.
If you are doubting between the Decimator or the G-String, I will tell you: G-String!, no doubt!.
This one REALLY works.
Demo video
An image worths more than thousand words and, in our case, a sound more than thousand words.
In the following video I am doing a comparison of the two pedals by ISP, the Decimator and the G-String Decimator.
I think the video is very helpful and will clearly see the different behaviour of both pedals.
Don't miss it!.
Note: this entry was already published in my old Spanish version of this blog, around January 2012. I'm translating it here.
During the tests I did with my pedalboard based in Mad Professor's range of pedals, the level of the floor noise raised really high.
I've checked first the ISP Decimator pedal, trying to get rid of the noise but, such a pedal, completely removed the noise but with the drawback of destroy the tail of my sounds (decay).
Every noise gate directly affects sound's dynamics. As a compressor works over volume peaks, noise gates work as a downstream compressor, pushing to zero the signals below threshold's value.
Most noise gates are real tone-suckers, not just affecting artificially to the decay of the notes but, even modifying the character or the sound, making it sharper, hollow or altering its frequential content.
ISP Technologies' noise gates are well known as, probably, the most transparent and natural noise gates available.
The Decimator works just over a single spot in your chain of effects and, it seems to be enough if you have very few gain pedals.
But, the G-String seems to work way better in longer chains, where the Decimator isn't able to do the same work.
After discovering myself that the Decimator version isn't enough for my needs and, after reading some good reviews about the G-String. I decided to go ahead with the G-String.
I've tested it and, this is all about this blog's entry: my impressions with the G-String.
Presentation
This pedal comes perfectly packed and with an user's manual short but good enough.
It looks as sturdy as his "little brother", the Decimator.
When you look at pictures, its size could seem similar to a Boss pedal but, is bigger in every dimension.
The swap of the battery is so comfortable as in Boss pedals. Practical. There is no need for a screwdriver.
It seems to have an iron core inside, because it weights considerably, like the Decimator.
Externally, it looks like the same as the Decimator. Differences can be found in the jacks. This pedal has 4 jacks, 3 on its right side (Guitar In, Guitar Out, Dec IN) and 1 on its left side (Dec Out).
As in the case of the Decimator, there is just a single control (Threshold). There are no other controls to fine tune the attack, door delay, compression level, etc.
Using it
While the Decimator seemed to work better at the end of the gain pedals, the G-String is the first and last pedal in the "protected" chain of pedals.
The idea is more or less like follows: the guitar will be connected to Guit In; the Guit Out goes to the first pedal to be "protected" and then, from the last pedal in the protected chain we go to the Dec In input. From Dec Out we go to the amp or to the first pedal unprotected before the amp's input.
So, I've put inside the protected chain from the Wah to the Fuzz and, out of protection, reverberation and delay.
Alternatively, you can link the output of the Fx loop to Dec In and, the input of the Fx loop to Dec Out.
G-String seems to analyze the original signal (the one coming by Guit In) and, it proportionally adjusts the noise level inside the protection loop (Dec In to Dec Out).
User's manual points you to select the threshold level with the guitar plugged and no other effect pedal active, just to remove the floor noise coming from your pickups and the cable between your guitar and the G-String.
My tests say that this works really nice in clean but, that you have to fine tune the threshold once your noisy gain pedals are being switched on.
What I did instead was to switch on the noisiest of my pedals, leaving the strings open and untouched and, gently working on the threshold until the floor noise disappeared.
Results were... IMPRESSIVE !!!
Same operation with the Decimator doesn't works. If I set the threshold level to get rid of the floor noise that the fuzz introduces and, I switch on one more gain pedal before, the noise level raises and the gate opens, creating some intermittencies.
With the G-String, just to test it in depth, I was able to switch off EVERY gain pedal simultaneously and, after mutting the strings, the sound and noise completely quieted.
In the negative side is the decay of the sound. While with chords everything seems to work fine, I had some issues with some sustained bendings and, while doing a vibrato while bending.
In those cases, sometimes the gate is being triggered and the tail of the sound suddenly deads.
Paradoxically, maintaining same threshold in clean, it doesn't seem to affect the continuity and natural character of the sound. The Decimator, with same Threshold affected really hard the dynamics of the clean sound.
Conclusions
I don't know of a better noise gate, in a pedal format. I don't mean that there is no better, just that I don't know any better one.
Before going for the G-String, I was visiting lots of forums where there were discussing about the few noise gates available and, it seemed that the MXR Noise Clamp didn't worked so good and, that the Boss NS2 was a tone-sucker.
If you are doubting between the Decimator or the G-String, I will tell you: G-String!, no doubt!.
This one REALLY works.
Demo video
An image worths more than thousand words and, in our case, a sound more than thousand words.
In the following video I am doing a comparison of the two pedals by ISP, the Decimator and the G-String Decimator.
I think the video is very helpful and will clearly see the different behaviour of both pedals.
Don't miss it!.
17 September 2014
Pedals: ProCo RAT Whiteface reissue
Introduction
Note: this entry was already published in my old Spanish version of this blog, around March, 2012. I'm just reproducing it here because it can be of interest to someone.
I am quite sure that any guitarist that is searching his/her distortion pedal, probably checked at least one of the pedals belonging to the RAT family (ProCo is the builder).
Even that this is one of the very old designs, the RAT family grows from time to time with the addition of a new member. Currently, there are several ProCo pedals, all based in the original RAT but, incorporating some modifications to cover the needs of RAT users.
You should probably know already that the RAT pedal's design was based in the MXR Distortion+ but, the original design was modified to increase the gain, among some other sonic differences.
Some time ago, I've purchased a Chinese RAT 2, which has a bit more gain than the traditional RAT. And, it seems to be one of the classic distortion tones that I like more.
I wanted to check the differences between the cheap version (RAT 2) and the expensive RAT Whiteface reissue, since it seems that the last one was built with a selection of components closer to the original unit. Specially, the IC is the same as the original one.
Presentation
This pedal was built in a very sturdy box.
Pots have a nice touch, not loose, not tight.
As in the case of the original, there is no LED that can inform you if the unit is switched on.
This is a true-bypass unit so, it doesn't affects the tone of your rig when switched off.
At the bottom of the pedal, there is a metallic door for the battery, with a big screw (that can be handled with the hand with ease). The issue I see is that such a screw is so big that it a mess to insert the pedal in my pedalboard.
Externally, the pedal looks like the RAT 2, with very few differences (pots, battery door' screw and the logo). The most important differences are inside, in the circuit.
An advertising shirt comes as a gift with this pedal.
Testing the pedal
I can just establish direct comparison with the RAT 2, since I've got no other ProCo RAT deriveds.
Respect to the RAT 2, the Whiteface has clearly less gain (a booster or a transparent overdrive before can be a good thing). The sound is similar but, the WF sounds a tad more refined, less processed than the RAT 2. The RAT 2 sounds a tad more raspy and wild.
So, there is not that big difference between the expensive and the cheap but, I prefer the sound of the WF.
While the RAT 2 has a lot of drive with volume and gain knobs really low, in the WF you need to increase more the volume to be able to make the distortion and filter knobs to deliver a similar response as in the Rat 2.
But, once you get the sweet spot of the three knobs (Volume, Distortion and Filter), to hear the neck pickup around the 12th fret is fantastic, generating a nice vocalish, guttural sound.
A light touch of a booster or clean overdrive before this pedal can help to get the best from the WF.
I am using the Xotic EP Booster before, just to meat the body of the Strato, before it reaches the WF.
I was setting the booster level while the WF was switched on, to get the best interaction between both pedals.
This pedal seems to work better with humbuckers than with single coils so, the extra gain that the booster gives to the single coils definitively help to get better results from the WF.
Additionally to this slight increase of transparent gain (that couldn't be necessary with pickups with a hotter output), the tone and grain of the distortion can be modified stacking some coloring overdrive before (OCD, TS808, etc.). In this way, you can achieve a more dense and sustained sound, with a color slightly different.
Wah, Phaser and Compressor work really fine before this pedal.
A excessive reverb or delay effect after, could "wash" the sound too much, pushing the sound back in the mix space and, stolling part of its energetic sound.
Note: this entry was already published in my old Spanish version of this blog, around March, 2012. I'm just reproducing it here because it can be of interest to someone.
I am quite sure that any guitarist that is searching his/her distortion pedal, probably checked at least one of the pedals belonging to the RAT family (ProCo is the builder).
Even that this is one of the very old designs, the RAT family grows from time to time with the addition of a new member. Currently, there are several ProCo pedals, all based in the original RAT but, incorporating some modifications to cover the needs of RAT users.
You should probably know already that the RAT pedal's design was based in the MXR Distortion+ but, the original design was modified to increase the gain, among some other sonic differences.
Some time ago, I've purchased a Chinese RAT 2, which has a bit more gain than the traditional RAT. And, it seems to be one of the classic distortion tones that I like more.
I wanted to check the differences between the cheap version (RAT 2) and the expensive RAT Whiteface reissue, since it seems that the last one was built with a selection of components closer to the original unit. Specially, the IC is the same as the original one.
Presentation
This pedal was built in a very sturdy box.
Pots have a nice touch, not loose, not tight.
As in the case of the original, there is no LED that can inform you if the unit is switched on.
This is a true-bypass unit so, it doesn't affects the tone of your rig when switched off.
At the bottom of the pedal, there is a metallic door for the battery, with a big screw (that can be handled with the hand with ease). The issue I see is that such a screw is so big that it a mess to insert the pedal in my pedalboard.
Externally, the pedal looks like the RAT 2, with very few differences (pots, battery door' screw and the logo). The most important differences are inside, in the circuit.
An advertising shirt comes as a gift with this pedal.
Testing the pedal
I can just establish direct comparison with the RAT 2, since I've got no other ProCo RAT deriveds.
Respect to the RAT 2, the Whiteface has clearly less gain (a booster or a transparent overdrive before can be a good thing). The sound is similar but, the WF sounds a tad more refined, less processed than the RAT 2. The RAT 2 sounds a tad more raspy and wild.
So, there is not that big difference between the expensive and the cheap but, I prefer the sound of the WF.
While the RAT 2 has a lot of drive with volume and gain knobs really low, in the WF you need to increase more the volume to be able to make the distortion and filter knobs to deliver a similar response as in the Rat 2.
But, once you get the sweet spot of the three knobs (Volume, Distortion and Filter), to hear the neck pickup around the 12th fret is fantastic, generating a nice vocalish, guttural sound.
A light touch of a booster or clean overdrive before this pedal can help to get the best from the WF.
I am using the Xotic EP Booster before, just to meat the body of the Strato, before it reaches the WF.
I was setting the booster level while the WF was switched on, to get the best interaction between both pedals.
This pedal seems to work better with humbuckers than with single coils so, the extra gain that the booster gives to the single coils definitively help to get better results from the WF.
Additionally to this slight increase of transparent gain (that couldn't be necessary with pickups with a hotter output), the tone and grain of the distortion can be modified stacking some coloring overdrive before (OCD, TS808, etc.). In this way, you can achieve a more dense and sustained sound, with a color slightly different.
Wah, Phaser and Compressor work really fine before this pedal.
A excessive reverb or delay effect after, could "wash" the sound too much, pushing the sound back in the mix space and, stolling part of its energetic sound.
16 September 2014
Wiring DIY: Hermetico's HH X61 SD mod
Classification
Guitar Modded
LP-body with two Humbuckers but, only two controls: master volume and master tone.
Description

Guitar Modded
LP-body with two Humbuckers but, only two controls: master volume and master tone.
Description
- HH layout, 4 conductors pickups
- Two Triple Shot rings (Seymour Duncan)
- 1 Swiftcraft 3-way switch (pickups selector)
- 1 Master Volume and 1 Master Tone, both with pull/push
- 1 4PDT on/on switch (blower-switch)
Difficulty Level
Medium-hard.
Features
- With all switches off, it provides standard HH tones but, with a single master volume and a single master tone.
- Volume pot's pull/push switch is being used to put the Neck pickup Out-of-Phase (when the bridge pickup is also selected) and, reverses the split coil (if split).
- Tone pot's pull/push switch is being used to put both pickups in series (independently of if they are split or with coils in parallel). It overwrites every position of the 3-way (so, you get the same combo in Treble / Middle / Rythm).
- Triple shots are able to deliver following combinations for each pickup: split north, split south, coils in series and coils parallel, depending on the position of the two micro-switches on the ring.
- Finally, the 4PDT on/on switch wants to be a "blower" switch (name often used for a feature that allows you to directly with your bridge humbucker, usually bypassing all switching system and controls). In this case, the user wanted to go for bridge full-humbucker but, thru master volume and tone, overwriting the rest of switches in this design.
Wiring Diagram
Click on the picture for full size.
Comments
Notes: white wires are being represented in light-blue and, bare wires in grey. Pickup's wire colors follow Seymour Duncan' schema.
The requester for this design was a Seymour Duncan's forum mate, who already had a working solution based in a couple of triple-shots and a serializer and phaser switches.
He wanted to introduce a blower switch, in a way that he could bypass both triple shot rings' switching, both pull/pushes and, the 3-way. He wanted to run the bridge pickup in full humbucker mode but, thru volume and tone controls (not a direct-out, as often is being requested).
There was a discussion saying that this blower switch couldn't be done with just a 4PDT on/on switch and that, a 6-poles switch would be necessary.
I had the impression that it could be done with just a 4PDT on/on switch and, wanted to go into design, achieving a working solution.
The big issue on this design is the Triple Shot system, since it's some kind of black-box, where the switching occurs in background. The inputs for the Triple Shot are the 4 conductor wires of its respective pickup. The outputs of the Triple Shot are a couple of wires (positive-white and, negative-black).
Internally, this is what happens:
- Coils in series (standard humbucker): green to negative (black), red and white linked together, black to positive (white).
- Coils in parallel: green and white to negative (black), red and black to positive (white).
- Split to South: green, white and red to negative (black), black to positive (white).
- Split to North: green to negative (black), white, red and black to positive (white).
Depending on what do you want to do after coils arrangement selected by the Triple Shot, you should ground the negative wire (black) or not.
In the case of neck pickup, we want to do an out-of-phase if the volume pull/push is up so, we cannot ground the negative before this happens. But, since the negative of the neck pickup could be put in series with the positive of the bridge pickup, when the tone pull/push is up, we cannot ground neck's negative until the serializer switch.
That's why in that phaser switch (tone pull/push), we are just deciding with of the two wires (negative-black, positive-white) will definitively be assigned to pickup's positive-orange, negative-dark green.
In the serializer switch, neck's negative (dark green) goes to ground (if the switch is off) or it's being linked to bridge's positive (white).
The tricky part is all related to the bridge pickup. If that blower switch wasn't there, we would just solder bridge's wires to their respective lug of the Triple Shot and, from there, we would run the positive (white) and negative (black) wires to the serializer, before to decide what goes to the 3-way switch, for pickups selection.
But the blower concept obliges us to route pickup's conductor wires first to the blower switch and, only if the blower is off, from that switch to its Triple Shot ring and rest of switching system.
Another issue introduced with this particular blower concept is that we need to choose between two different sources (whole switching system or just the bridge pickup) as input for the volume and tone controls so, at least, we need one pole to choose what to run to volume's input.
In principle, to completely bypass the bridge's triple shot, we would need 4 poles, one for each pickup's wire. This and and additional pole we need for volume's input makes 5 poles and therefore, this is where the discussion about doing it with a 6 poles switch comes from.
But, If we think on it twice, bridge's green wire will be always ground, directly when the blower is on but, thru the negative of the triple shot when the blower is off, also.
Read above the description of what happens inside the Triple Shot and, you will realize that the green input is always linked to the negative (black) output.
Therefore, I can solder the pickup's green directly to the Triple Shot and, since the rest of wires will never go to their inputs if the blower is on, I'm sure the only thing that will happens inside the triple shot is that the green wire will be always linked to the negative wire, which I have to always ground, in any case. That frees one of the poles and, allows me to play with a 4PDT on/on switch, instead of going for a 5PDT or a 6PDT (usually, rotaries).
Now, let's focus in the blower switch.
Red, white and black wires from bridge pickup go to their own poles (common lug, center lug on each column). When the switch is off (upper lugs, on diagram), each wire is effectively linked to their respective inputs on the Triple Shot, allowing the whole switching system.
But, when the switch is on (lower lugs on diagram), we avoid to send those wires to the triple shot and, we jumper white and red together (to put coils in series) and, we link pickup's output (black) to the input of the volume-tone-jack network.
Last pole is volume-tone-jacks input (in pink). We will choose between the output from the 3-way (upper lug, when switch is off) and the output from bridge pickup alone (lower lug, when switch is on).
Some additional comments.
Since the blower is being implemented with a 4PDT on/on switch, this solution is easily portable to a Fender HH Stratocaster and, we can use Fender's S-1 volume/switch for that blower switch, with will leave us a classy design, without altering the look of the axe.
15 September 2014
Pedals: Carl Martin Octaswitch MKII
Introduction
Note: this is an entry previously posted in my old Spanish version of this blog, around December 2012. Pedals loaded in my pedalboard had changed a lot but, the illustration of some uses of the Carl Martin Octaswitch MKII are still valid.
In a previous entry, I've already described the Carl Martin Octaswitch MKII and its multiple (but limited) possibilities. After several re-configurations of my pedalboard, looking for the best utility, I've reached some compromise solution, which I would like to share with you all.
The Octaswitch allows you to combine up to 8 simultaneous effects in series and, send them up to two amps (two mono outputs) or, an stereo amp and, even to change the channel of up to two amps (or two channels of a single amp), when you select one of the 8 available banks.
The issue is that you have just 8 banks, or combinations. If we think on clean, clean with chorus, clean with vibe, clean with compressor, clean with vibe and compressor, blues, classic distortion, hi gain distortion, fuzz, fuzz with vibe, distortion with compressor, etc., we can see that the number of combinations we can need for a cover band can be a lot more than the 8 available in the Octaswitch.
So, there is no other way than to find a compromise solution that can be of real help.
After a lot of thinking, I've considered that the best approach was to leave inside the Octaswitch the different gain pedals, selecting different gain textures for each bank, from clean to extreme distortion and, keeping out the Octaswitch all those pedals that I consider as sound modifiers: filters, modulations, time effects, compressor, booster, etc.
Therefore, I could define the following banks:
Assigning different combinations of gain pedals inside the Octaswitch.
Before the Octaswitch I would place the Tuner, the Wah, the Phaser, the Booster and Compressor and, after the Octaswitch, the Modulation and Time effects, by example.
Pedals connexion scheme
Please, click on the picture for a full size image.

Comments
All these pedals are True Bypass and, none was identified as a Tone-sucker.
The OCD presents some impendance issues, depending on which pedal goes before or after but, in this particular case creates no conflict with any pedal.
The Wah, even that base in an old design (Picture Wah) is "fuzz-friendly".
Mad Professor Red Fire Fuzz corresponds to a modern design and, therefore, I can freely place it in any position of the chain but, I've found it working better at the end of the chain pedals.
Even that the booster (Xotic EP Booster) and the Compressor (Mad Professor Forest Green Compressor) can be considered as gain pedals, I am leaving those out of the loops because of the considerations I will describe when talking about each pedal in detail.
If we follow the flow from the guitar's input, we can see that the first pedal in the chain is the tuner (TC Electronics Polytune). This pedal is True Bypas and, as soon as you switch it on, it shut ups the whole chain, allowing you to just tune your guitar. Being True Bypass and not a tune-sucker, you could put it at any place in the chain but, it makes more sense to me to leave it at the very beginning, to completely shut up the rig (it works as a master switch).
In any case, the pedals type signal-followers (that requiere a clean signal to work their best), as the tuner, filters or whammy, are best placed at the beginning of the chain.
The output of the tuner goes to the Guitar In input of the noise gate (ISP Decimator G-String).
The noise game gets its input signal as a reference to correct the noise that will come (increased by gain pedals) back thru its Dec In input.
The guitar's input is directly linked to the Guit Out output, which we can see that goes to the input of the first pedal that we want to protect with the noise gate: the Wah.
The output of the Octaswitch (combination of one or more gain pedals, depending on the bank) is linked to the Dec In input of the noise gate, which closes the loop of the set of pedals protected by the noise gate.
The input in Dec In is being analyzed and contrasted against the input Guit In, to remove the noise, taking into account the original signal.
Once the noise was filtered in Dec In, the signal goes out the noise gate thru the output Dec Out, which in this case was connected to the input of the Delay effect (which is out of the protection of the noise gate, to don't cut echoes' tails).
Following the natural signal flow. We go from the tuner to the noise gate and, from the noise gate to the Booster (Xotic EP Booster). Since the booster is a gain pedal, it generates (well, just increases) the floor noise and, therefore, it makes sense that it remains under the protection of the noise gate.
I'm using here the EP booster just to feed the current intensity to make the stratocaster to sound a tad beefer. The boost knob never goes beyond 9:00.
The output of the Booster goes to the input of the Wah (Real McCoy RMC4 Picture Wah).
Theoretically, the Wah should be the first pedal in the chain but, I've already mentioned that this Wah has very few impedance problems so, I prefer to boost a bit the signal with the booster before and, to provide electrons enough to the rest of the chain.
Anyway, the Wah is usually switched off and, I only use it together with gain for certain parts.
It makes no sense to include it in Octaswitch loops since, I want to be free of activate it with any of the different gain textures (clean, overdrive, distortion, fuzz...).
The output of the Wah is connected to the input of the Phaser (Mad Professor Tiny Orange Phaser).
Even that a phaser is a modulation pedal and, its theoretical natural position would be after gain pedals and before delay, I find it sounding better before gain pedals.
Additionally, phaser creates some swatch white noise that can be only be eliminated if it is under the protection of the noise gate.
After the Phaser, we have the compressor (Mad Professor Forest Green Compressor). We are still out of the Octaswitch but, inside the protection of the noise gate.
Compressors have two natural positions, at the beginning of the chain (to compress the natural dnamics and add some sustain); or at the end of the chain, to compress the already processed sound.
I prefer it at the beginning of the chain in a pedalboard and, at the end with studio gear.
Compressor significatively raise the floor noise of the signal and therefore, it makes sense to put them under the protection of the noise gate.
Before filtering pedals (Wah...) and modulations (phaser...), it increases a lot the signal, giving a great strenght to the effect.
Placed after filters and modulations, it helps to better control the dramatic peaks of effects with a great range of frequencies, as the Phaser, Wah or Flanger, delivering a more consistent signal to the pedals after it.
With compressor, I am ending the chain of pedals before the input of the Octaswitch.
The output of the compressor goes to the input of the Octaswitch.
In the loop of the Octaswitch I've place 4 gain pedals, to achieve different gain textures.
In the first loop, I've got a classic bluesy overdrive (Mad Professor Little Green Wonder), similar to a TS808.
In the second loop, a more modern Overdrive, more general (Fulltone OCD V3).
In previous tests, I've realized that the Little Green Wonder likes more to drive other pedals than to be driven by other pedals. If it gets a strong input from other pedal, it saturates too much, compressing the sound.
The OCD handles better this kind of previous saturation.
In the third loop, a classic distortion pedal: the ProCo RAT Whiteface (reissue).
In the fourth loop, a modern fuzz, the Mad Professor Fire Red Fuzz.
Those 4 pedals allow several combinations:
* LGW
* OCD
* RAT
* Fuzz
* LGW -> OCD
* LGW -> RAT
* LGW -> Fuzz
* OCD -> RAT
* OCD -> Fuzz
* LGW -> OCD -> RAT
* LGW -> OCD -> Fuzz
* OCD -> RAT -> Fuzz
* LGW -> OCD -> RAT -> Fuzz
Evidently, there are more available combinations that switches (banks) in the Octaswitch so, there isn't more option than to choose just 8 from those.
But, once the 8 gain textures were selected, we can open the sonic palette by adding any of the other sound modifiers that are out of the Octaswitch:
* Wah
* Phaser
* Compresor
* Wah -> Phaser
* Wah -> Compresor
* Phaser -> Compresor
* Wah -> Phaser -> Compresor
Sure, this obliges you to some feet dance (if you need more than one modifier at once) but, since those are often used for certain "accents" or "details", they effectively multiply the possibilities of the 8 gain textures already chosen.
Remember that the Octaswitch has one more additional switch called Bypass that, will link its input with its output, bypassing all the loops and, therefore, you can consider that Bypass as your "clean channel", having 8 gain textures additionally to your clean channel.
From the Octaswitch, we exit by one of the two mono exits to the input Dec In of the G-String, therefore closing the loop of pedals under the protection of the noise gate. Therefore, we will have protected (when active) the following pedals: booster, wah, phaser, compressor, overdrives, distortions and fuzz.
Finally, from the G-String we go to the input of the delay (Mad Professor Deep Blue Delay) and, we reach the amp thru the exit of such a delay.
The delay stays out of the protection of the noise gate, to avoid to cut the echoes' tails.
Thanks to the excellent behaviour of the G-String, this is enough to set the Threshold while in clean (no active pedal), up to your floor noise disappears. It doesn't matter which pedal will be active after this setting, the G-string will magically get rid off any noise.
Of course, there are infinite ways to use the Octaswitch but, you will always have to decide about just 8 possibilities. In my case, this solution is "the best" for my needs but, your imagination and needs can lead you to a very different set of solutions (that you could share!).
Note: this is an entry previously posted in my old Spanish version of this blog, around December 2012. Pedals loaded in my pedalboard had changed a lot but, the illustration of some uses of the Carl Martin Octaswitch MKII are still valid.
In a previous entry, I've already described the Carl Martin Octaswitch MKII and its multiple (but limited) possibilities. After several re-configurations of my pedalboard, looking for the best utility, I've reached some compromise solution, which I would like to share with you all.
The Octaswitch allows you to combine up to 8 simultaneous effects in series and, send them up to two amps (two mono outputs) or, an stereo amp and, even to change the channel of up to two amps (or two channels of a single amp), when you select one of the 8 available banks.
The issue is that you have just 8 banks, or combinations. If we think on clean, clean with chorus, clean with vibe, clean with compressor, clean with vibe and compressor, blues, classic distortion, hi gain distortion, fuzz, fuzz with vibe, distortion with compressor, etc., we can see that the number of combinations we can need for a cover band can be a lot more than the 8 available in the Octaswitch.
So, there is no other way than to find a compromise solution that can be of real help.
After a lot of thinking, I've considered that the best approach was to leave inside the Octaswitch the different gain pedals, selecting different gain textures for each bank, from clean to extreme distortion and, keeping out the Octaswitch all those pedals that I consider as sound modifiers: filters, modulations, time effects, compressor, booster, etc.
Therefore, I could define the following banks:
- Clean
- Blues Overdrive
- Clean Overdrive
- Classic Distortion
- Modern Distortion
- Fuzz
- Extreme Fuzz
- Total Chaos
Assigning different combinations of gain pedals inside the Octaswitch.
Before the Octaswitch I would place the Tuner, the Wah, the Phaser, the Booster and Compressor and, after the Octaswitch, the Modulation and Time effects, by example.
Pedals connexion scheme
Please, click on the picture for a full size image.

Comments
All these pedals are True Bypass and, none was identified as a Tone-sucker.
The OCD presents some impendance issues, depending on which pedal goes before or after but, in this particular case creates no conflict with any pedal.
The Wah, even that base in an old design (Picture Wah) is "fuzz-friendly".
Mad Professor Red Fire Fuzz corresponds to a modern design and, therefore, I can freely place it in any position of the chain but, I've found it working better at the end of the chain pedals.
Even that the booster (Xotic EP Booster) and the Compressor (Mad Professor Forest Green Compressor) can be considered as gain pedals, I am leaving those out of the loops because of the considerations I will describe when talking about each pedal in detail.
If we follow the flow from the guitar's input, we can see that the first pedal in the chain is the tuner (TC Electronics Polytune). This pedal is True Bypas and, as soon as you switch it on, it shut ups the whole chain, allowing you to just tune your guitar. Being True Bypass and not a tune-sucker, you could put it at any place in the chain but, it makes more sense to me to leave it at the very beginning, to completely shut up the rig (it works as a master switch).
In any case, the pedals type signal-followers (that requiere a clean signal to work their best), as the tuner, filters or whammy, are best placed at the beginning of the chain.
The output of the tuner goes to the Guitar In input of the noise gate (ISP Decimator G-String).
The noise game gets its input signal as a reference to correct the noise that will come (increased by gain pedals) back thru its Dec In input.
The guitar's input is directly linked to the Guit Out output, which we can see that goes to the input of the first pedal that we want to protect with the noise gate: the Wah.
The output of the Octaswitch (combination of one or more gain pedals, depending on the bank) is linked to the Dec In input of the noise gate, which closes the loop of the set of pedals protected by the noise gate.
The input in Dec In is being analyzed and contrasted against the input Guit In, to remove the noise, taking into account the original signal.
Once the noise was filtered in Dec In, the signal goes out the noise gate thru the output Dec Out, which in this case was connected to the input of the Delay effect (which is out of the protection of the noise gate, to don't cut echoes' tails).
Following the natural signal flow. We go from the tuner to the noise gate and, from the noise gate to the Booster (Xotic EP Booster). Since the booster is a gain pedal, it generates (well, just increases) the floor noise and, therefore, it makes sense that it remains under the protection of the noise gate.
I'm using here the EP booster just to feed the current intensity to make the stratocaster to sound a tad beefer. The boost knob never goes beyond 9:00.
The output of the Booster goes to the input of the Wah (Real McCoy RMC4 Picture Wah).
Theoretically, the Wah should be the first pedal in the chain but, I've already mentioned that this Wah has very few impedance problems so, I prefer to boost a bit the signal with the booster before and, to provide electrons enough to the rest of the chain.
Anyway, the Wah is usually switched off and, I only use it together with gain for certain parts.
It makes no sense to include it in Octaswitch loops since, I want to be free of activate it with any of the different gain textures (clean, overdrive, distortion, fuzz...).
The output of the Wah is connected to the input of the Phaser (Mad Professor Tiny Orange Phaser).
Even that a phaser is a modulation pedal and, its theoretical natural position would be after gain pedals and before delay, I find it sounding better before gain pedals.
Additionally, phaser creates some swatch white noise that can be only be eliminated if it is under the protection of the noise gate.
After the Phaser, we have the compressor (Mad Professor Forest Green Compressor). We are still out of the Octaswitch but, inside the protection of the noise gate.
Compressors have two natural positions, at the beginning of the chain (to compress the natural dnamics and add some sustain); or at the end of the chain, to compress the already processed sound.
I prefer it at the beginning of the chain in a pedalboard and, at the end with studio gear.
Compressor significatively raise the floor noise of the signal and therefore, it makes sense to put them under the protection of the noise gate.
Before filtering pedals (Wah...) and modulations (phaser...), it increases a lot the signal, giving a great strenght to the effect.
Placed after filters and modulations, it helps to better control the dramatic peaks of effects with a great range of frequencies, as the Phaser, Wah or Flanger, delivering a more consistent signal to the pedals after it.
With compressor, I am ending the chain of pedals before the input of the Octaswitch.
The output of the compressor goes to the input of the Octaswitch.
In the loop of the Octaswitch I've place 4 gain pedals, to achieve different gain textures.
In the first loop, I've got a classic bluesy overdrive (Mad Professor Little Green Wonder), similar to a TS808.
In the second loop, a more modern Overdrive, more general (Fulltone OCD V3).
In previous tests, I've realized that the Little Green Wonder likes more to drive other pedals than to be driven by other pedals. If it gets a strong input from other pedal, it saturates too much, compressing the sound.
The OCD handles better this kind of previous saturation.
In the third loop, a classic distortion pedal: the ProCo RAT Whiteface (reissue).
In the fourth loop, a modern fuzz, the Mad Professor Fire Red Fuzz.
Those 4 pedals allow several combinations:
* LGW
* OCD
* RAT
* Fuzz
* LGW -> OCD
* LGW -> RAT
* LGW -> Fuzz
* OCD -> RAT
* OCD -> Fuzz
* LGW -> OCD -> RAT
* LGW -> OCD -> Fuzz
* OCD -> RAT -> Fuzz
* LGW -> OCD -> RAT -> Fuzz
Evidently, there are more available combinations that switches (banks) in the Octaswitch so, there isn't more option than to choose just 8 from those.
But, once the 8 gain textures were selected, we can open the sonic palette by adding any of the other sound modifiers that are out of the Octaswitch:
* Wah
* Phaser
* Compresor
* Wah -> Phaser
* Wah -> Compresor
* Phaser -> Compresor
* Wah -> Phaser -> Compresor
Sure, this obliges you to some feet dance (if you need more than one modifier at once) but, since those are often used for certain "accents" or "details", they effectively multiply the possibilities of the 8 gain textures already chosen.
Remember that the Octaswitch has one more additional switch called Bypass that, will link its input with its output, bypassing all the loops and, therefore, you can consider that Bypass as your "clean channel", having 8 gain textures additionally to your clean channel.
From the Octaswitch, we exit by one of the two mono exits to the input Dec In of the G-String, therefore closing the loop of pedals under the protection of the noise gate. Therefore, we will have protected (when active) the following pedals: booster, wah, phaser, compressor, overdrives, distortions and fuzz.
Finally, from the G-String we go to the input of the delay (Mad Professor Deep Blue Delay) and, we reach the amp thru the exit of such a delay.
The delay stays out of the protection of the noise gate, to avoid to cut the echoes' tails.
Thanks to the excellent behaviour of the G-String, this is enough to set the Threshold while in clean (no active pedal), up to your floor noise disappears. It doesn't matter which pedal will be active after this setting, the G-string will magically get rid off any noise.
Of course, there are infinite ways to use the Octaswitch but, you will always have to decide about just 8 possibilities. In my case, this solution is "the best" for my needs but, your imagination and needs can lead you to a very different set of solutions (that you could share!).
Where am I?
Where am I?
Long time I am not posting in my blog. It could seem I am not interested in guitarist stuff anymore but, nothing farest of real thing.
I had some personal troubling waters, specially related to my job. I'm just one more of the employees, resulting of this deep crisis. So, excuse me if I am kissing the sky.
Holidays took their time, also.
But, parallely to that bad stuff, I had great things in my guitarist's life.
I'm actively collaborating with David Allen. He was so kind to send me several sets of his pickups to test and, I have to admit that those are the best pickups I've ever tested and, I would recommend it to every tone-lover, with the eyes closed.
I'm doing wiring designs for his own customers and, this is something I love to do.
I've put in contact a Spanish store (Auvisa) with DA, to create the first store in Europe that is allowd to sell David Allen' stuff (pickups and pedals). Don't miss Auvisa offer. Get your DA pickups there, if you are in Europe!!!.
I'm doing this for love to DA' stuff. I'm not receiving a single cent. But, I love to push what really surprises me.
Thru David Allen, I knew about Southern Bell Guitars and, I had to order my dreamed customized guitar, which I hope will become my number one. But, this will come in around 3 months so, I have to wait for a while.
I'm also in the project of doing some demo videos about David Allen pickups, at Auvisa. Something that should happen very soon.
In the meanwhile, I bought a Fender Bassman LTD (for which I will open a new post) and, I am still dealing with it. I would probably swap the Jensen P10R speakers. I'm sorry but, new Jensen's never cut the mix. They sound awesome alone but, they simply don't cut the mix. I've got 4 Celestion Gold ready to mount in that Bassman.
I've already bought a re-tubing set from Watford Valves, with NOS JAN/Philips 6L6WGB tubes and, tested several alternatives for V1 (12AX7, 5751 and 12AY7).
So, I've got a lot to talk about this amp, also but, I still need some time to get the whole picture.
Finally, I've got two new pedals from Strymon, the BlueSky (Reverb) and the Ola (chorus and vibrato). I've found the Möbius too complex and, I prefer the more user-friendly formats of the El Capistan, BlueSky and Ola, instead.
Something that will need one or two more entries in my blog.
Well, that's a short note to let you know that I'm still active and testing stuff and, that I will post something else when I am more familiar with all these new stuff so, keep in tune!.
Rock in!.
Long time I am not posting in my blog. It could seem I am not interested in guitarist stuff anymore but, nothing farest of real thing.
I had some personal troubling waters, specially related to my job. I'm just one more of the employees, resulting of this deep crisis. So, excuse me if I am kissing the sky.
Holidays took their time, also.
But, parallely to that bad stuff, I had great things in my guitarist's life.
I'm actively collaborating with David Allen. He was so kind to send me several sets of his pickups to test and, I have to admit that those are the best pickups I've ever tested and, I would recommend it to every tone-lover, with the eyes closed.
I'm doing wiring designs for his own customers and, this is something I love to do.
I've put in contact a Spanish store (Auvisa) with DA, to create the first store in Europe that is allowd to sell David Allen' stuff (pickups and pedals). Don't miss Auvisa offer. Get your DA pickups there, if you are in Europe!!!.
I'm doing this for love to DA' stuff. I'm not receiving a single cent. But, I love to push what really surprises me.
Thru David Allen, I knew about Southern Bell Guitars and, I had to order my dreamed customized guitar, which I hope will become my number one. But, this will come in around 3 months so, I have to wait for a while.
I'm also in the project of doing some demo videos about David Allen pickups, at Auvisa. Something that should happen very soon.
In the meanwhile, I bought a Fender Bassman LTD (for which I will open a new post) and, I am still dealing with it. I would probably swap the Jensen P10R speakers. I'm sorry but, new Jensen's never cut the mix. They sound awesome alone but, they simply don't cut the mix. I've got 4 Celestion Gold ready to mount in that Bassman.
I've already bought a re-tubing set from Watford Valves, with NOS JAN/Philips 6L6WGB tubes and, tested several alternatives for V1 (12AX7, 5751 and 12AY7).
So, I've got a lot to talk about this amp, also but, I still need some time to get the whole picture.
Finally, I've got two new pedals from Strymon, the BlueSky (Reverb) and the Ola (chorus and vibrato). I've found the Möbius too complex and, I prefer the more user-friendly formats of the El Capistan, BlueSky and Ola, instead.
Something that will need one or two more entries in my blog.
Well, that's a short note to let you know that I'm still active and testing stuff and, that I will post something else when I am more familiar with all these new stuff so, keep in tune!.
Rock in!.
Pedals: Mesa Boogie drive pedals
Introduction
I've ended with the four pedals that Mesa Boogie is offering, without taking into account the EQ pedal and, drive pedals with EQ versions.
I've already said that I was highly surprised with the quality and tone of those pedals, while accidentally testing them in a shop.
Currently, those are my gain pedals, for every style and, I would like to share my impressions about each one.
Let's go...
Mesa Boogie Gain Pedals
Here you are an overall picture of my current pedalboard (could change tomorrow, you know!).
Just click on images for full size.


Tone Burster
Probably the pedal you will never choose, since it seems to do nothing, right?.
Well, I see the Tone Burster as some kind of good Xotic EP Booster, with complete control over Treble and Bass frequencies.
When I tweak my pedalboard, I first directly plug the guitar to the amp, tweak the EQ and hear.
Then, I plug the guitar to the pedalboard, adjust output level with the Decibel+ (same as directly plugged) and then, I switch on the Tone Burst to help to get the same tone I had directly plugged.
Sometimes, it means to add or remove some highs or lows.
I set up the gain just to produce a nice beam of electrons, without affecting the tone.
But, you could use this pedal to really push your pre-amp, as any good clean overdrive could do.
It's up to you.
My take is just to use it to restore what it was lost or altered from the input of my guitar to the input of the gain pedals.
This pedal could bring you a good amount of gain and, even hot your pre-amp without issues.
But, since the rest of MB's are in the chain, I prefer discrete settings for it.
Grid Slammer
Well, this seems to be MB's own take of a Tube Screamer but, somewhat more open and detailed.
To get TS tones, you would need to roll off the Tone knob.
I am using it for Smoking cleans and also as a must-have pedal to drive the Flux Drive, which complements really nicely.
Together with the Flux Drive, it delivers great Marshalish tones, very old school tones for great classy Hard Rock stuff.
Alone, it gives you that presence and light break of the TS and, drives your pre-amp section as good.
This is probably the only pedal I could substitute with any other good light overdrive, like Wampler Euphoria, TS, David Allen Bazooka, Timmy, Jetter Jetdrive, etc.
When pushed hard and used together with the Flux Drive, the feedback in your amp is high.
I also find it as cutting the sustain, if the gain control isn't rolled in enough.
Flux Drive
It seems to be a Marshallish tone but, a tad dark and, mimes MB's Mark IV amps.
Alone, has its use and, I use it for certain driven sounds (as some dirty blues) but, I love it specially when is being pushed by the Grid Slammer (or any TS alike pedal).
A TS pedal before fills the slightly recessed mids of this pedal, helping it to better cut the mix.
Grid Slammer and Flux Drive together, at reasonable gain, instantaneously give you Deep Purple's sound, by example (among many other classic Hard Rock tones).
In any case, their active tones will allow you to better shape the frequential content of this pedal.
A very good classic gain pedal.
Throttle Box
Ha ha ha. Here is where MB's hi gain tones live.
The Mids Cut control allows you to shape the overall frequential content of this pedal and, it's naturally dark, dense and sustained.
I prefer it more open and then, the Mid's cut is barely totally rolled off and, the tone knob is around 2:00h, for a better cut.
It provides infinite sustain and all that wall of sound that you needed for liquid hi gain solos.
This pedal is made with two PCBs (I've never seen a more complexer gain pedal before!) so, you can imagine the amount of Electronics Engineering behing it.
Absolutely, a keeper. My hi gain tones are coming from this pedal.
If you overdo it, the sound can be too much compressed but, the good thing is that this pedal covers anything you need in hi gain drive. I prefer it to Weehbo Bastard, to Wampler Triple Wreck, to Bogners, etc.
I love it.
Final comments
Gain pedals are, probably, the most swapped pedals on a pedalboard and, I am not an exception.
I've went along with all the classic (TS, DS-1, SD-1, RAT, Distortion+) and most of boutique (Wampler, Xotic, Mad Professor, Fulltone, Bogner, Jetter, MI Audio, ...).
Nowadays, MB's are my preferred ones. Maybe, I like Jetter's for classier tones with kranked amps but, MB's allow me to get nice tones at lower levels.
If you are in the market for a good set of gain pedals, don't forget to try those in your store.
Maybe, I will have some time to demo this pedals, some day...
Rock in!.
I've ended with the four pedals that Mesa Boogie is offering, without taking into account the EQ pedal and, drive pedals with EQ versions.
I've already said that I was highly surprised with the quality and tone of those pedals, while accidentally testing them in a shop.
Currently, those are my gain pedals, for every style and, I would like to share my impressions about each one.
Let's go...
Mesa Boogie Gain Pedals
Here you are an overall picture of my current pedalboard (could change tomorrow, you know!).
Just click on images for full size.
And, a detailed view of the four Mesa Boogie's.
I'm running this pedalboard plugged to a Fender Bassman LTD, because I prefer a great clean channel than a complex front-ended amp, with several channels.
As you can see, the entry point is the tuner, which is true bypass.
Second pedal is the Wampler Decibel+ buffer/booster and, it's there just because I've got a very fluctuant mains power and, I need that booster to correct the current intensity, depending on the day.
It never goes beyond 8:00 o'clock. The buffer helps me to drive the rest of pedals, because signal drops with a large pedalboard.
After the Decibel+, the Wah (maybe I should put the Decibel+ after it) and, following the wah, the compressor and the vibe. This is just what is before the four MB's.
After MB's, a Modulation pedal (mainly used for Chorus) and a Delay pedal.
Tone Burster
Probably the pedal you will never choose, since it seems to do nothing, right?.
Well, I see the Tone Burster as some kind of good Xotic EP Booster, with complete control over Treble and Bass frequencies.
When I tweak my pedalboard, I first directly plug the guitar to the amp, tweak the EQ and hear.
Then, I plug the guitar to the pedalboard, adjust output level with the Decibel+ (same as directly plugged) and then, I switch on the Tone Burst to help to get the same tone I had directly plugged.
Sometimes, it means to add or remove some highs or lows.
I set up the gain just to produce a nice beam of electrons, without affecting the tone.
But, you could use this pedal to really push your pre-amp, as any good clean overdrive could do.
It's up to you.
My take is just to use it to restore what it was lost or altered from the input of my guitar to the input of the gain pedals.
This pedal could bring you a good amount of gain and, even hot your pre-amp without issues.
But, since the rest of MB's are in the chain, I prefer discrete settings for it.
Grid Slammer
Well, this seems to be MB's own take of a Tube Screamer but, somewhat more open and detailed.
To get TS tones, you would need to roll off the Tone knob.
I am using it for Smoking cleans and also as a must-have pedal to drive the Flux Drive, which complements really nicely.
Together with the Flux Drive, it delivers great Marshalish tones, very old school tones for great classy Hard Rock stuff.
Alone, it gives you that presence and light break of the TS and, drives your pre-amp section as good.
This is probably the only pedal I could substitute with any other good light overdrive, like Wampler Euphoria, TS, David Allen Bazooka, Timmy, Jetter Jetdrive, etc.
When pushed hard and used together with the Flux Drive, the feedback in your amp is high.
I also find it as cutting the sustain, if the gain control isn't rolled in enough.
Flux Drive
It seems to be a Marshallish tone but, a tad dark and, mimes MB's Mark IV amps.
Alone, has its use and, I use it for certain driven sounds (as some dirty blues) but, I love it specially when is being pushed by the Grid Slammer (or any TS alike pedal).
A TS pedal before fills the slightly recessed mids of this pedal, helping it to better cut the mix.
Grid Slammer and Flux Drive together, at reasonable gain, instantaneously give you Deep Purple's sound, by example (among many other classic Hard Rock tones).
In any case, their active tones will allow you to better shape the frequential content of this pedal.
A very good classic gain pedal.
Throttle Box
Ha ha ha. Here is where MB's hi gain tones live.
The Mids Cut control allows you to shape the overall frequential content of this pedal and, it's naturally dark, dense and sustained.
I prefer it more open and then, the Mid's cut is barely totally rolled off and, the tone knob is around 2:00h, for a better cut.
It provides infinite sustain and all that wall of sound that you needed for liquid hi gain solos.
This pedal is made with two PCBs (I've never seen a more complexer gain pedal before!) so, you can imagine the amount of Electronics Engineering behing it.
Absolutely, a keeper. My hi gain tones are coming from this pedal.
If you overdo it, the sound can be too much compressed but, the good thing is that this pedal covers anything you need in hi gain drive. I prefer it to Weehbo Bastard, to Wampler Triple Wreck, to Bogners, etc.
I love it.
Final comments
Gain pedals are, probably, the most swapped pedals on a pedalboard and, I am not an exception.
I've went along with all the classic (TS, DS-1, SD-1, RAT, Distortion+) and most of boutique (Wampler, Xotic, Mad Professor, Fulltone, Bogner, Jetter, MI Audio, ...).
Nowadays, MB's are my preferred ones. Maybe, I like Jetter's for classier tones with kranked amps but, MB's allow me to get nice tones at lower levels.
If you are in the market for a good set of gain pedals, don't forget to try those in your store.
Maybe, I will have some time to demo this pedals, some day...
Rock in!.
Subscribe to:
Posts (Atom)